Bonus Material: Free Editorial Calendar Template
Today I'm going to show you exactly how to build an editorial calendar for your blog this year.
In fact, it's the exact same one I've used to plan and manage sites to 100,000+ monthly traffic.

How do I get better results than “the average” blogger?
I prioritize my editorial calendar by content topics with the highest traffic potential and highest ranking potential.
Grab my editorial calendar template below to see how it works.
Then read on to fill it out and make some real money from your blog 🙂
If you're an agency/consultant you can easily resell what I show you in this post for ballpark ~$2,500 USD as a service for your clients.
What Is An Editorial Calendar?
An editorial calendar is a calendar marketers use to manage the content they plan to produce, publish, and promote. For pro bloggers like Freddie, it’s the secret sauce he uses to plan one year of content in one day.
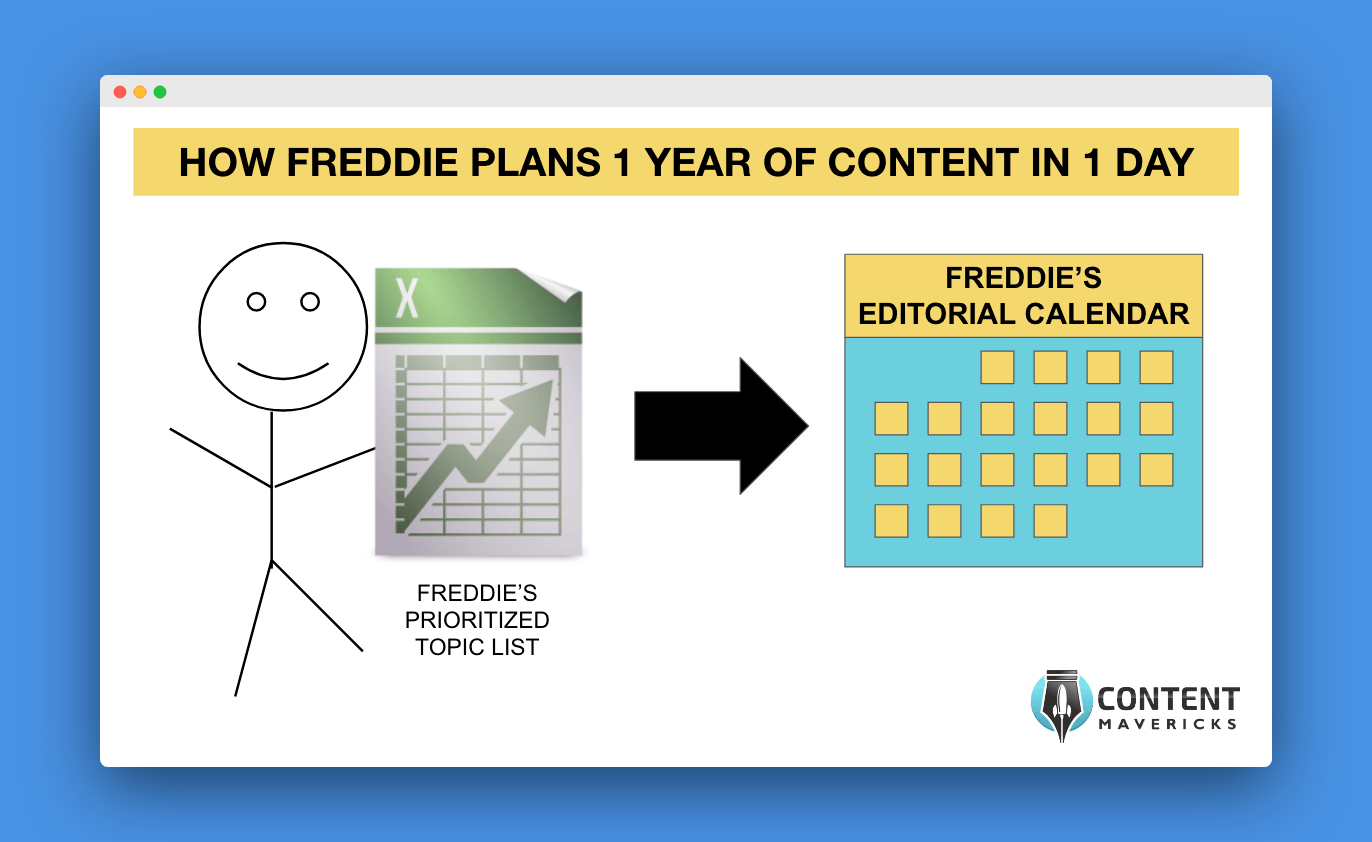
With a prioritized list of blog post topics planned out on one calendar, Freddie can keep organized, focus on deadlines, and be more productive all year long.
Why You Need An Editorial Calendar
There are three reasons why you should create an editorial calendar like Freddie, before you do anything else to grow your blog:
1. It Gives You A System You Can Follow To Grow Your Blog Traffic
If you’re like most bloggers, you:
- Brainstorm a list of topics related to your blog.
- Pick one with search volume and low keyword difficulty.
- Research, write it, and publish it to your blog in one day.
Every day you rinse and repeat, finding yourself on a never ending “content treadmill” like my buddy Freddie:
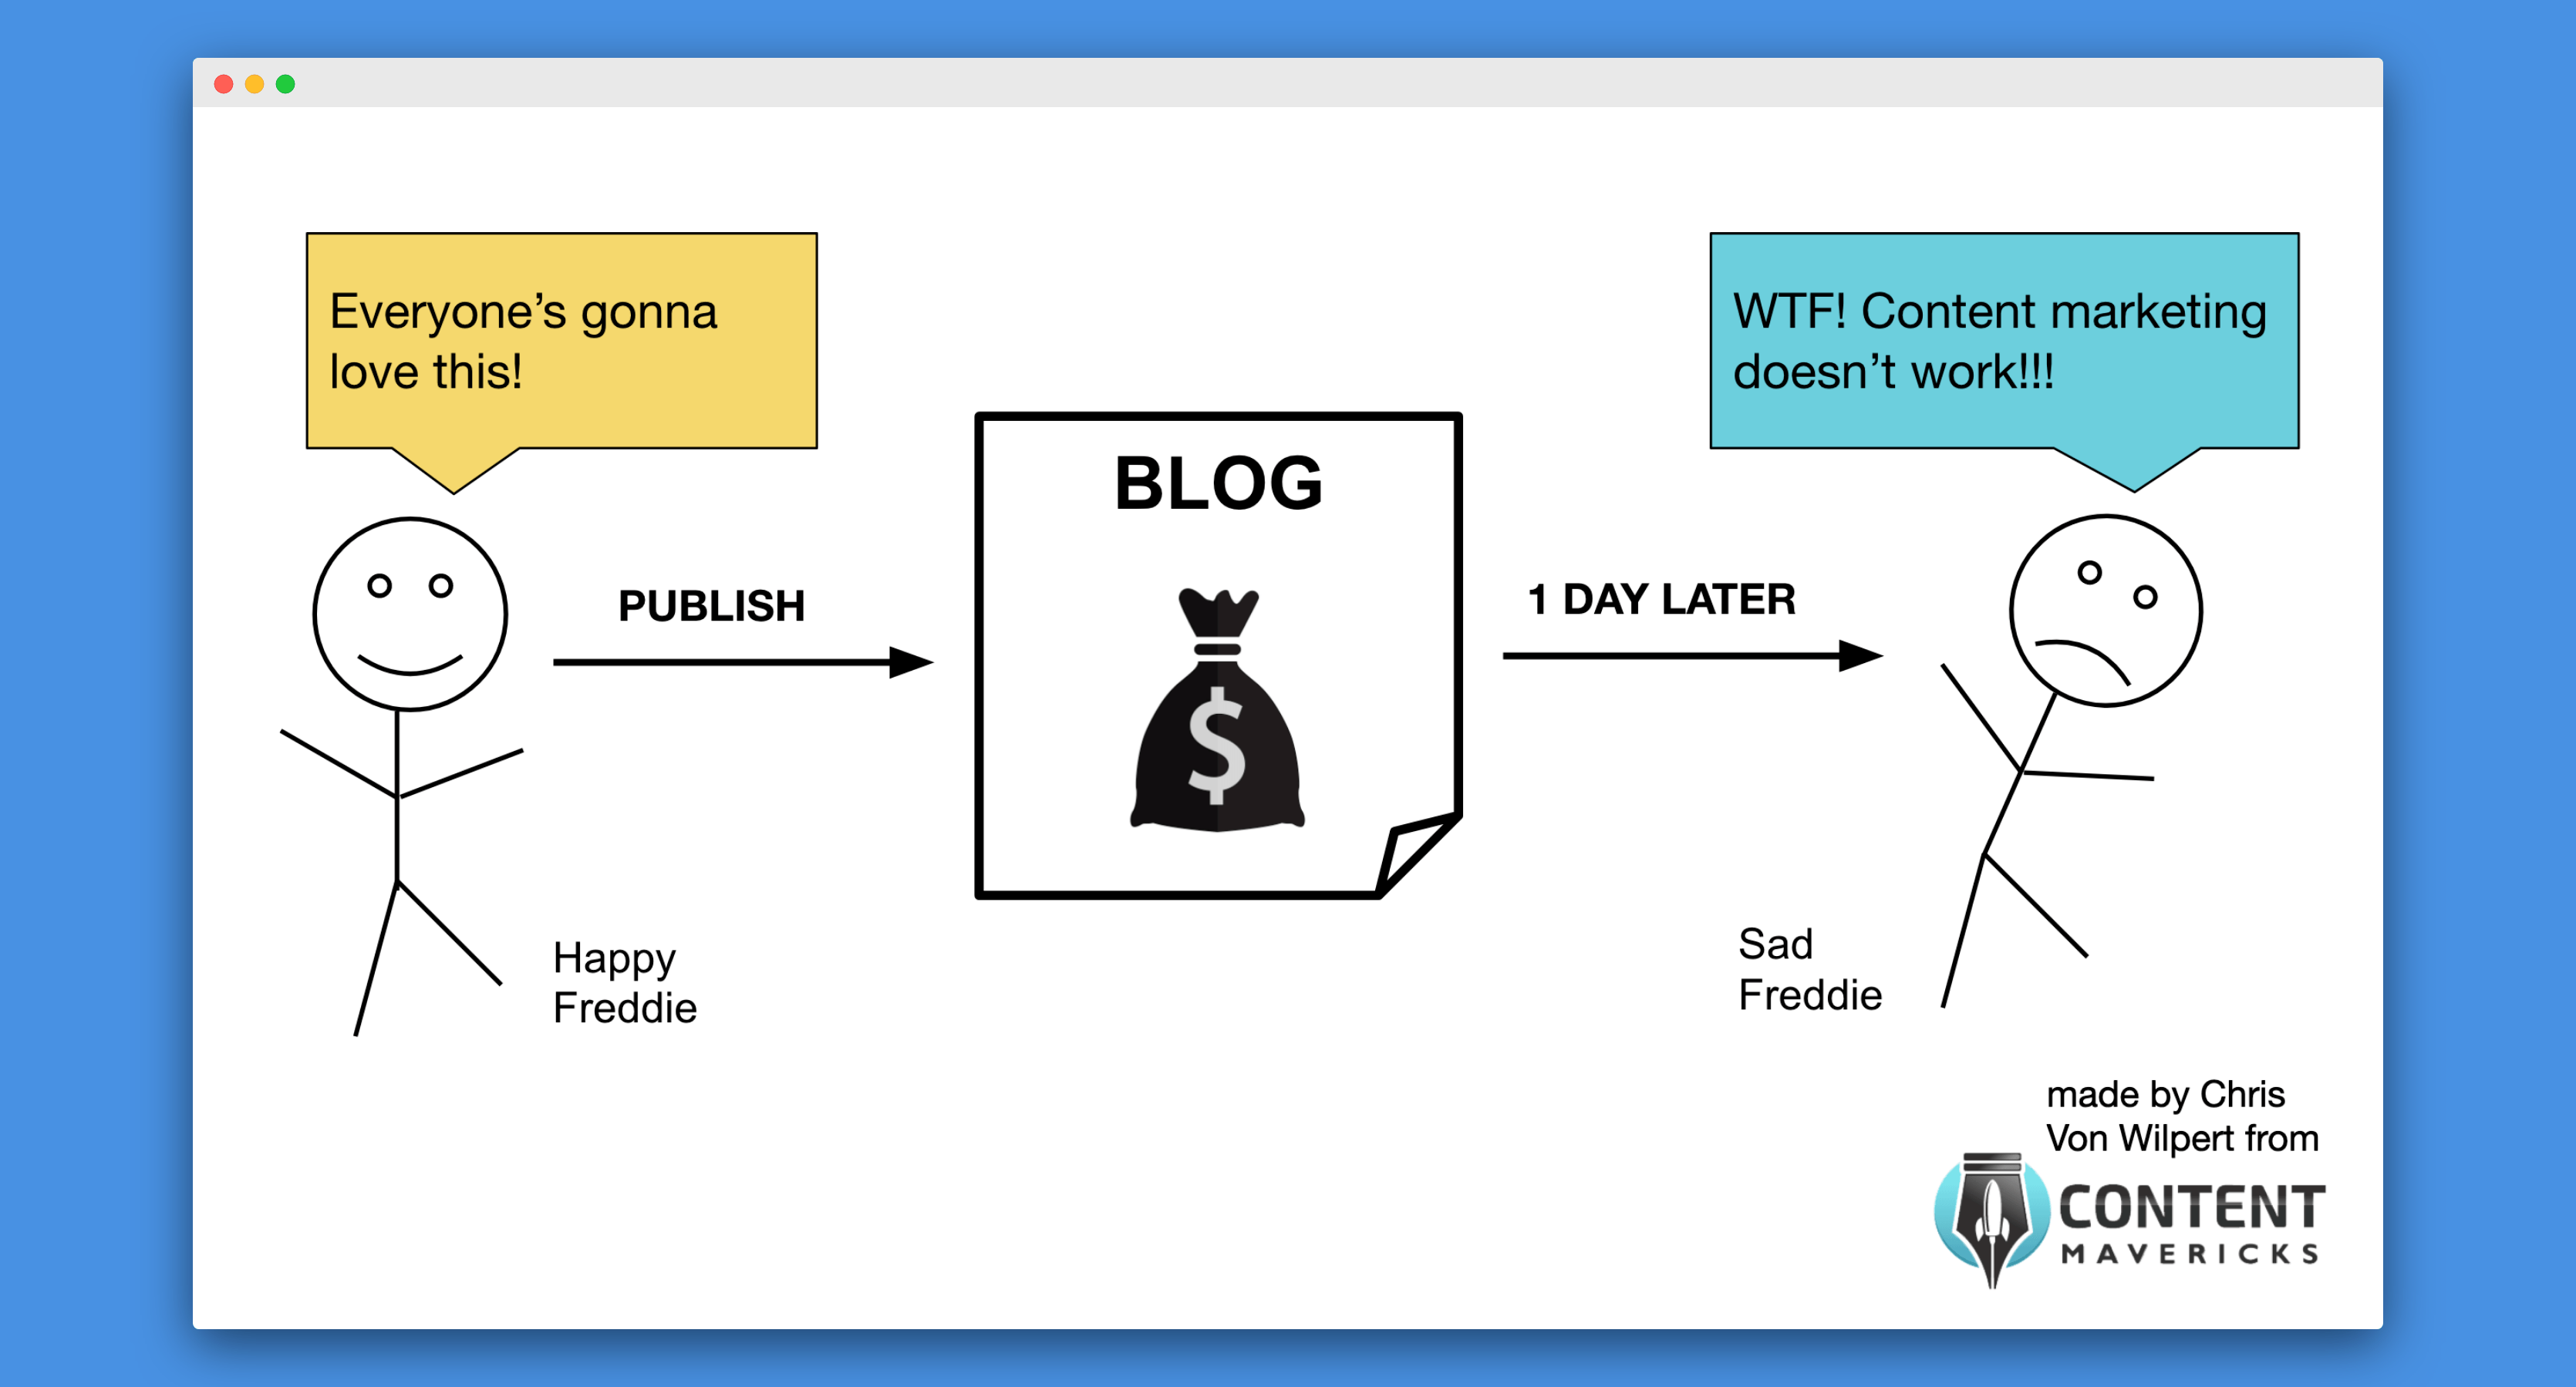
That’s not a system to scale your blog traffic.
If you want to seriously scale your blog, you need an editorial calendar, like this:
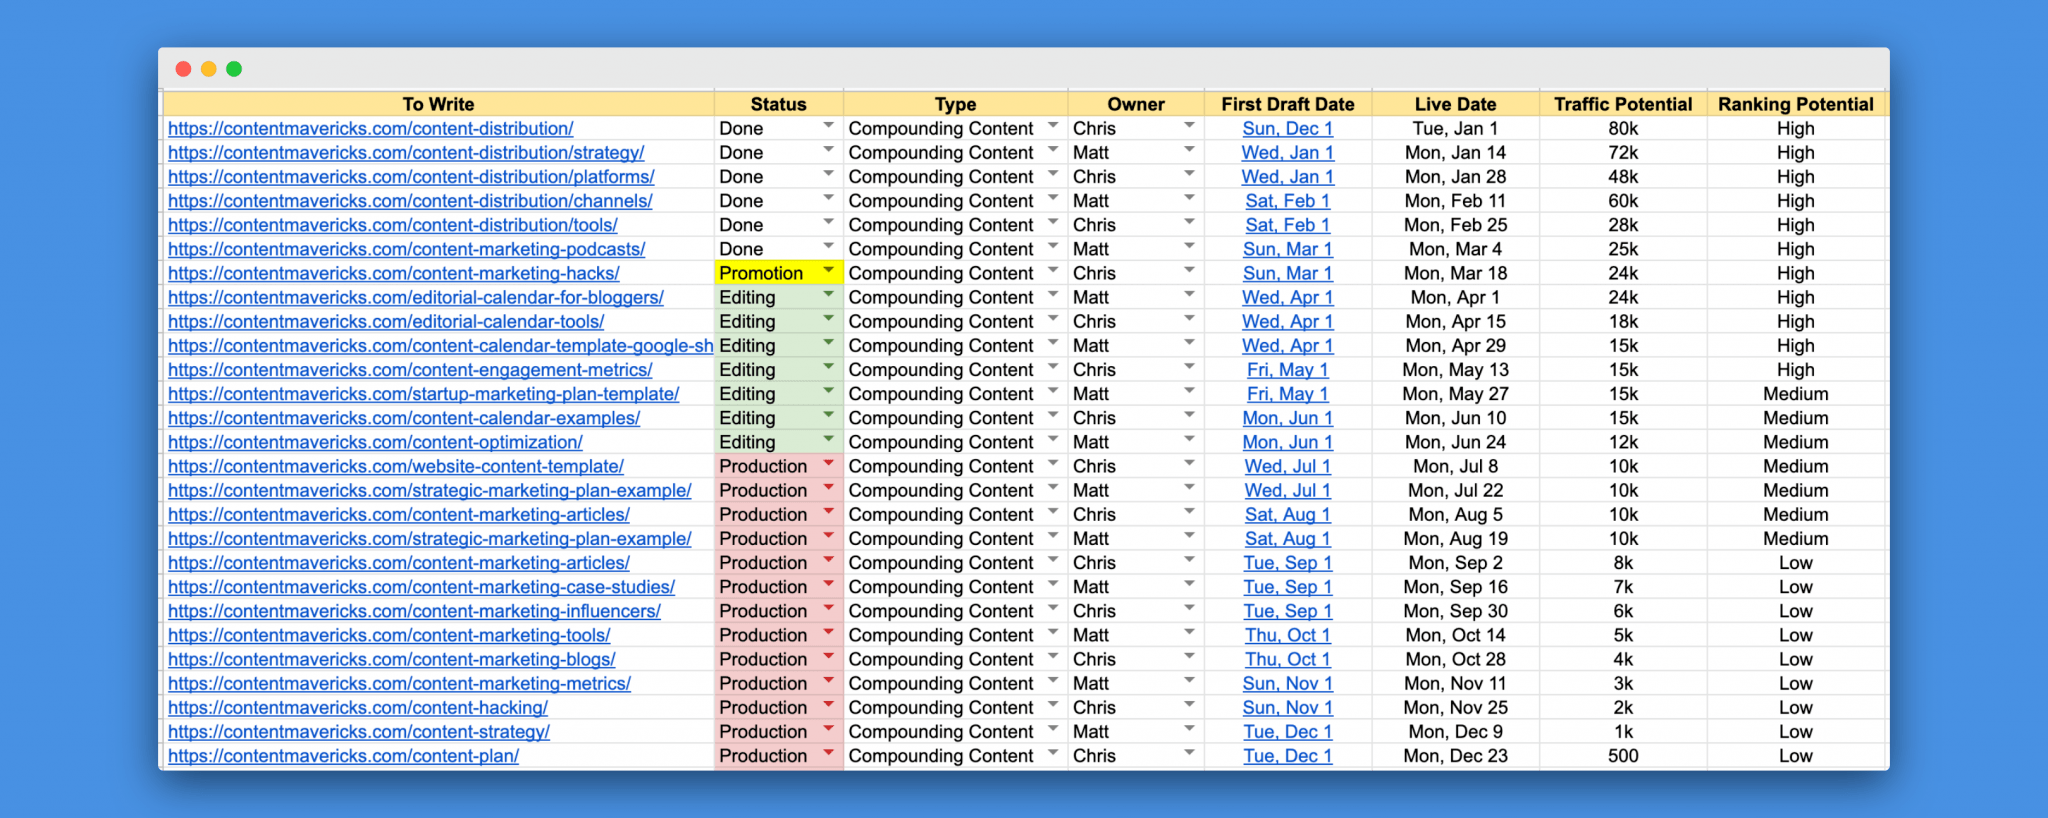
That’s an example of an editorial calendar planned out for a full year.
It has a biweekly publishing schedule, and two writers (e.g. you and one freelancer).
That’s a blogging system.
When you have a system like that...
2. It Gives People Ownership Of Their Role To Grow Your Blog
One of the best ways I’ve found to manage a team of bloggers, is to make people OWN things.
In my editorial calendar I literally have a column called “OWNER” with the person's name, the content they are responsible for and their deadline.

On your editorial calendar make people "Owners" of specific tasks and be there for them if they need your help.
Teamwork makes the dream work.
3. Know What Status Every Blog Post Is At A Glance
Without an editorial calendar, you’d have no idea what status each of your blog posts are at. On mine, I have five stages:
- Production
- Editing
- Promotion
- Scheduled
- Done
To make it easy for me to see the status of every blog post at a glance I have a “Status” column next to the URL of every blog post planned on my calendar.

With this, I can see how much content I have in the pipeline, so I’m not awake at night worrying about what date I need to publish my next blog post.
How To Create An Editorial Calendar To Massively Grow Your Blog Traffic
1. Identify What You’re Selling
If you want to make sales from the traffic you drive to your blog, you’re going to want to focus on blog post topics related to the product you sell.
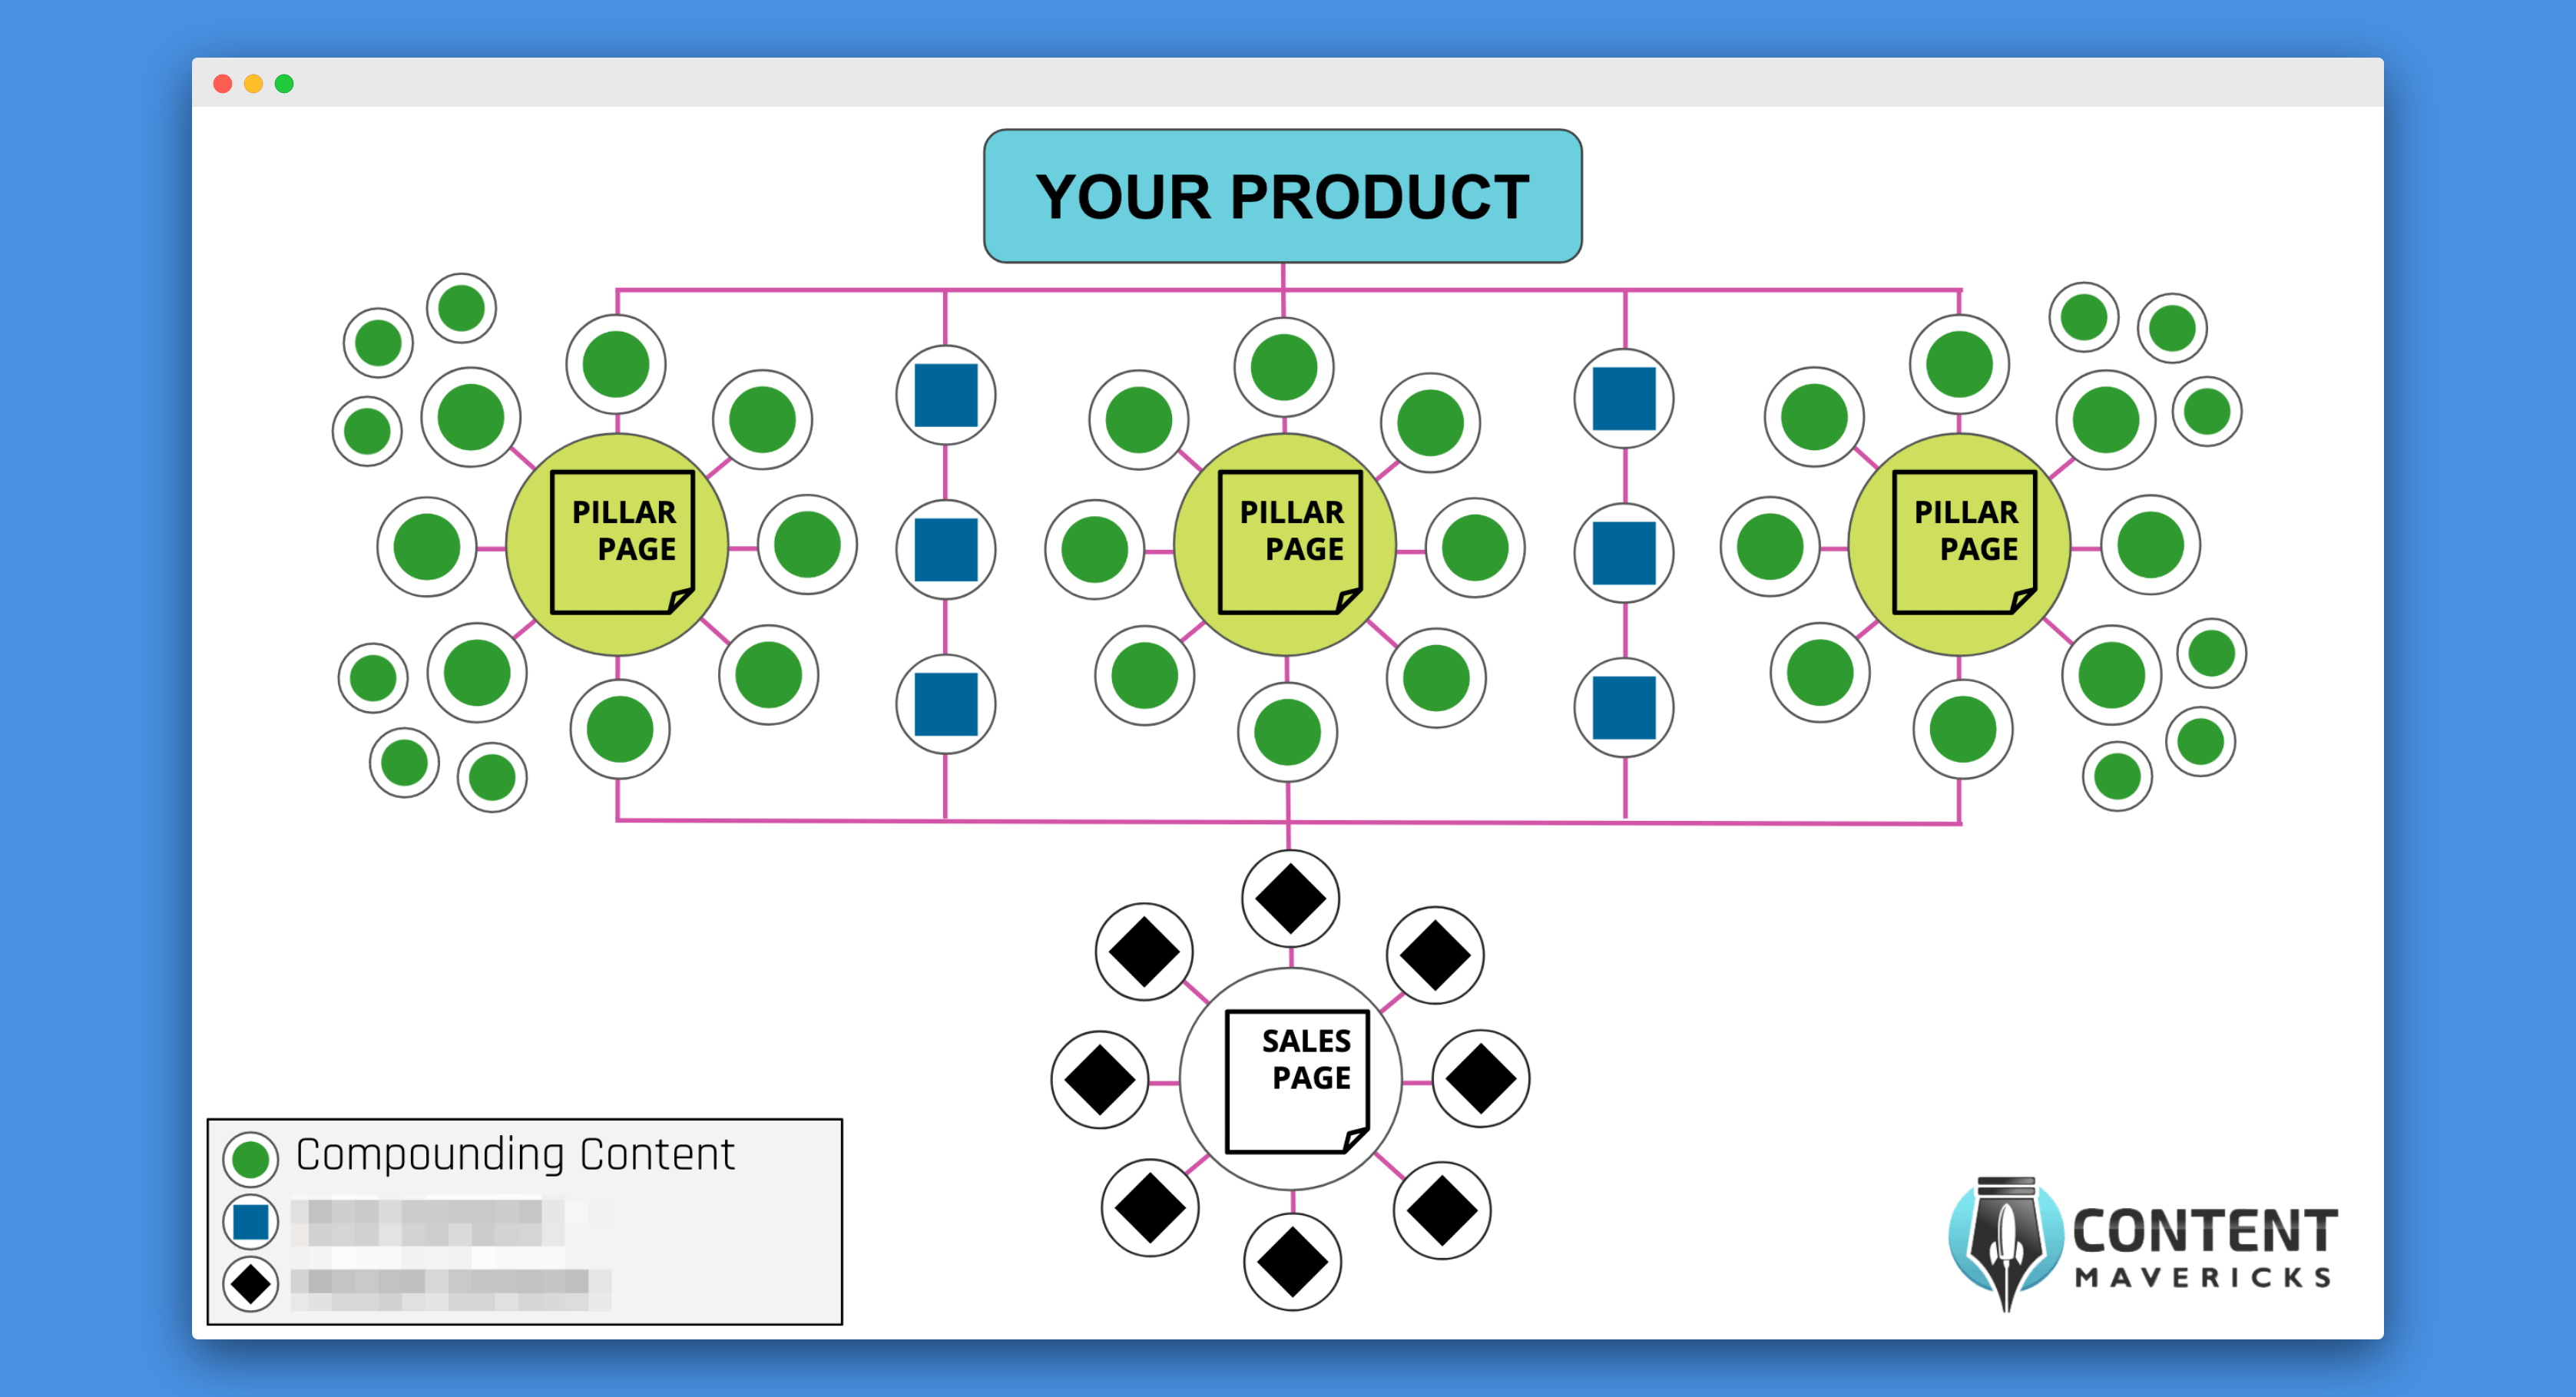
This is so you’re getting targeted blog traffic that converts into product sales.
So, first identify if you sell:
- A physical product
- A SaaS product
- A digital course
- A digital service
- A local service
Clear on exactly what you’re selling? Move onto step two.
2. Identify Who You’re Selling To
There are going to be people who’re the perfect fit for what you sell. You need to know exactly who that person is and isn’t.

Know who your target customer is? Move onto step three.
3. Identify Where Your Target Customers Hang Out
Knowing where your customers hang out will help you brainstorm blog post ideas related to pain points they’re struggling with right now.
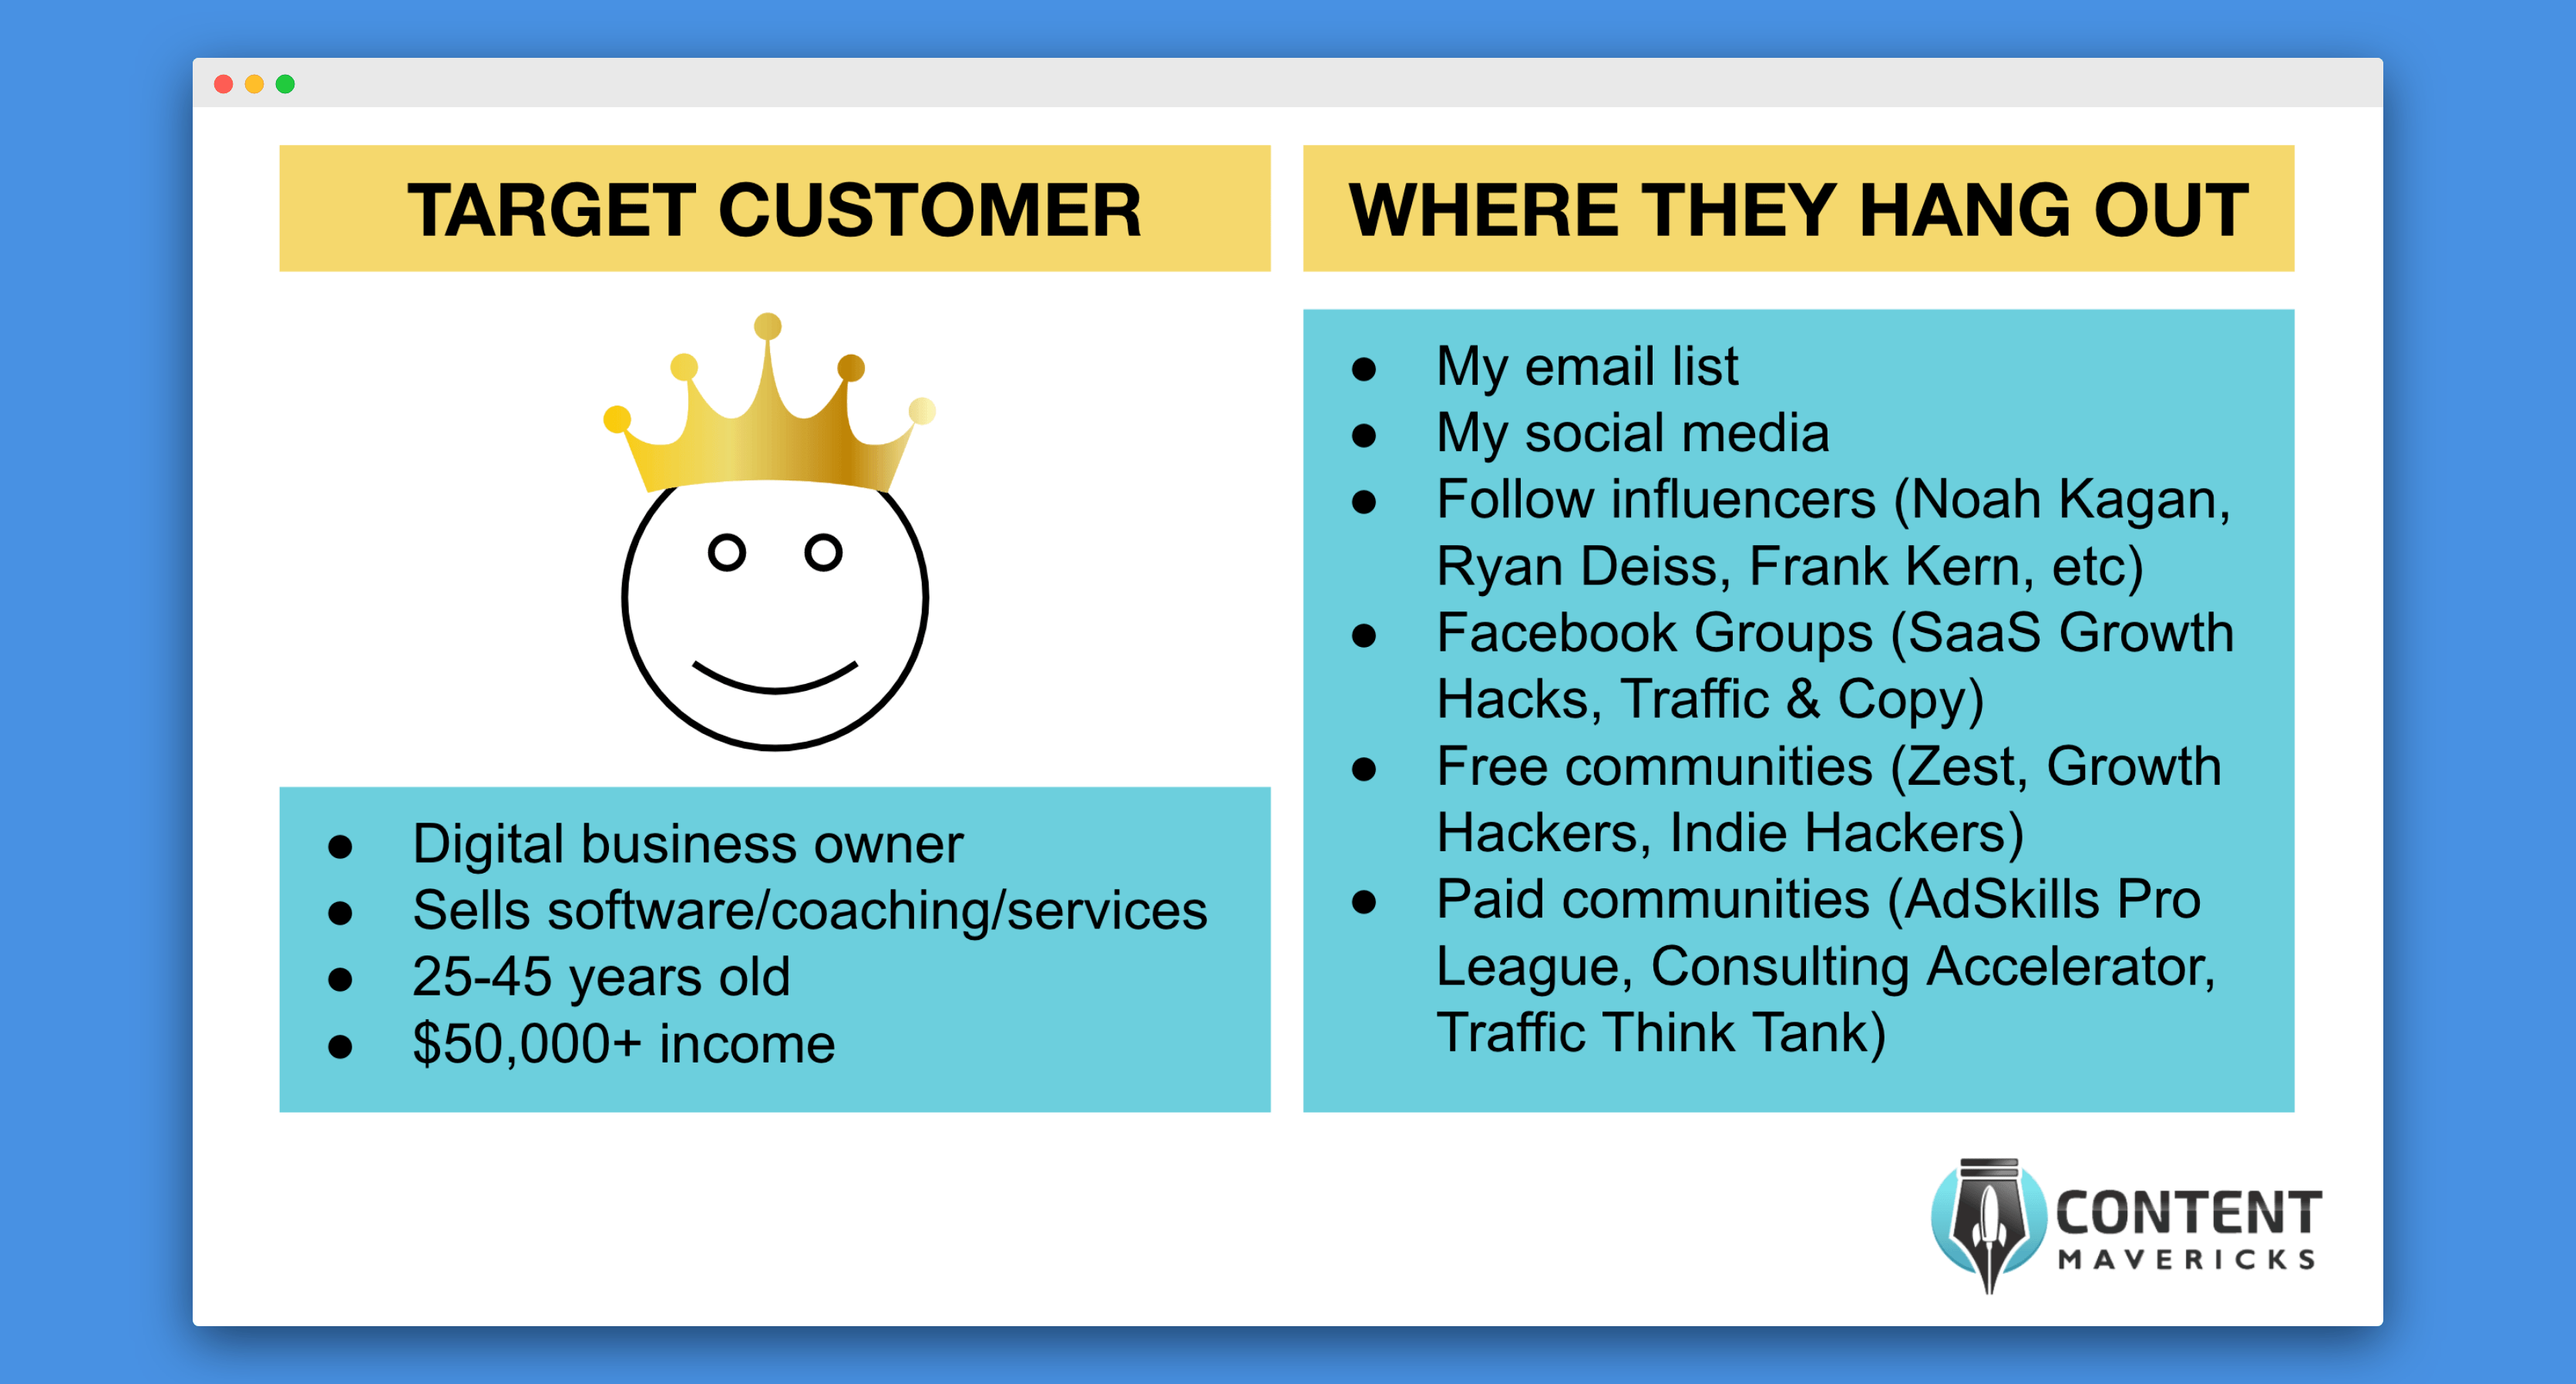
Stalk your target customer on social media to find out:
- What influencers they follow
- What Facebook Groups they’re active in
- What online communities they’re part of
- What content they share
Have those noted down? Move onto step four.
4. Brainstorm Blog Post Ideas
Do the following three things to come up with a list of blog post ideas:
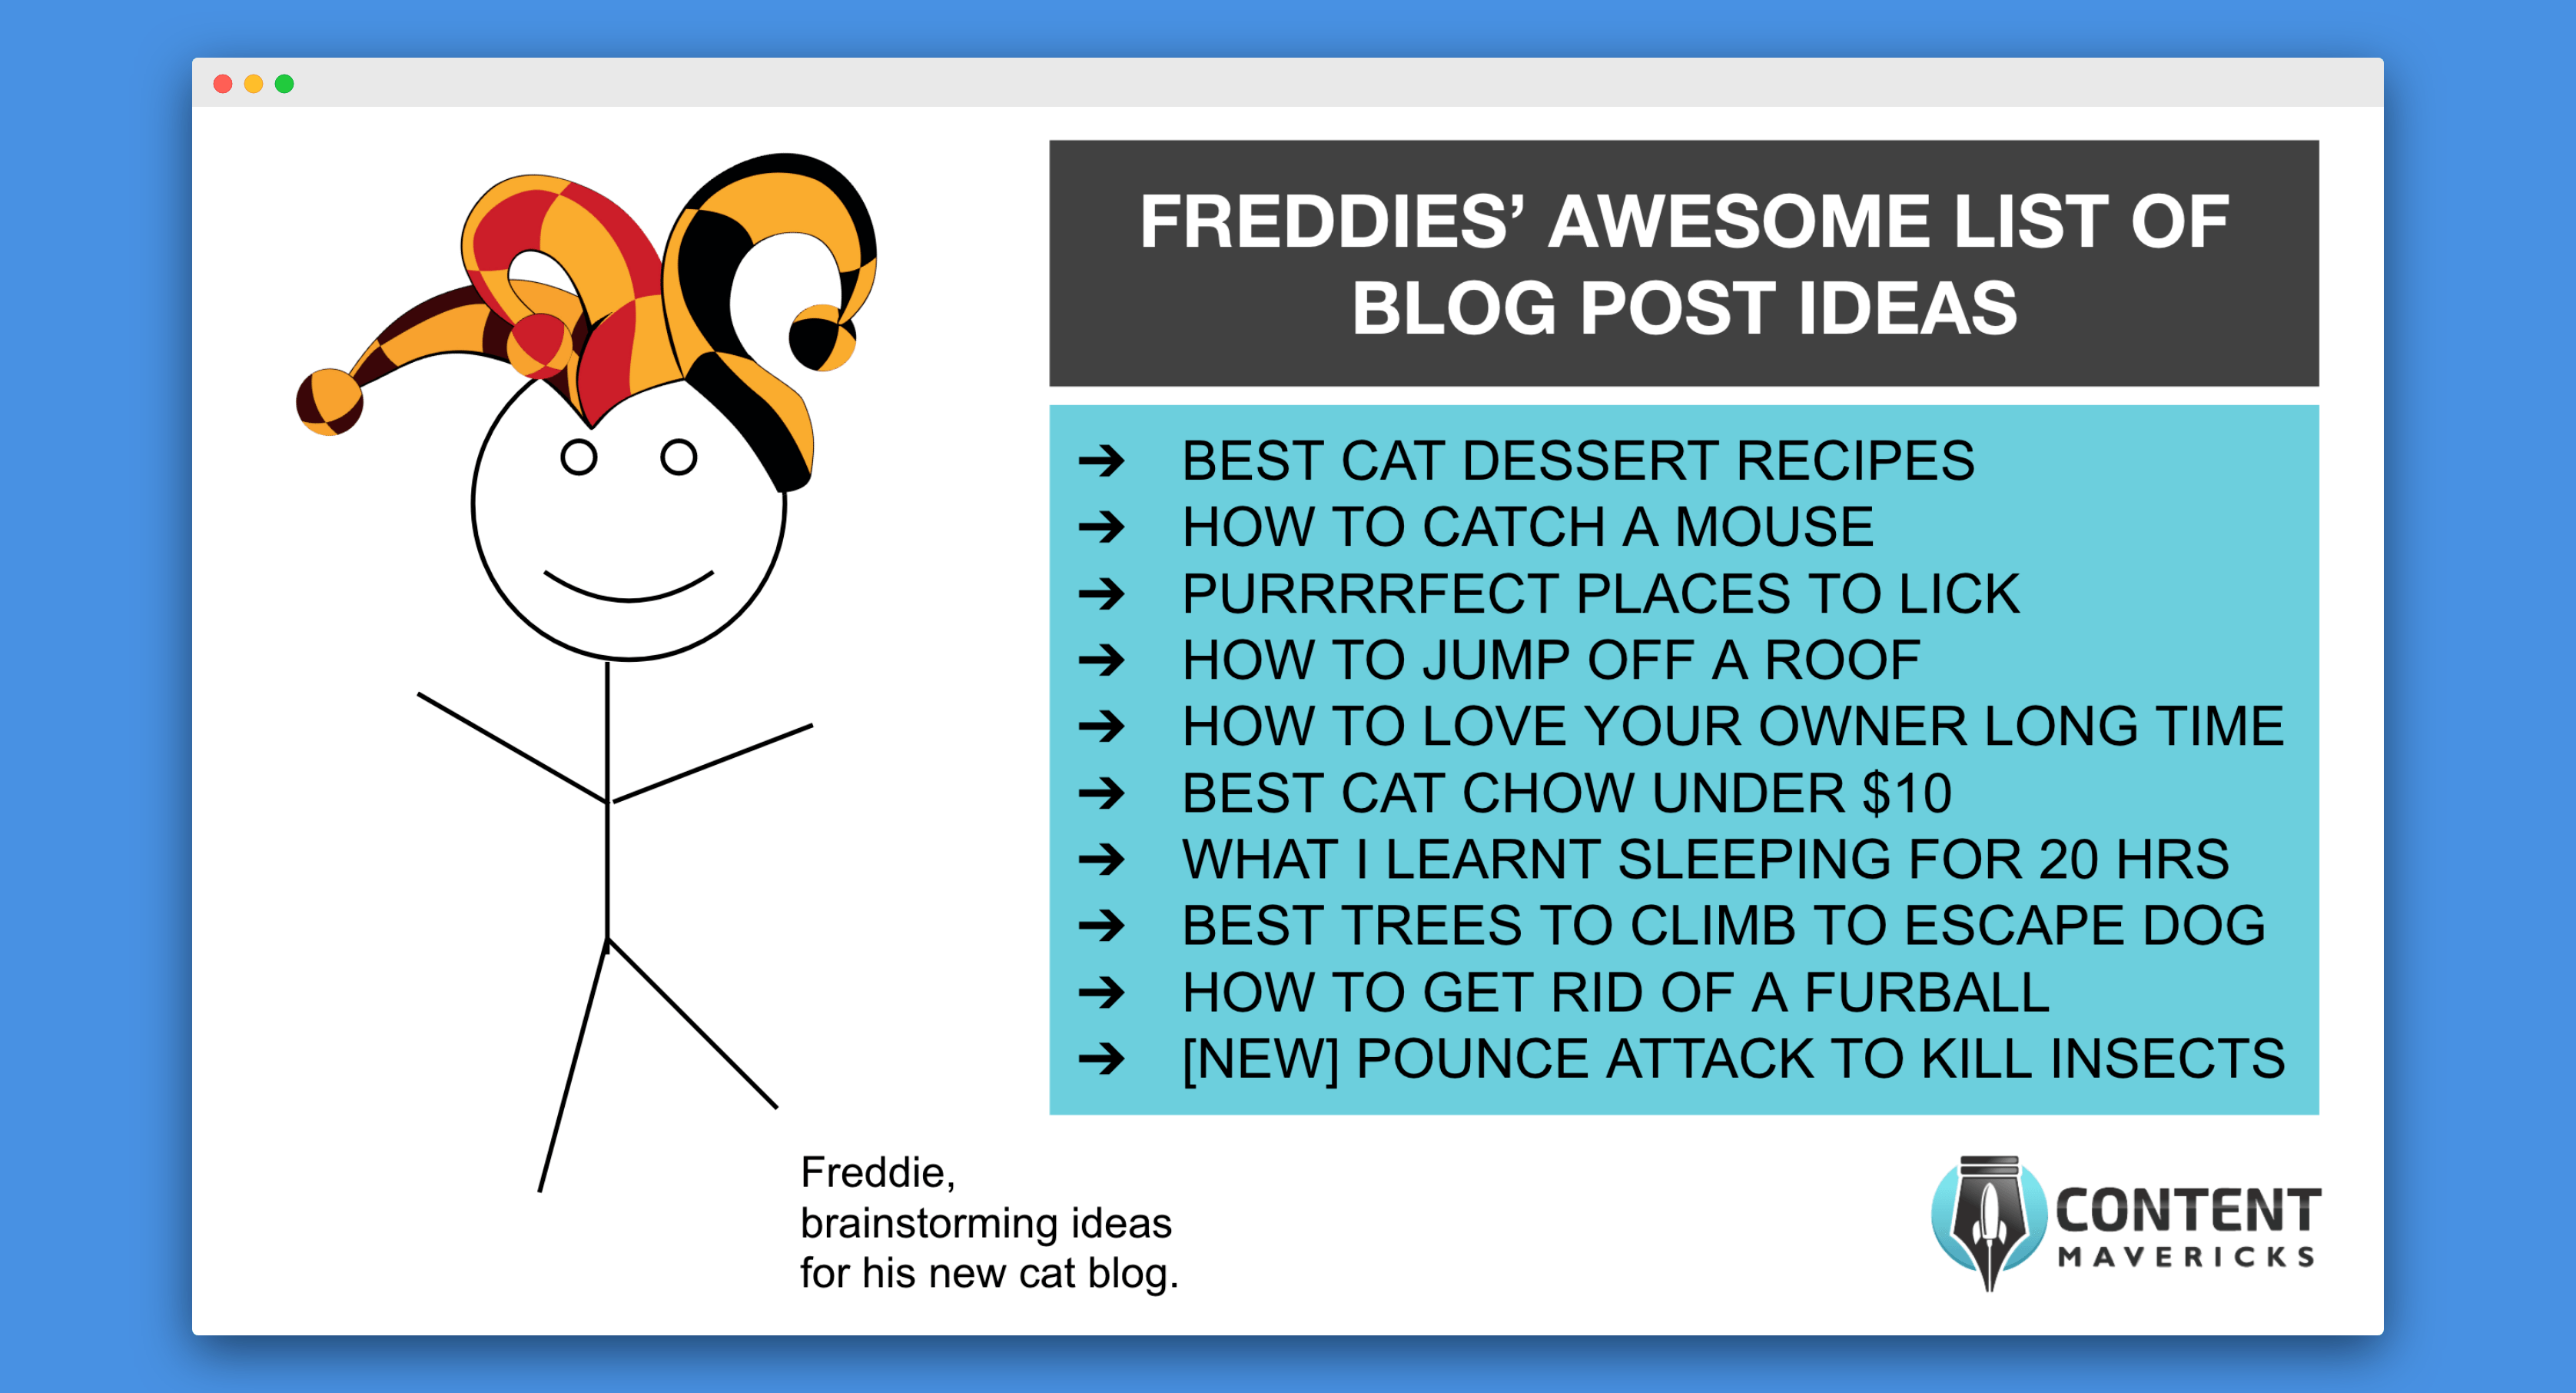
1. Set a timer for 10 minutes and brainstorm as many blog ideas as you can for the target customer you identified. If you’re struggling, aim to write down 10 ideas in 10 minutes.
2. Put a seed keyword related to your product into Google and note down all the Google Autocomplete Predictions for every A-Z letter combination.
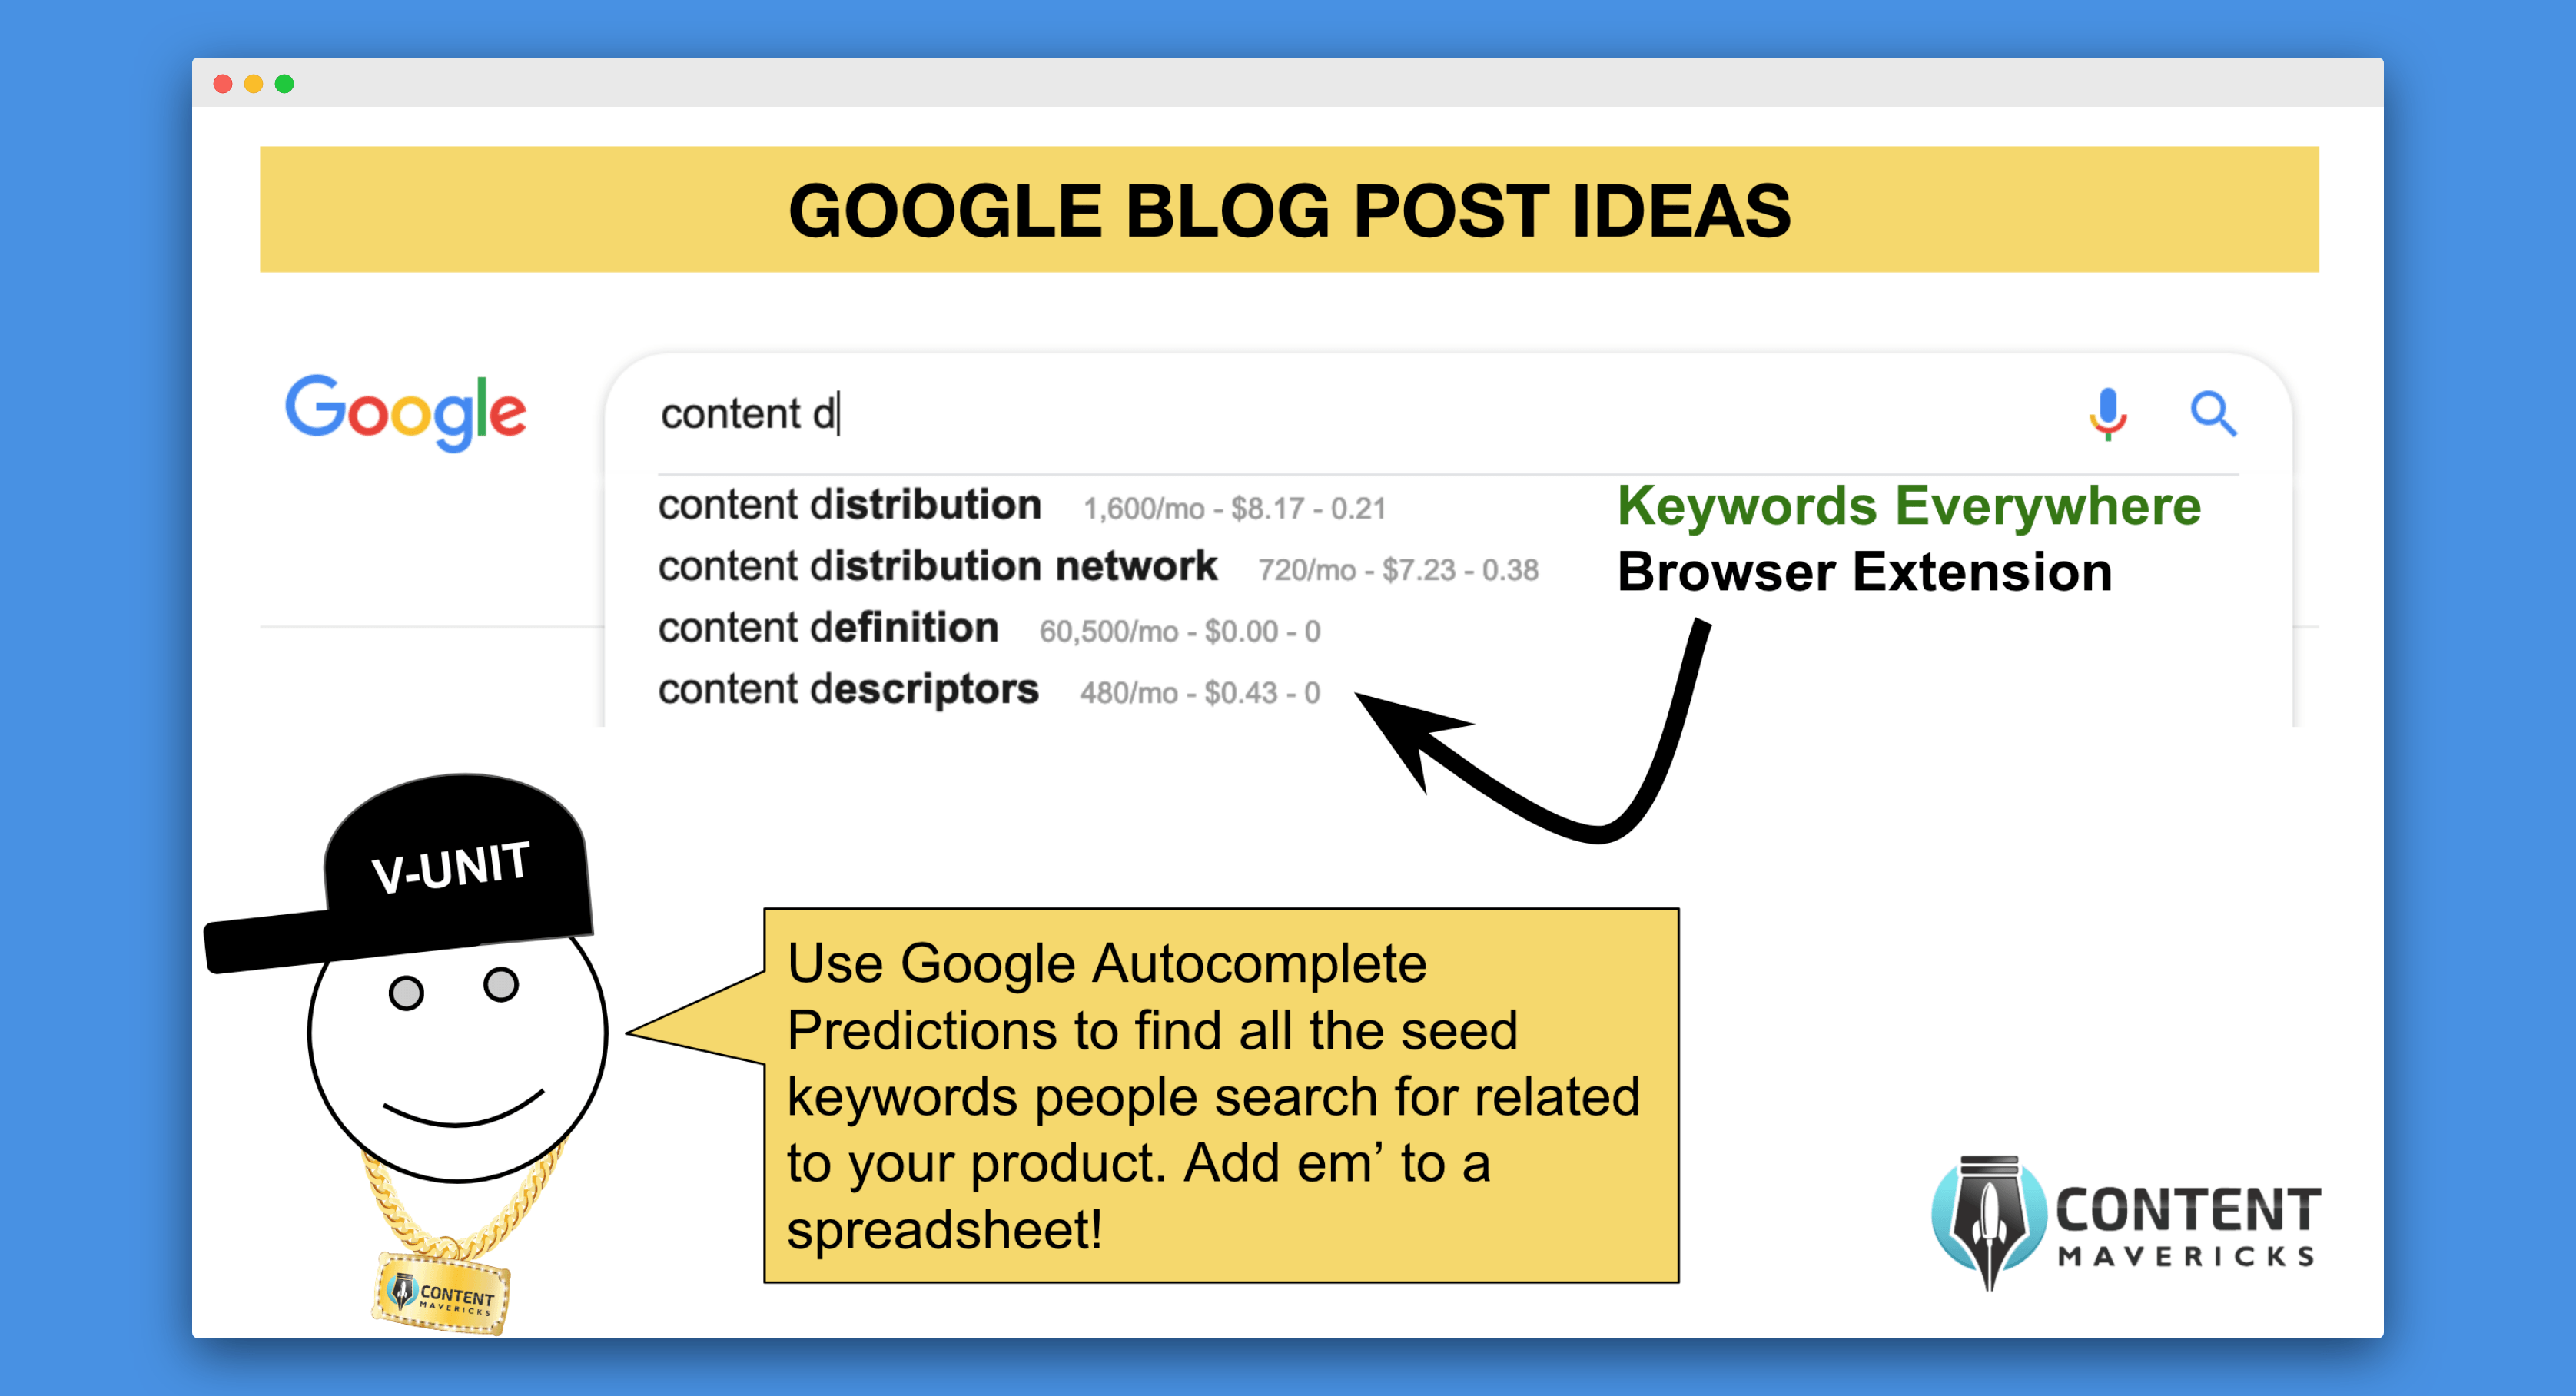
This is how I came up with Content Mavericks’ blog post on content marketing podcasts.
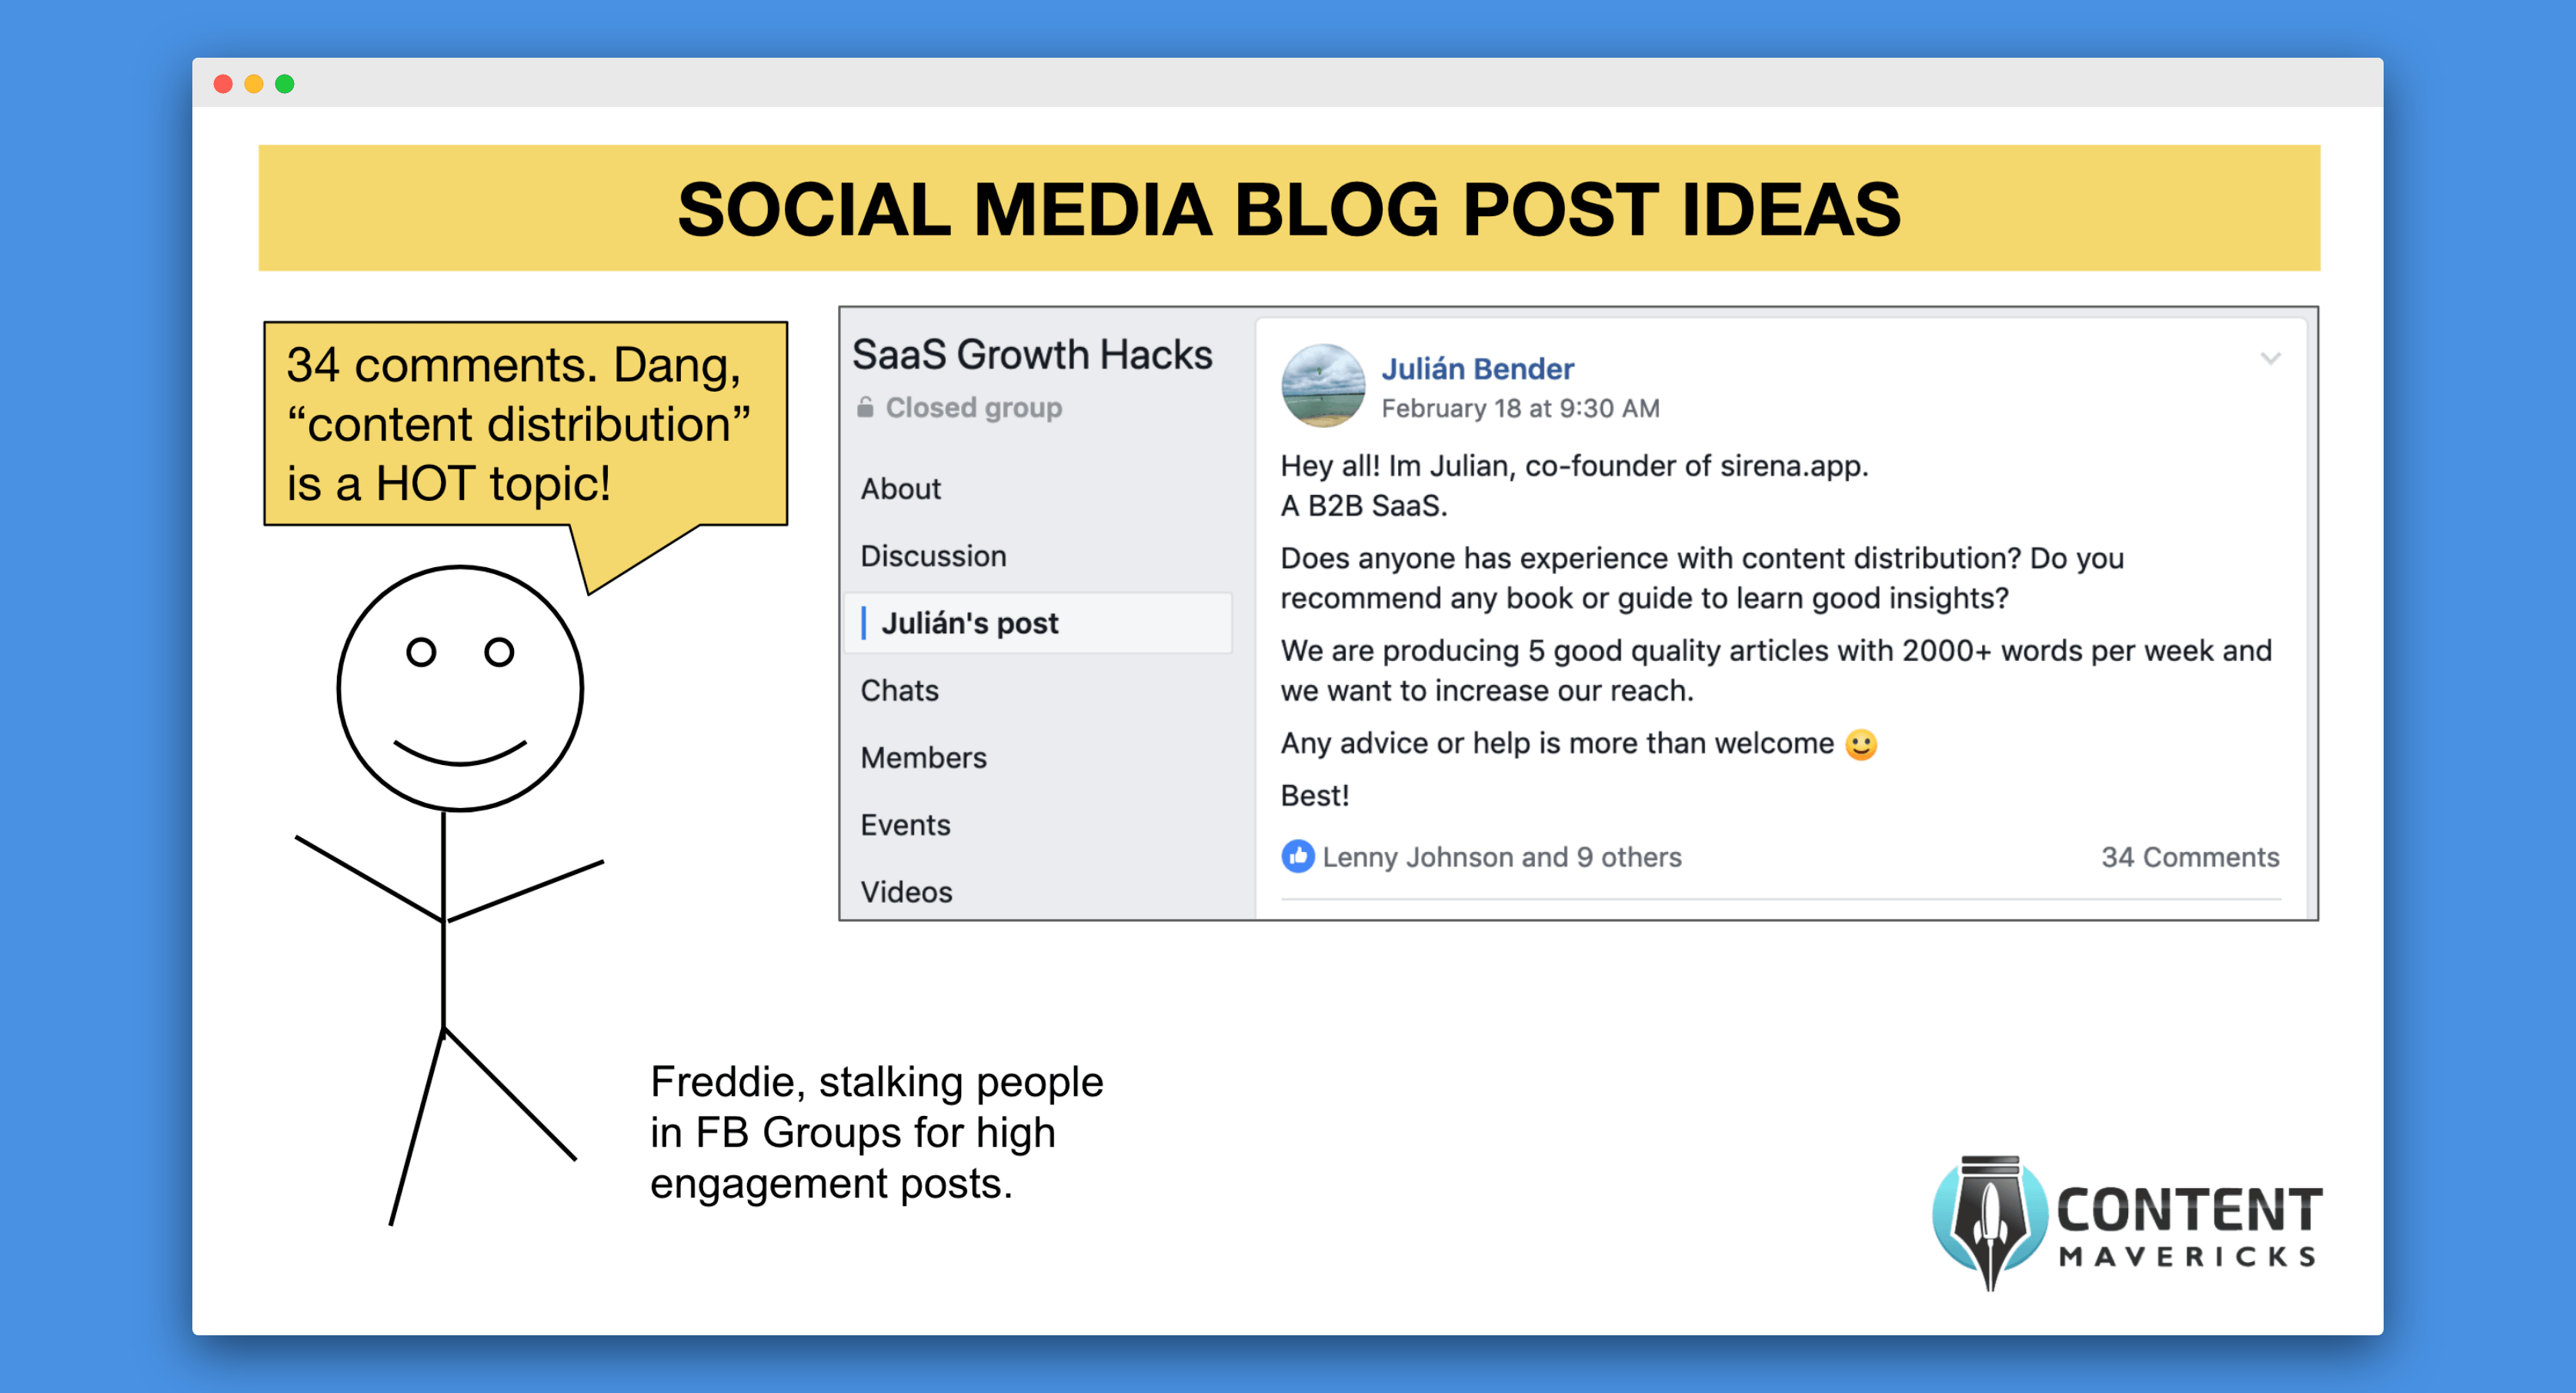
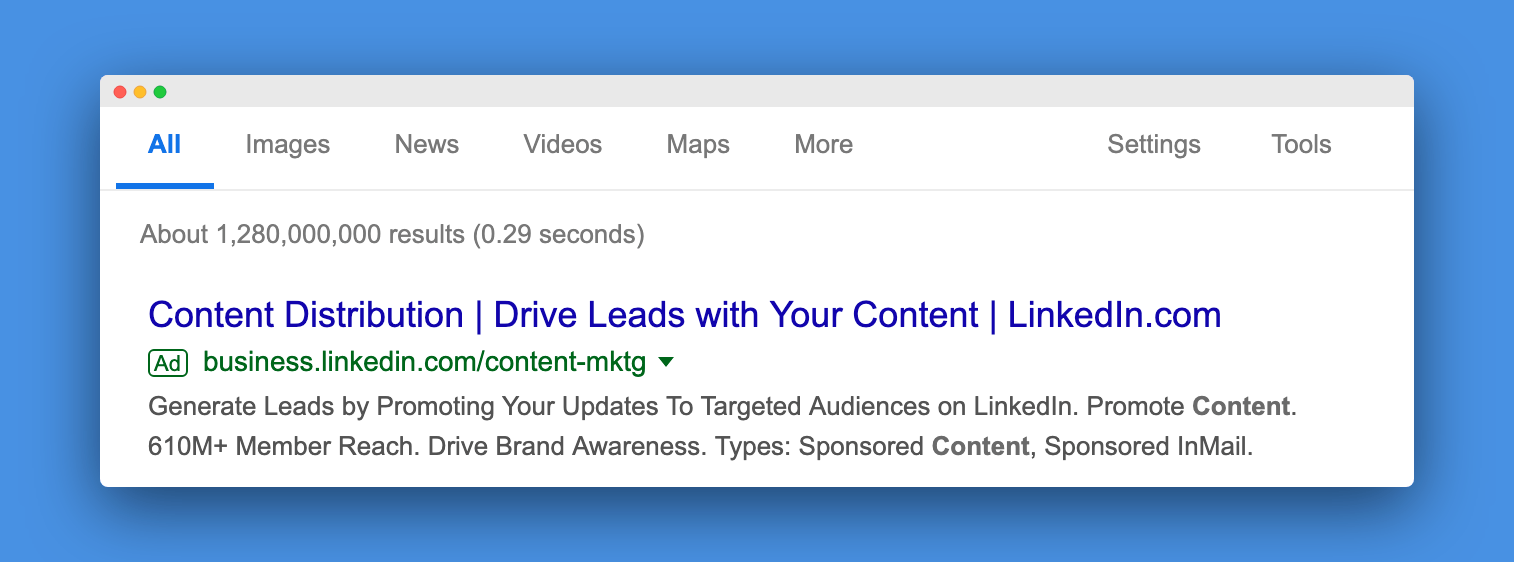
This is how I came up with Content Mavericks’ content series on content distribution.
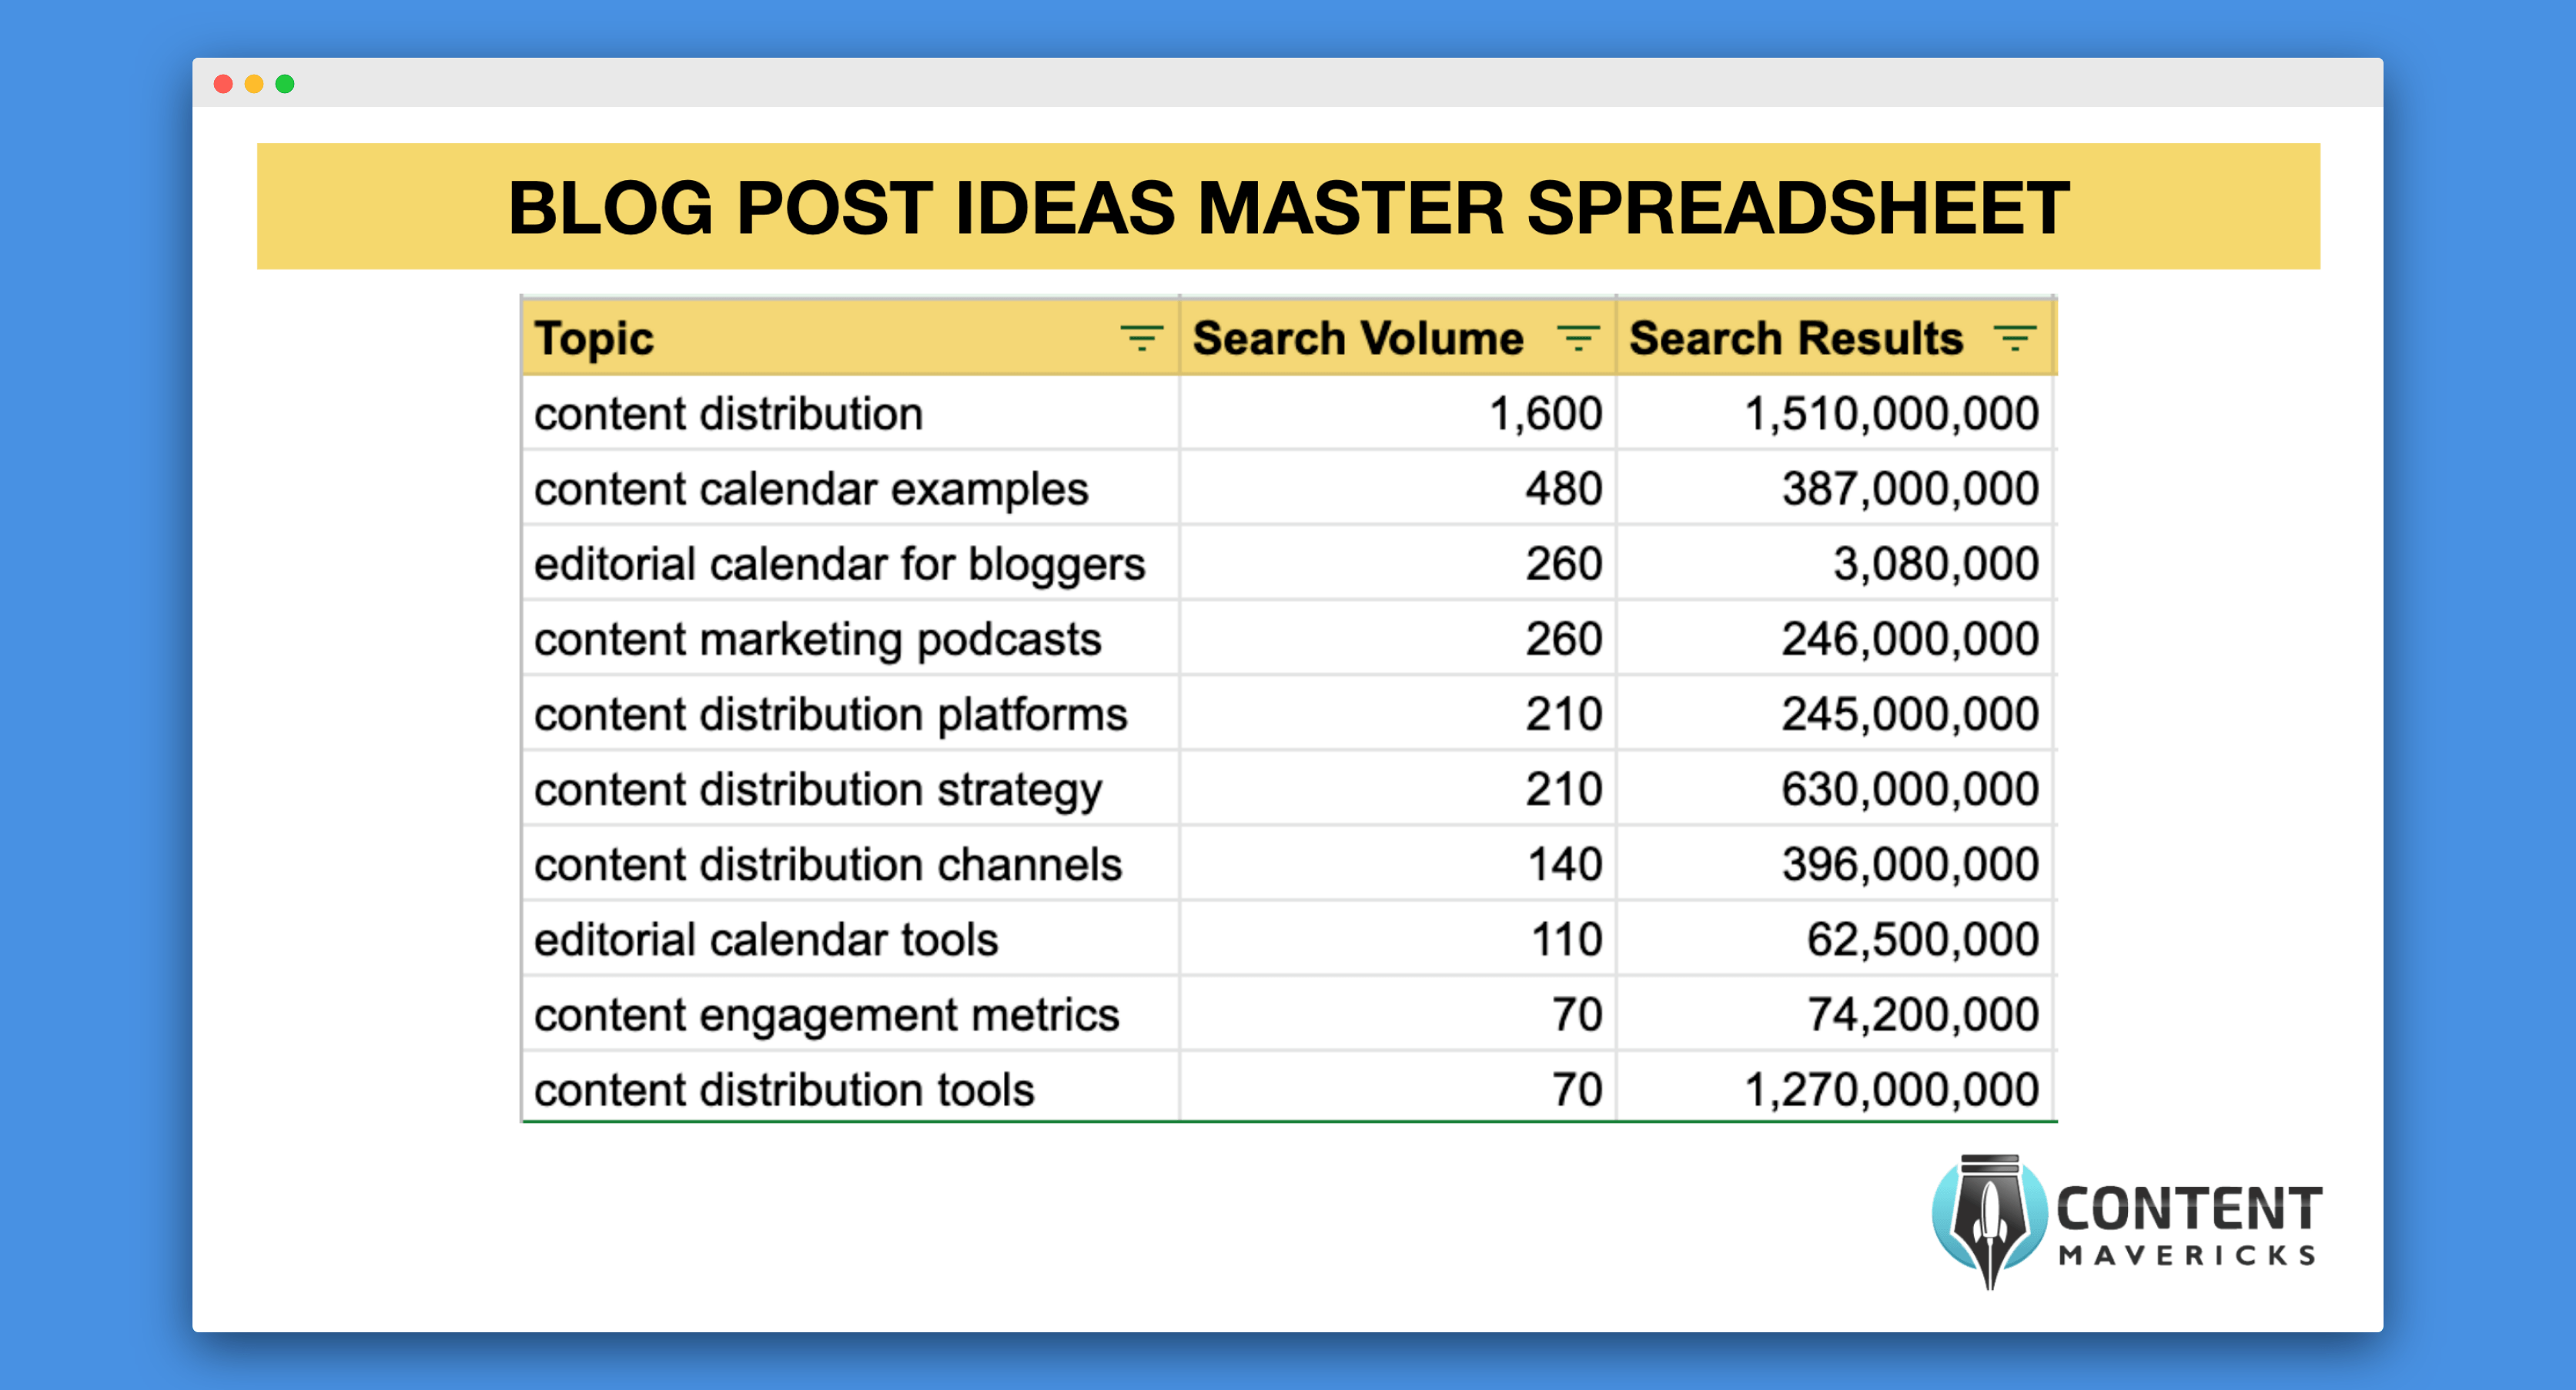
5. Put All Your Blog Post Ideas Into One Master Spreadsheet
Copy and paste all your blog post ideas into one master spreadsheet. For every keyword add the search volume. This can be found using a tool like Keywords Everywhere (see screenshot below) or Semrush.

Also add the number of search results. This can be found underneath the search bar at the top of Google search results pages (see screenshot below), or inside a tool like SEMrush.
Your master spreadsheet should look like this once done:
6. Add The Traffic Potential For Every Blog Post Topic
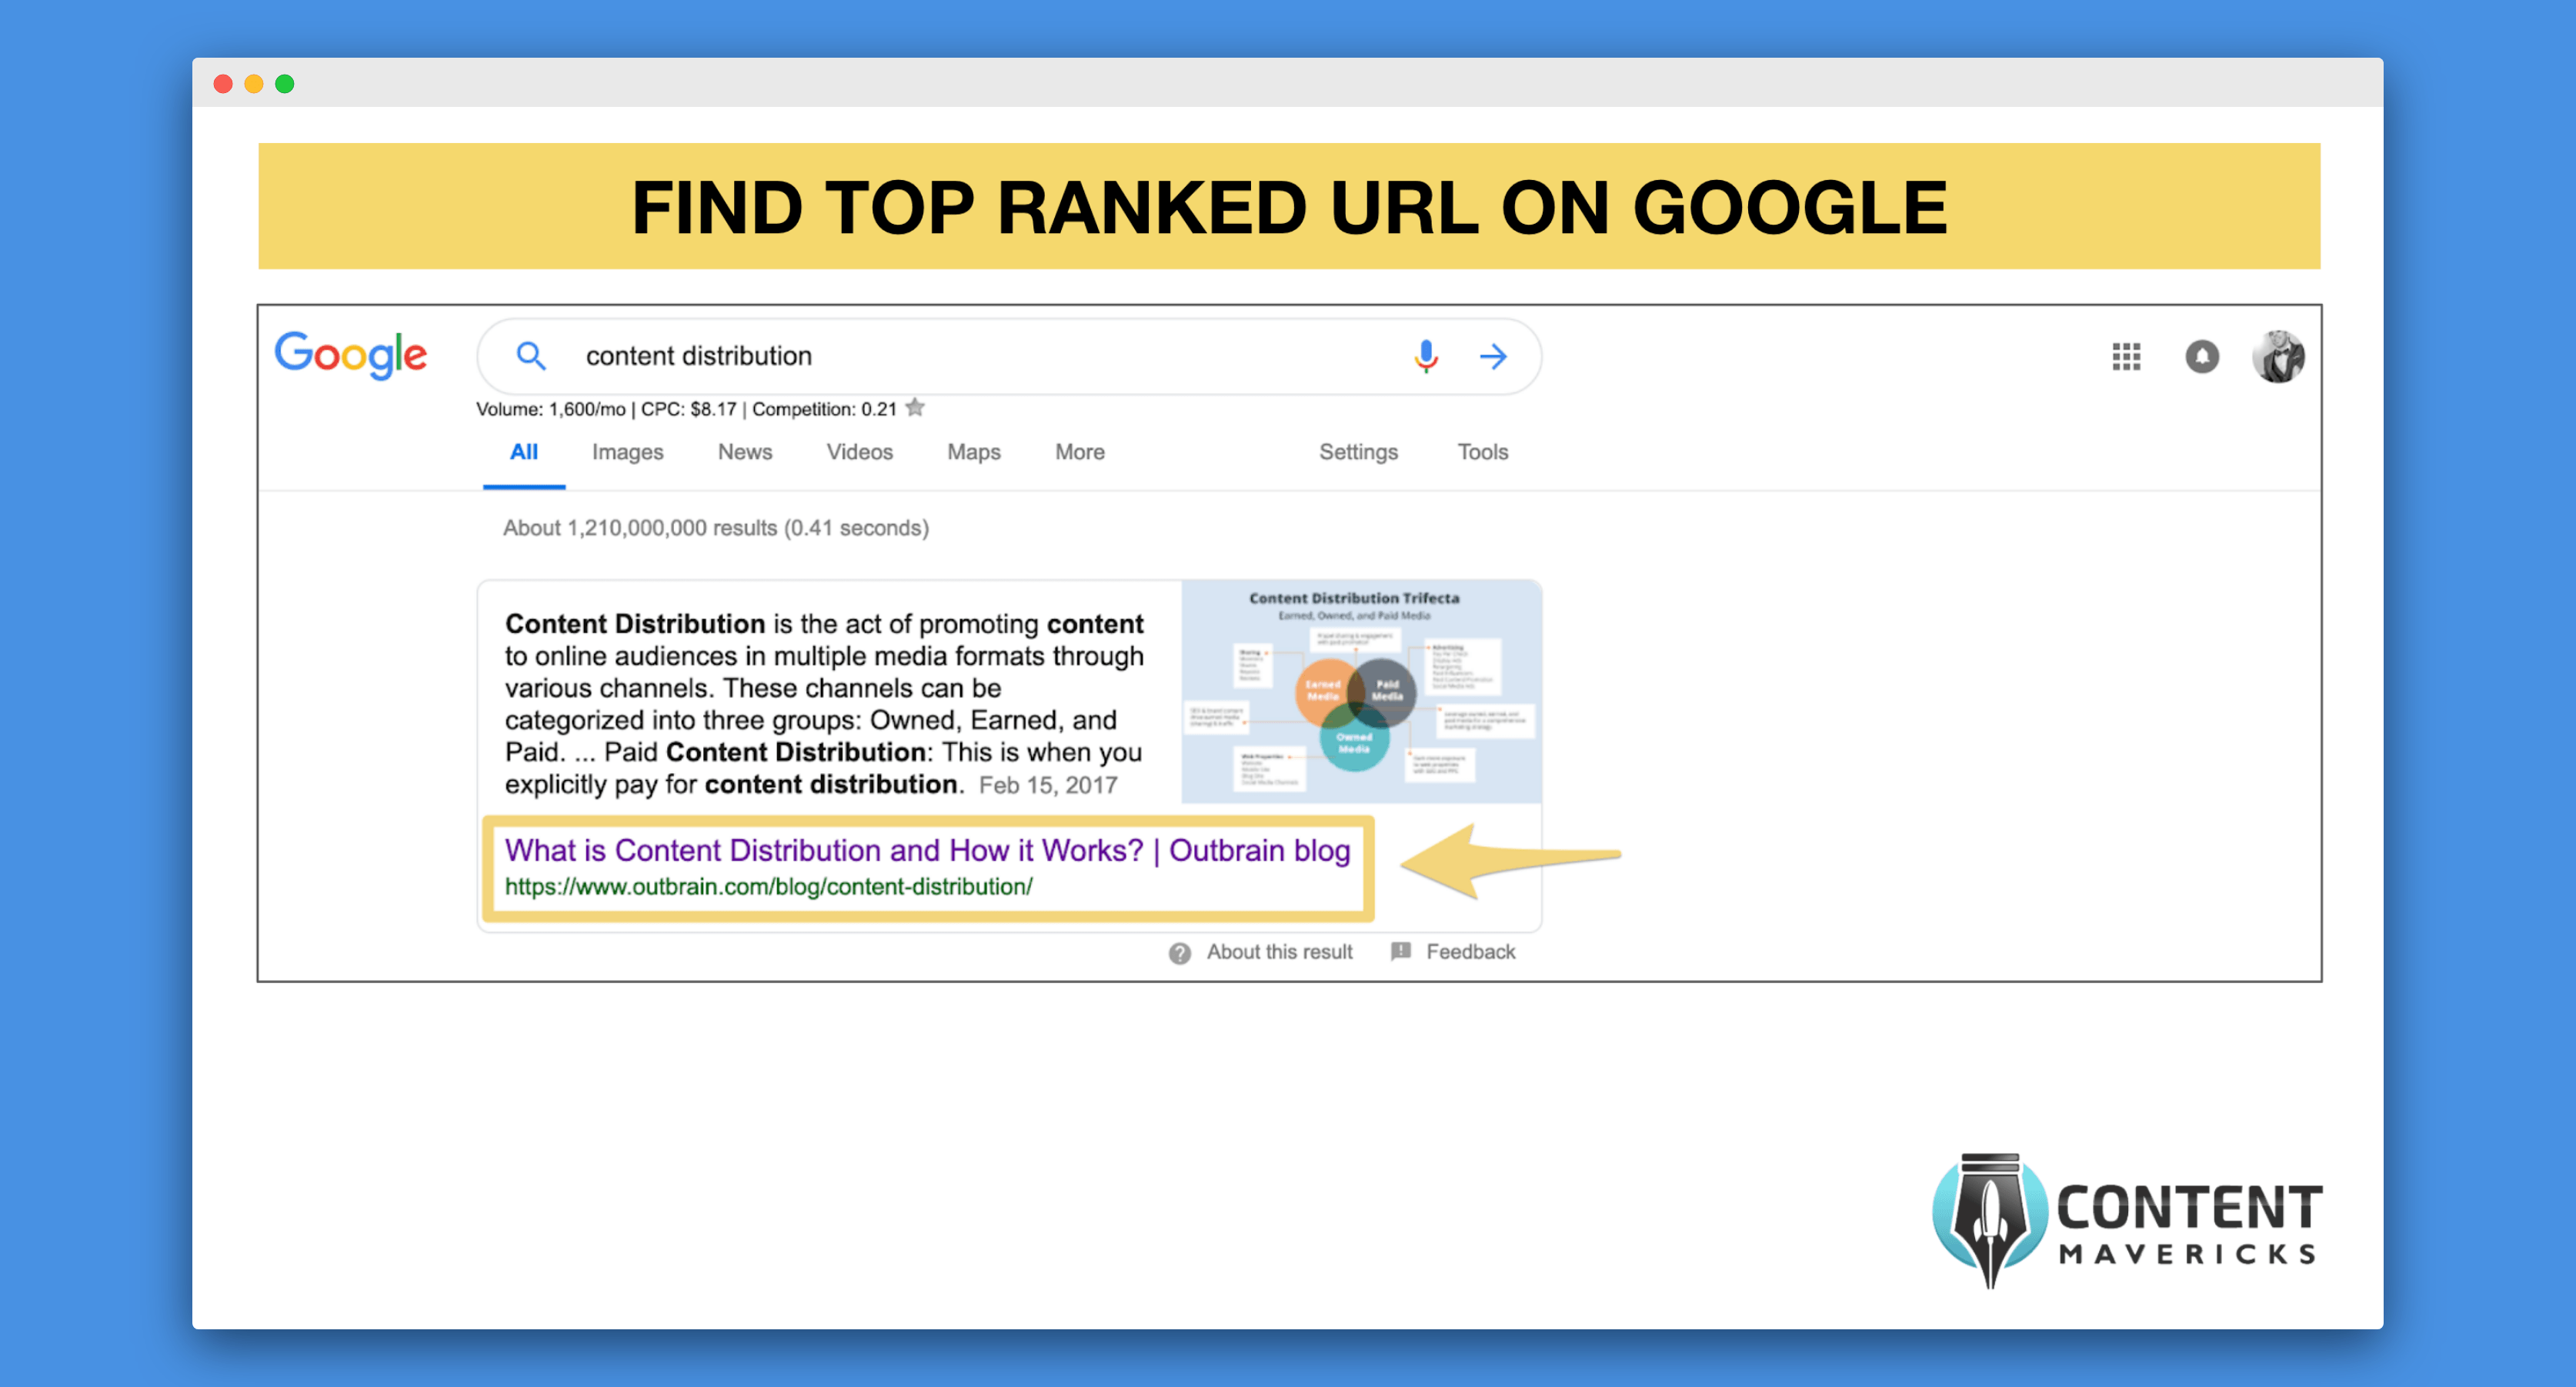
Next you’re going to find the top ranked URL for every topic in your spreadsheet:
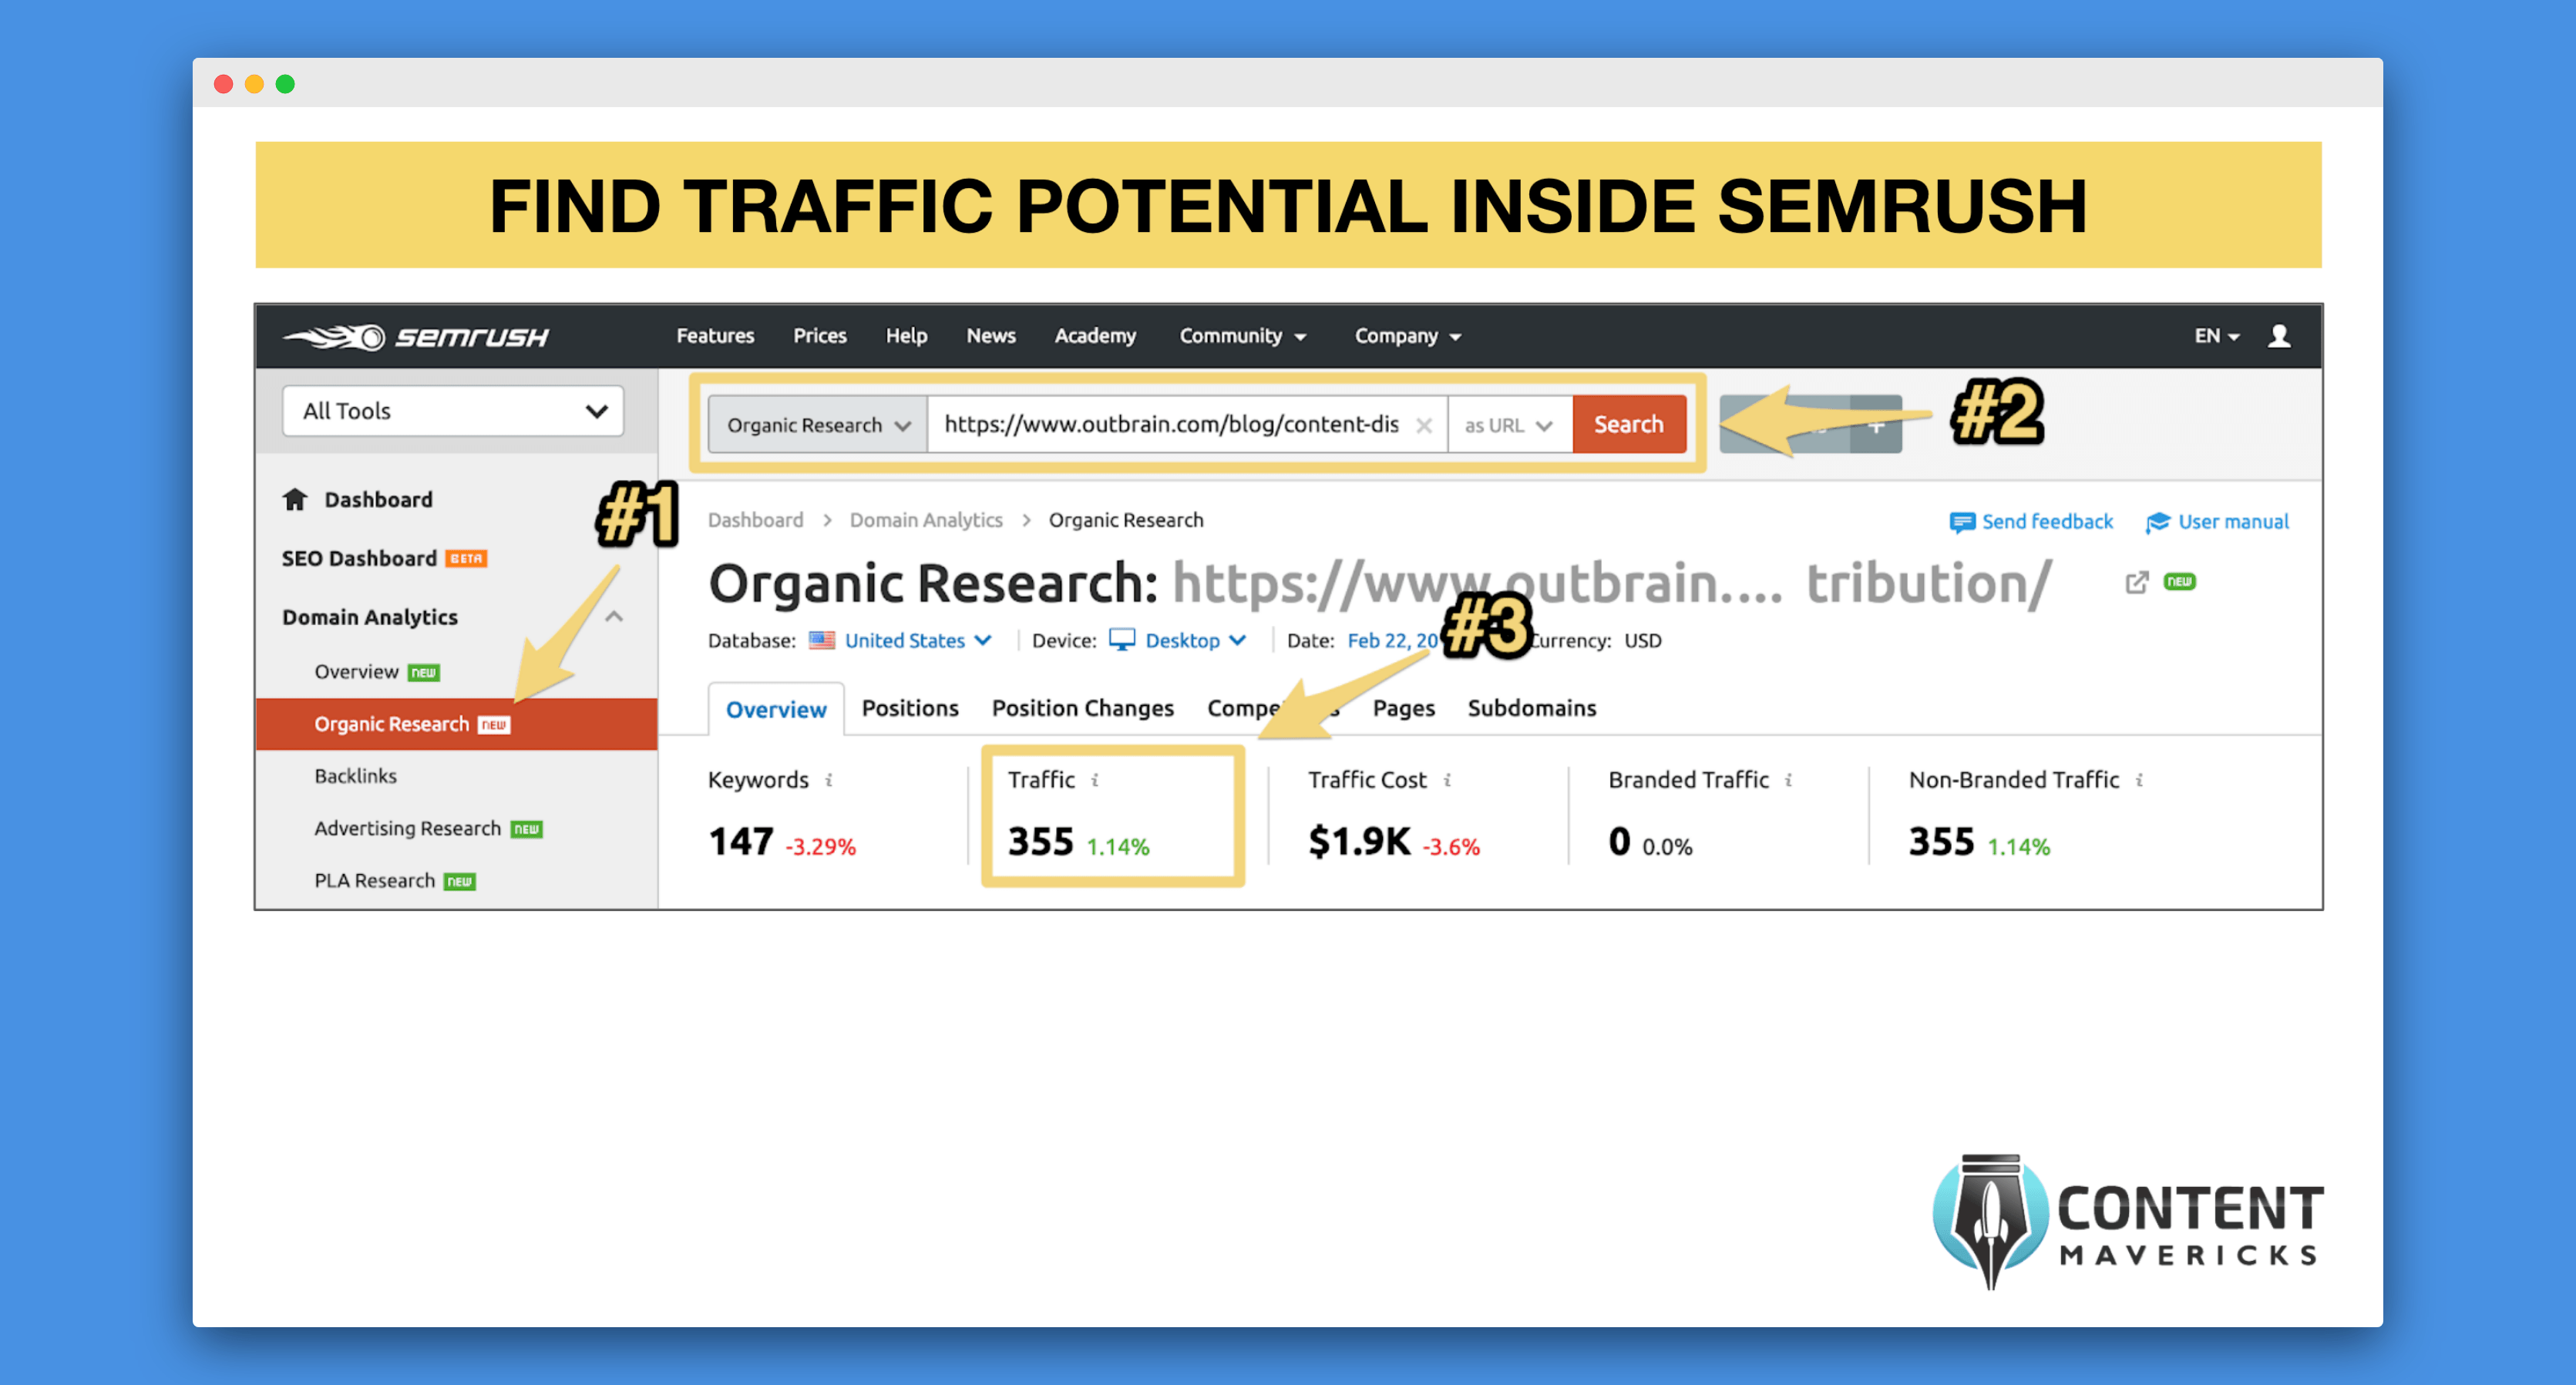
Then you’re going to go to Semrush > Organic Research and plug in the URL of the top ranked post to find the “traffic potential” for your topic.
Traffic potential is an estimate of the monthly traffic that blog post gets for all the keywords it ranks for on Google. It’s a way more accurate indicator of how much potential traffic you can get to your blog post versus search volume.
Note: Semrush is a paid tool, but they gave me a 14-day free trial for Content Mavericks readers. Perfect to find the organic traffic potential for all your topics.
Your master spreadsheet with traffic potential added should look like this once done:
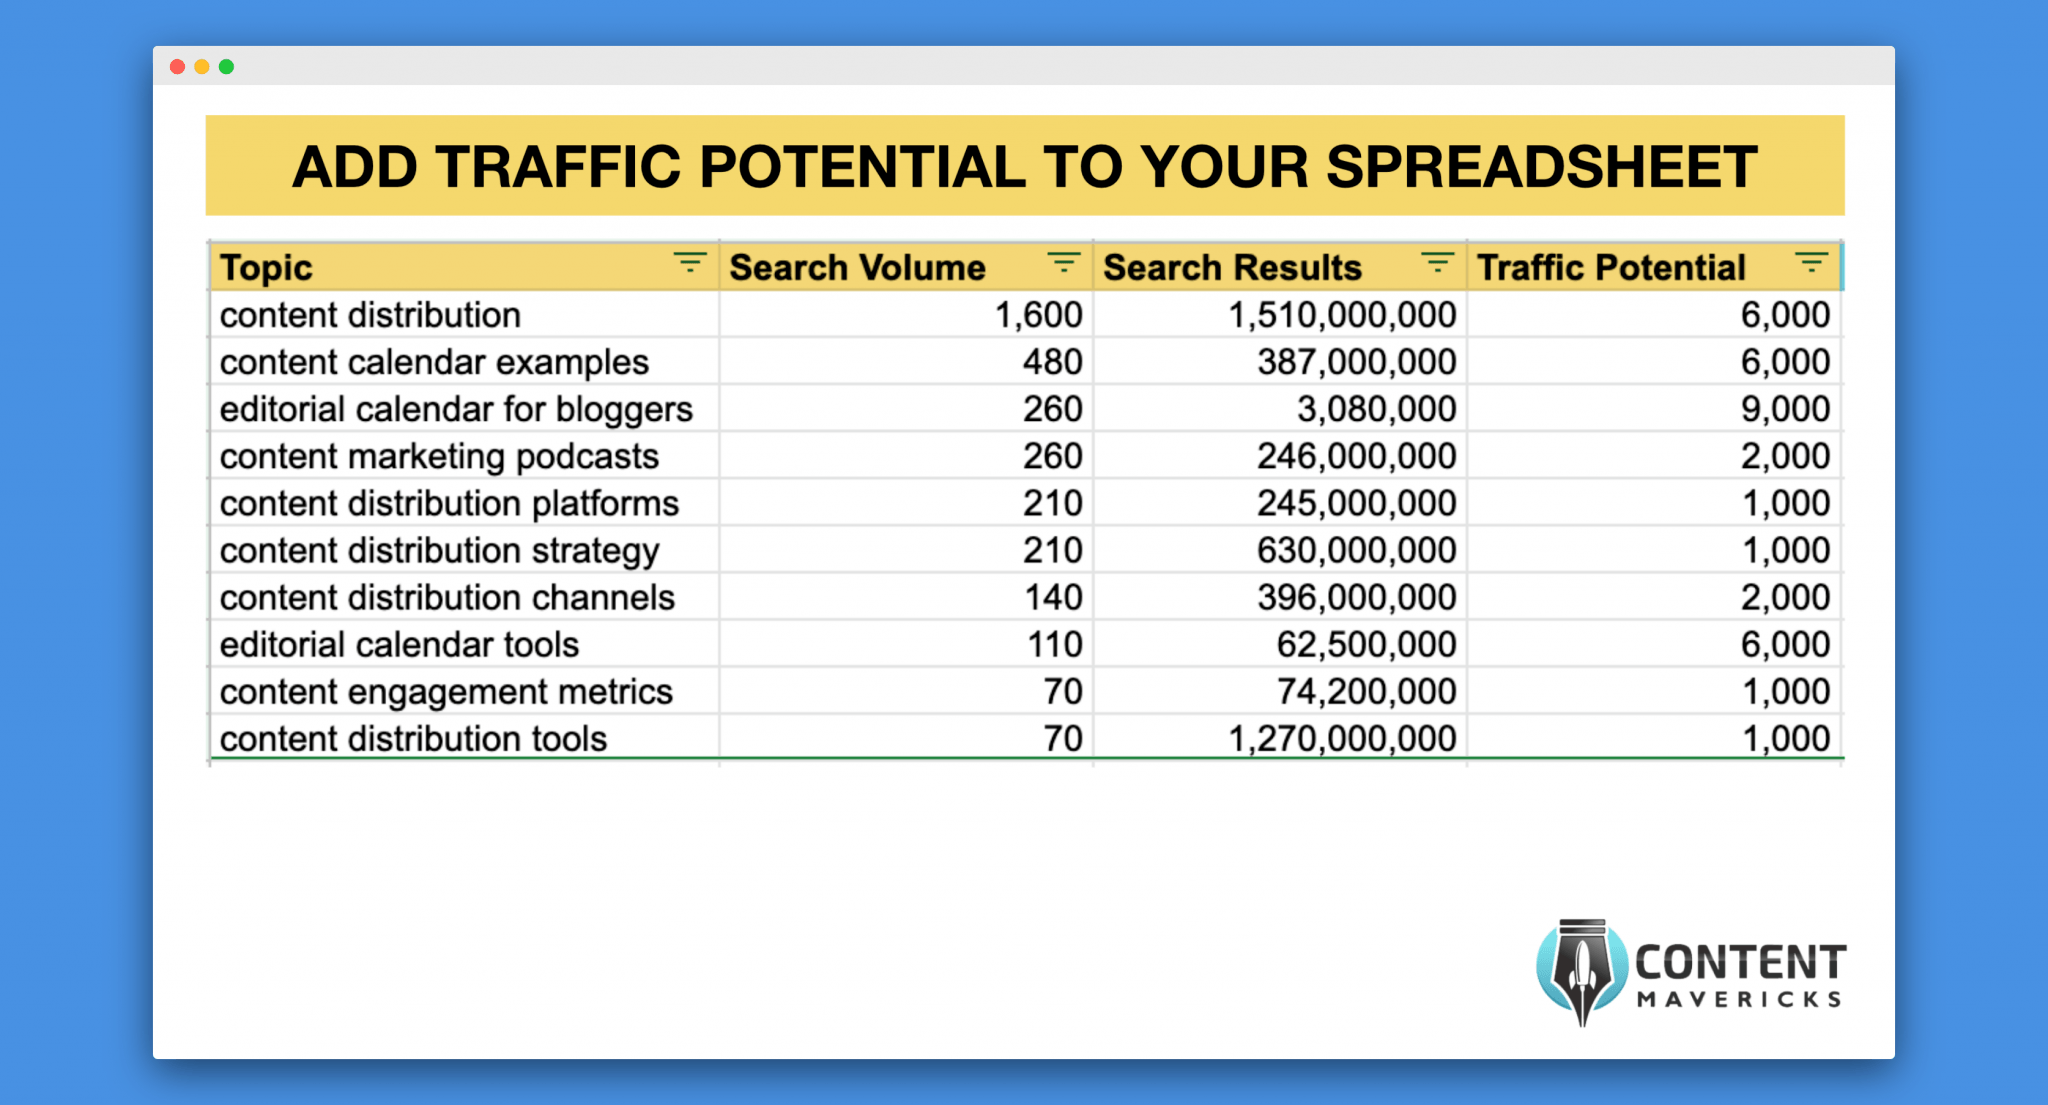
Note: I add the annual traffic potential into my spreadsheet so I can estimate my organic traffic growth over a whole year. You can use monthly or annual.
7. Prioritize Blog Post Ideas By “Traffic Score”
Traffic score is a metric I made up that is calculated by dividing the traffic potential for a topic by the number of search results for it on Google. I find it’s a great proxy for prioritizing topics you can write with low competition and high traffic potential.
Here’s what your master spreadsheet should look like after adding in the traffic score:
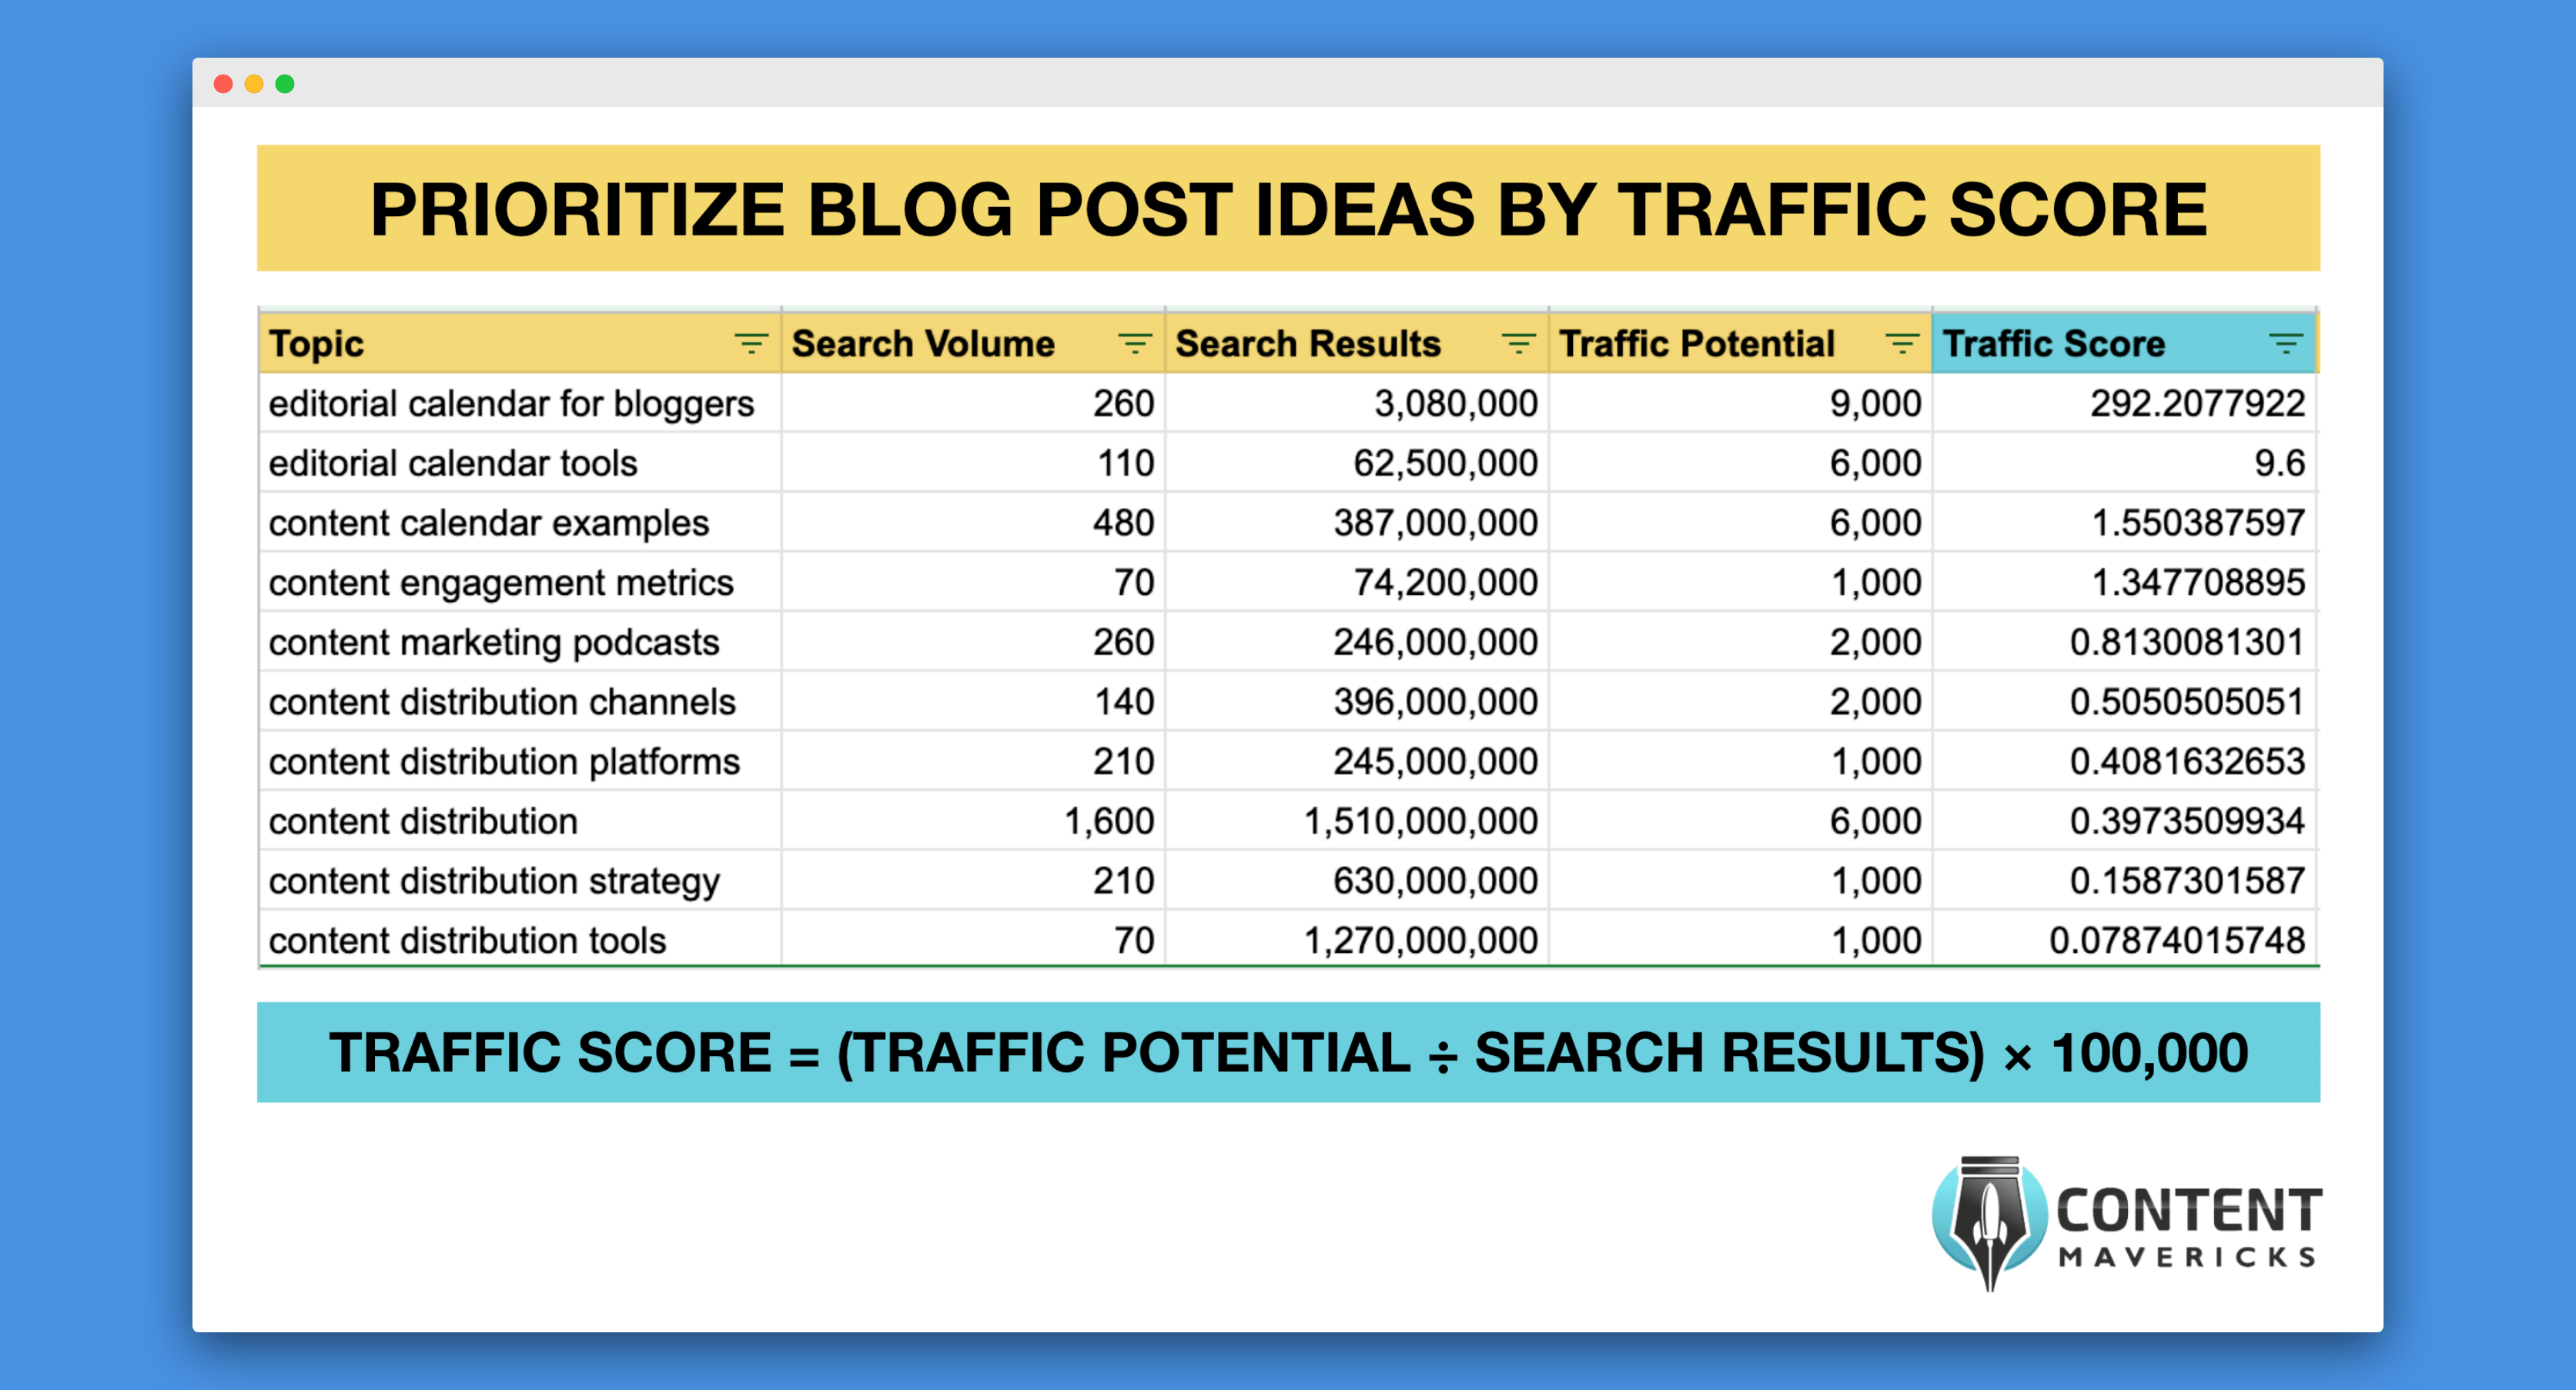
Note: In my example above I multiply the traffic score by 100,000. This is to make it easier to read, without five decimal places.
8. Identify If There Is An Opportunity Gap
Just because a blog post topic has high traffic potential and low competition (i.e. a high traffic score), doesn’t necessarily mean you can easily win for it on Google.
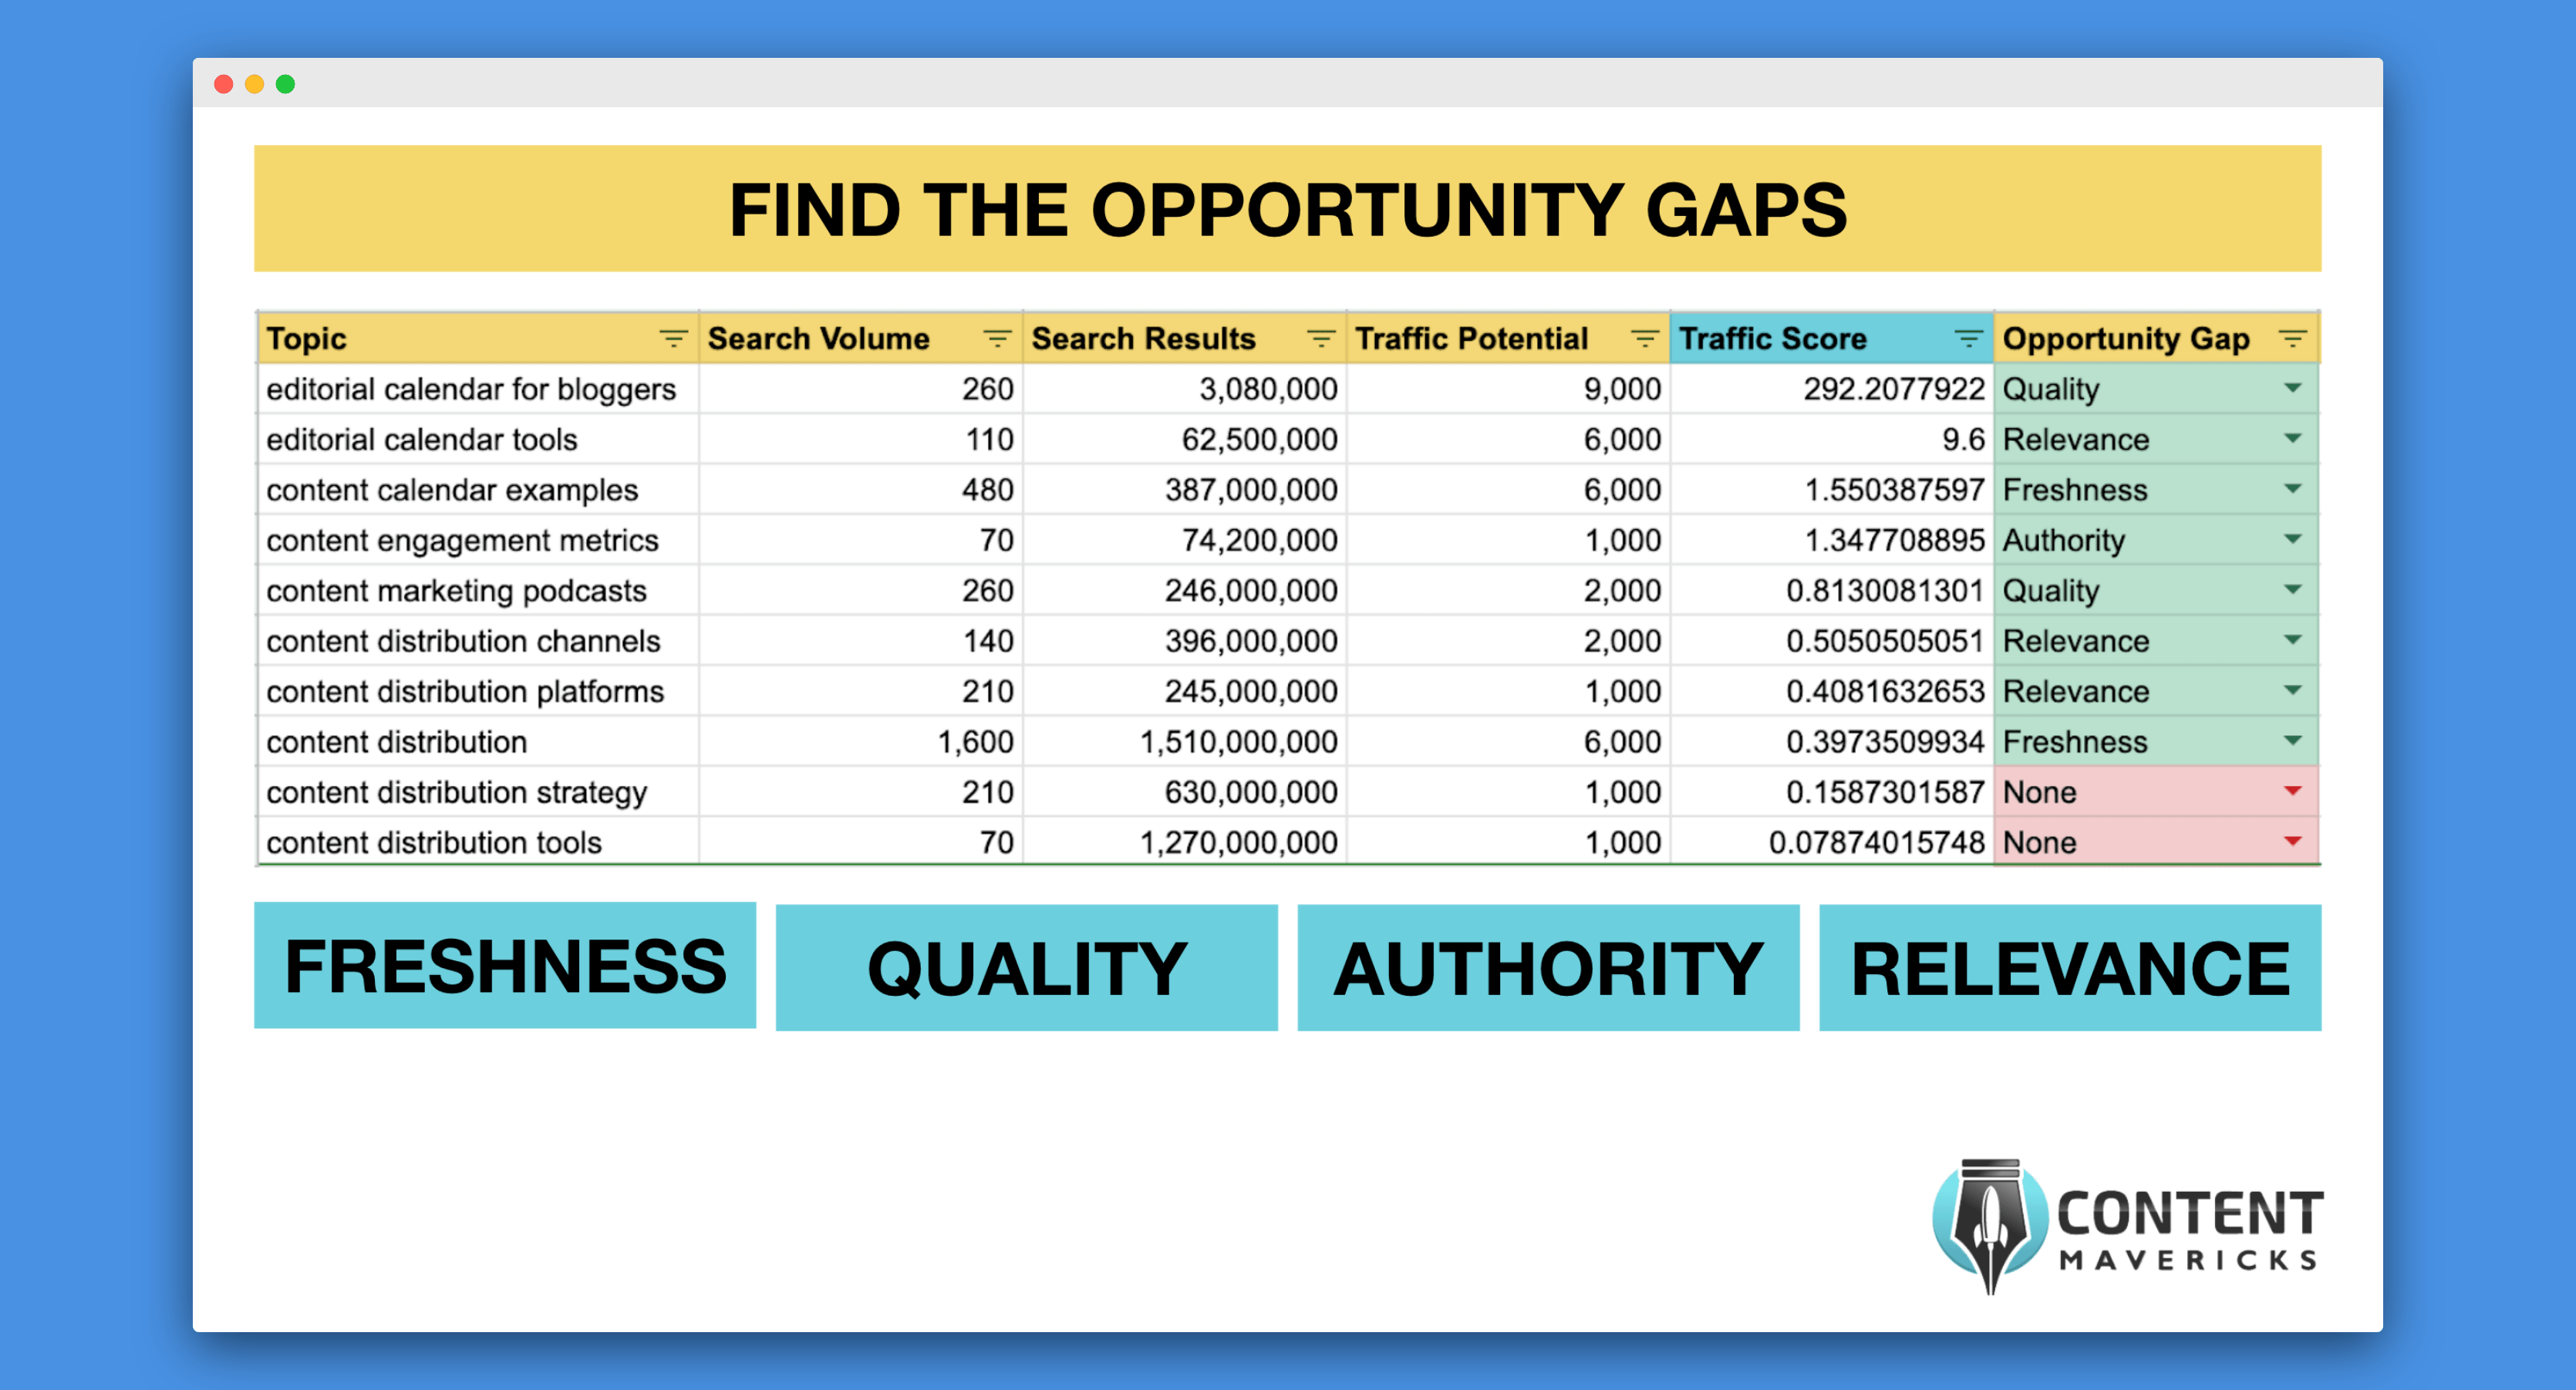
To see if a post is worth my time writing, I browse the first page of Google search results and look for four opportunity gaps:
- Freshness Gap: How long ago other posts were published.
- Quality Gap: How good other posts are written.
- Authority Gap: How established other sites are.
- Relevance Gap: How well the blog post meets the search intent of the user.
Here’s an example of the opportunity gaps I found for the topic “editorial calendar tools” in the top three ranking Google results:
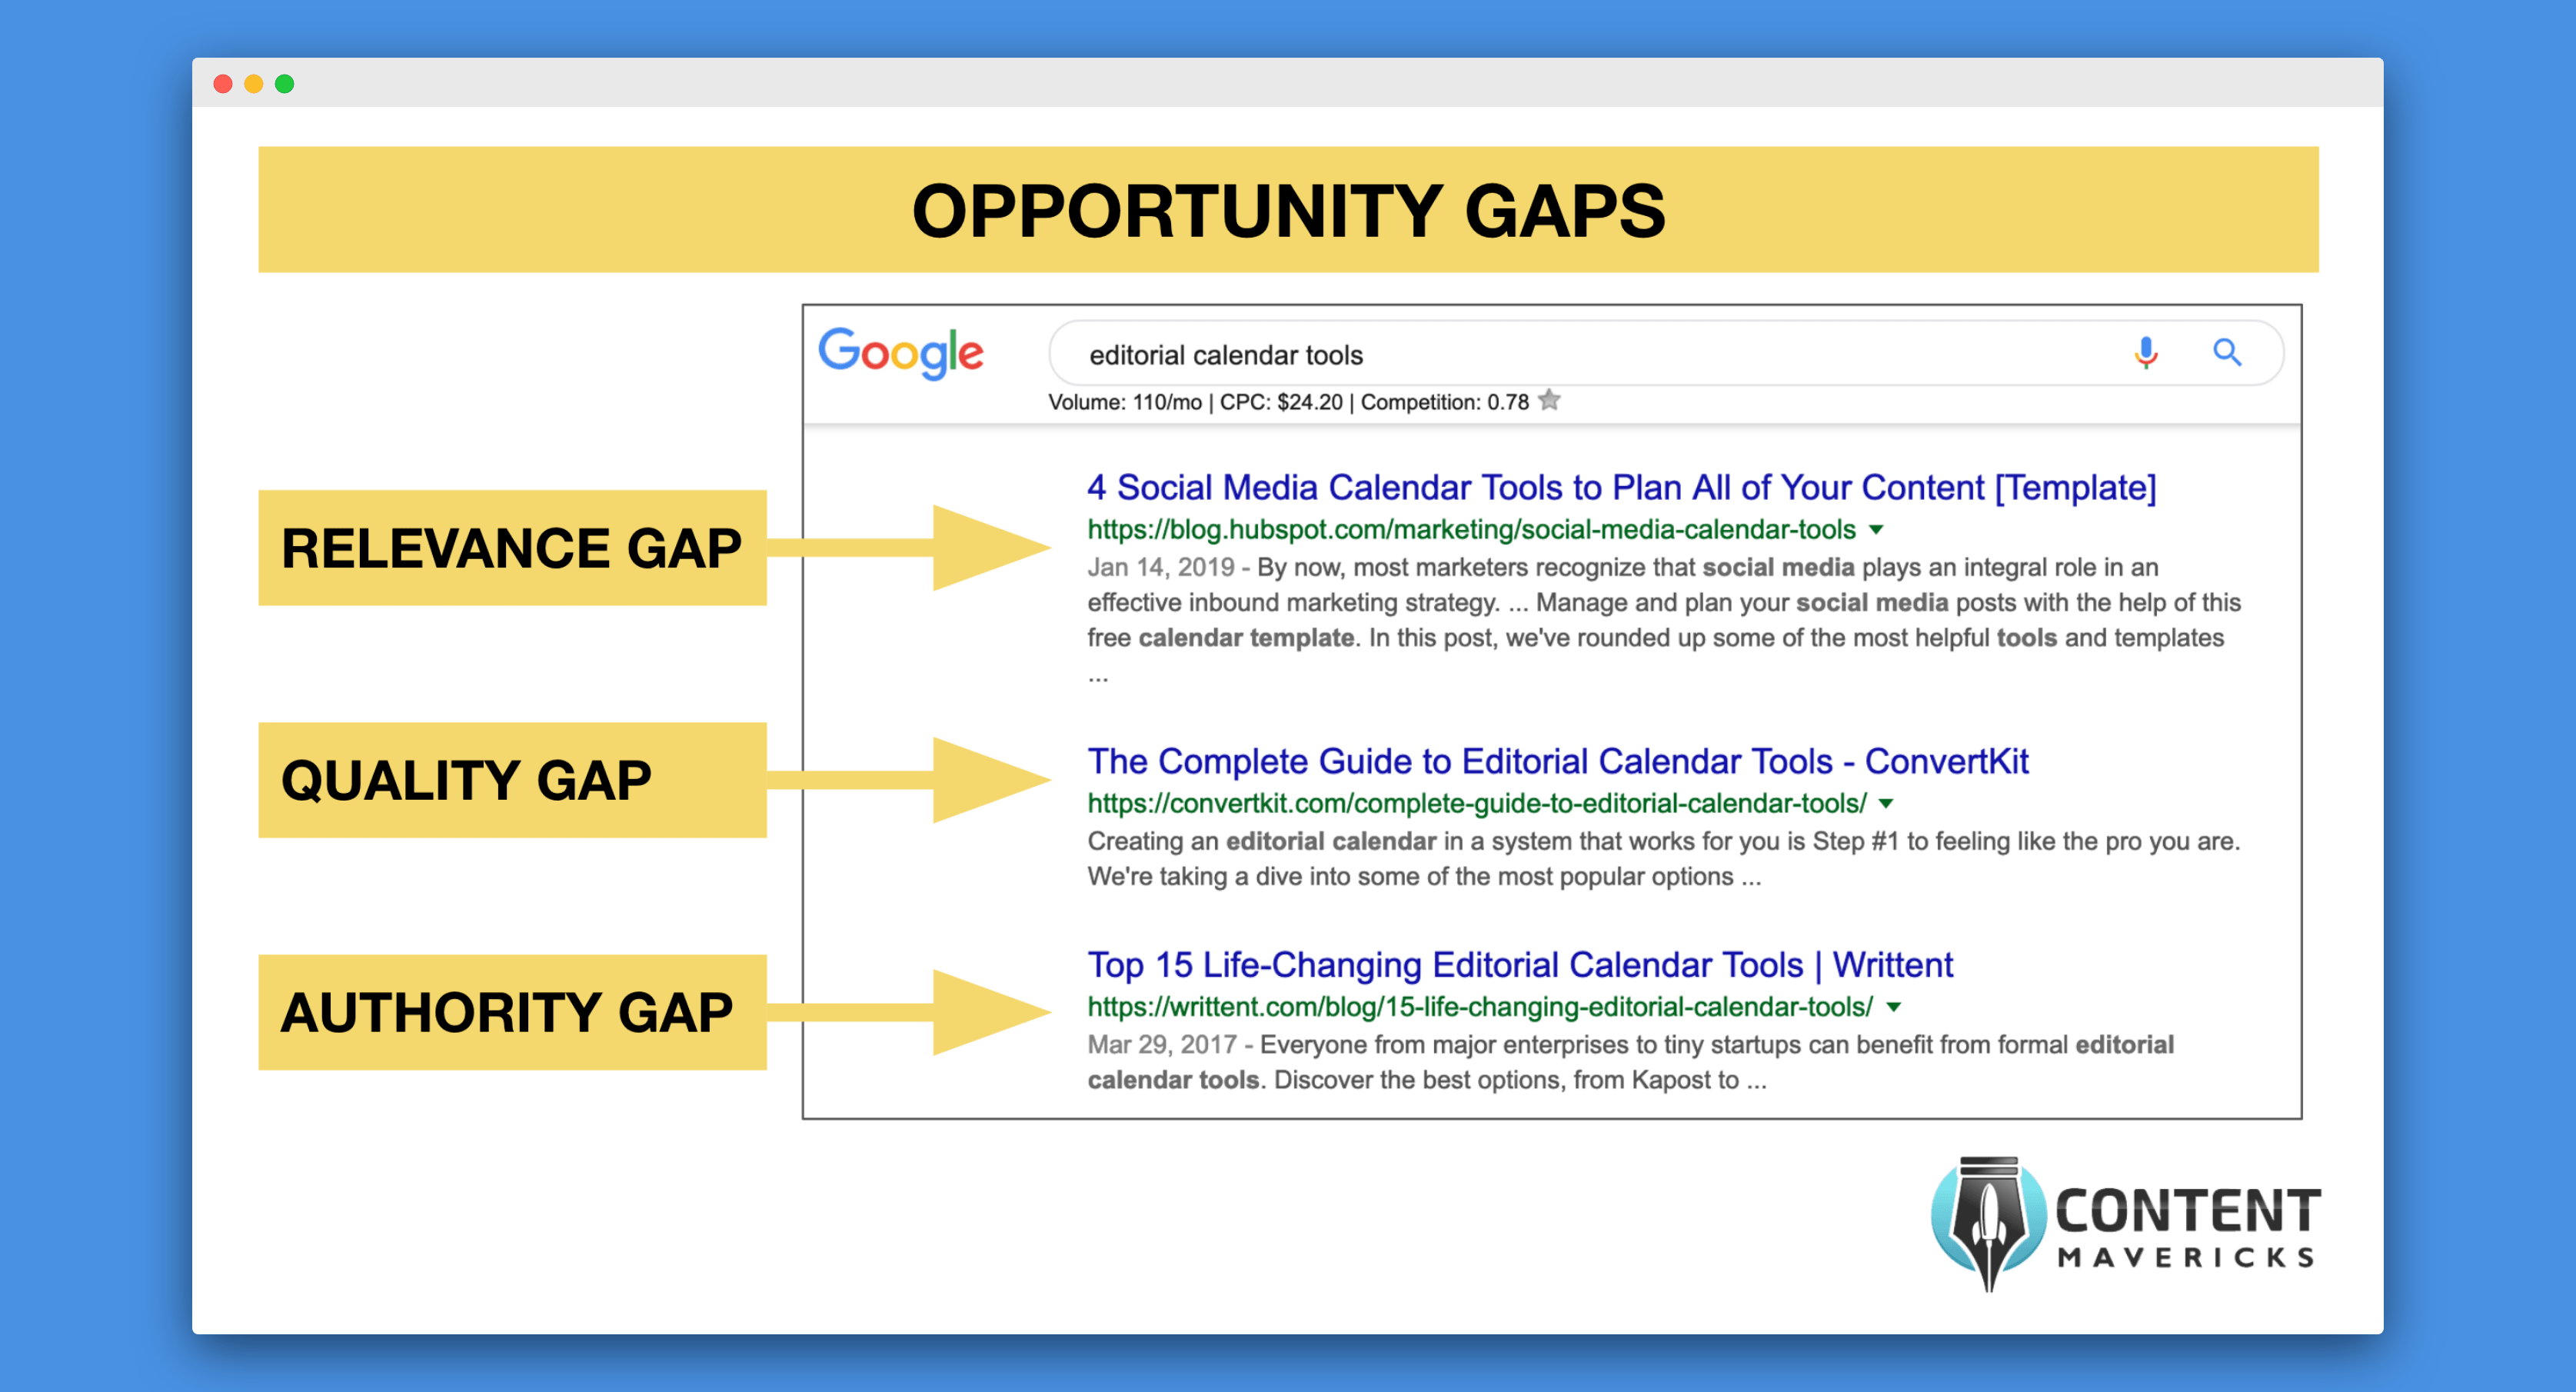
Here’s how I identified the opportunity gaps:
- Relevance Gap: The first blog post from HubSpot has the headline “4 Social Media Calendar Tools To Plan All Your Content.” It’s obvious from the headline this does not meet the search intent of “editorial calendar tools.”
- Quality Gap: The second blog post by ConvertKit isn’t well written. It’s a good list post, but there are no custom images, video walkthroughs or clear categorization for every tool.
- Authority Gap: The third blog post is by a website (Writtent) I’ve never heard of before (indicating an authority gap) and was published in 2017 (indicating a freshness gap).
Now you need to find the opportunity gaps for all the blog post ideas on your spreadsheet. By the end your spreadsheet should look like this:
9. Add The Ranking Potential For Every Blog Post Topic
Now you’ve found the opportunity gaps, you can find the ranking potential of all your blog post topics.
This is a relative measure of how easy it will be to rank your blog post on Google.
You’re going to give every blog post one of three ranks:
- High
- Medium
- Low
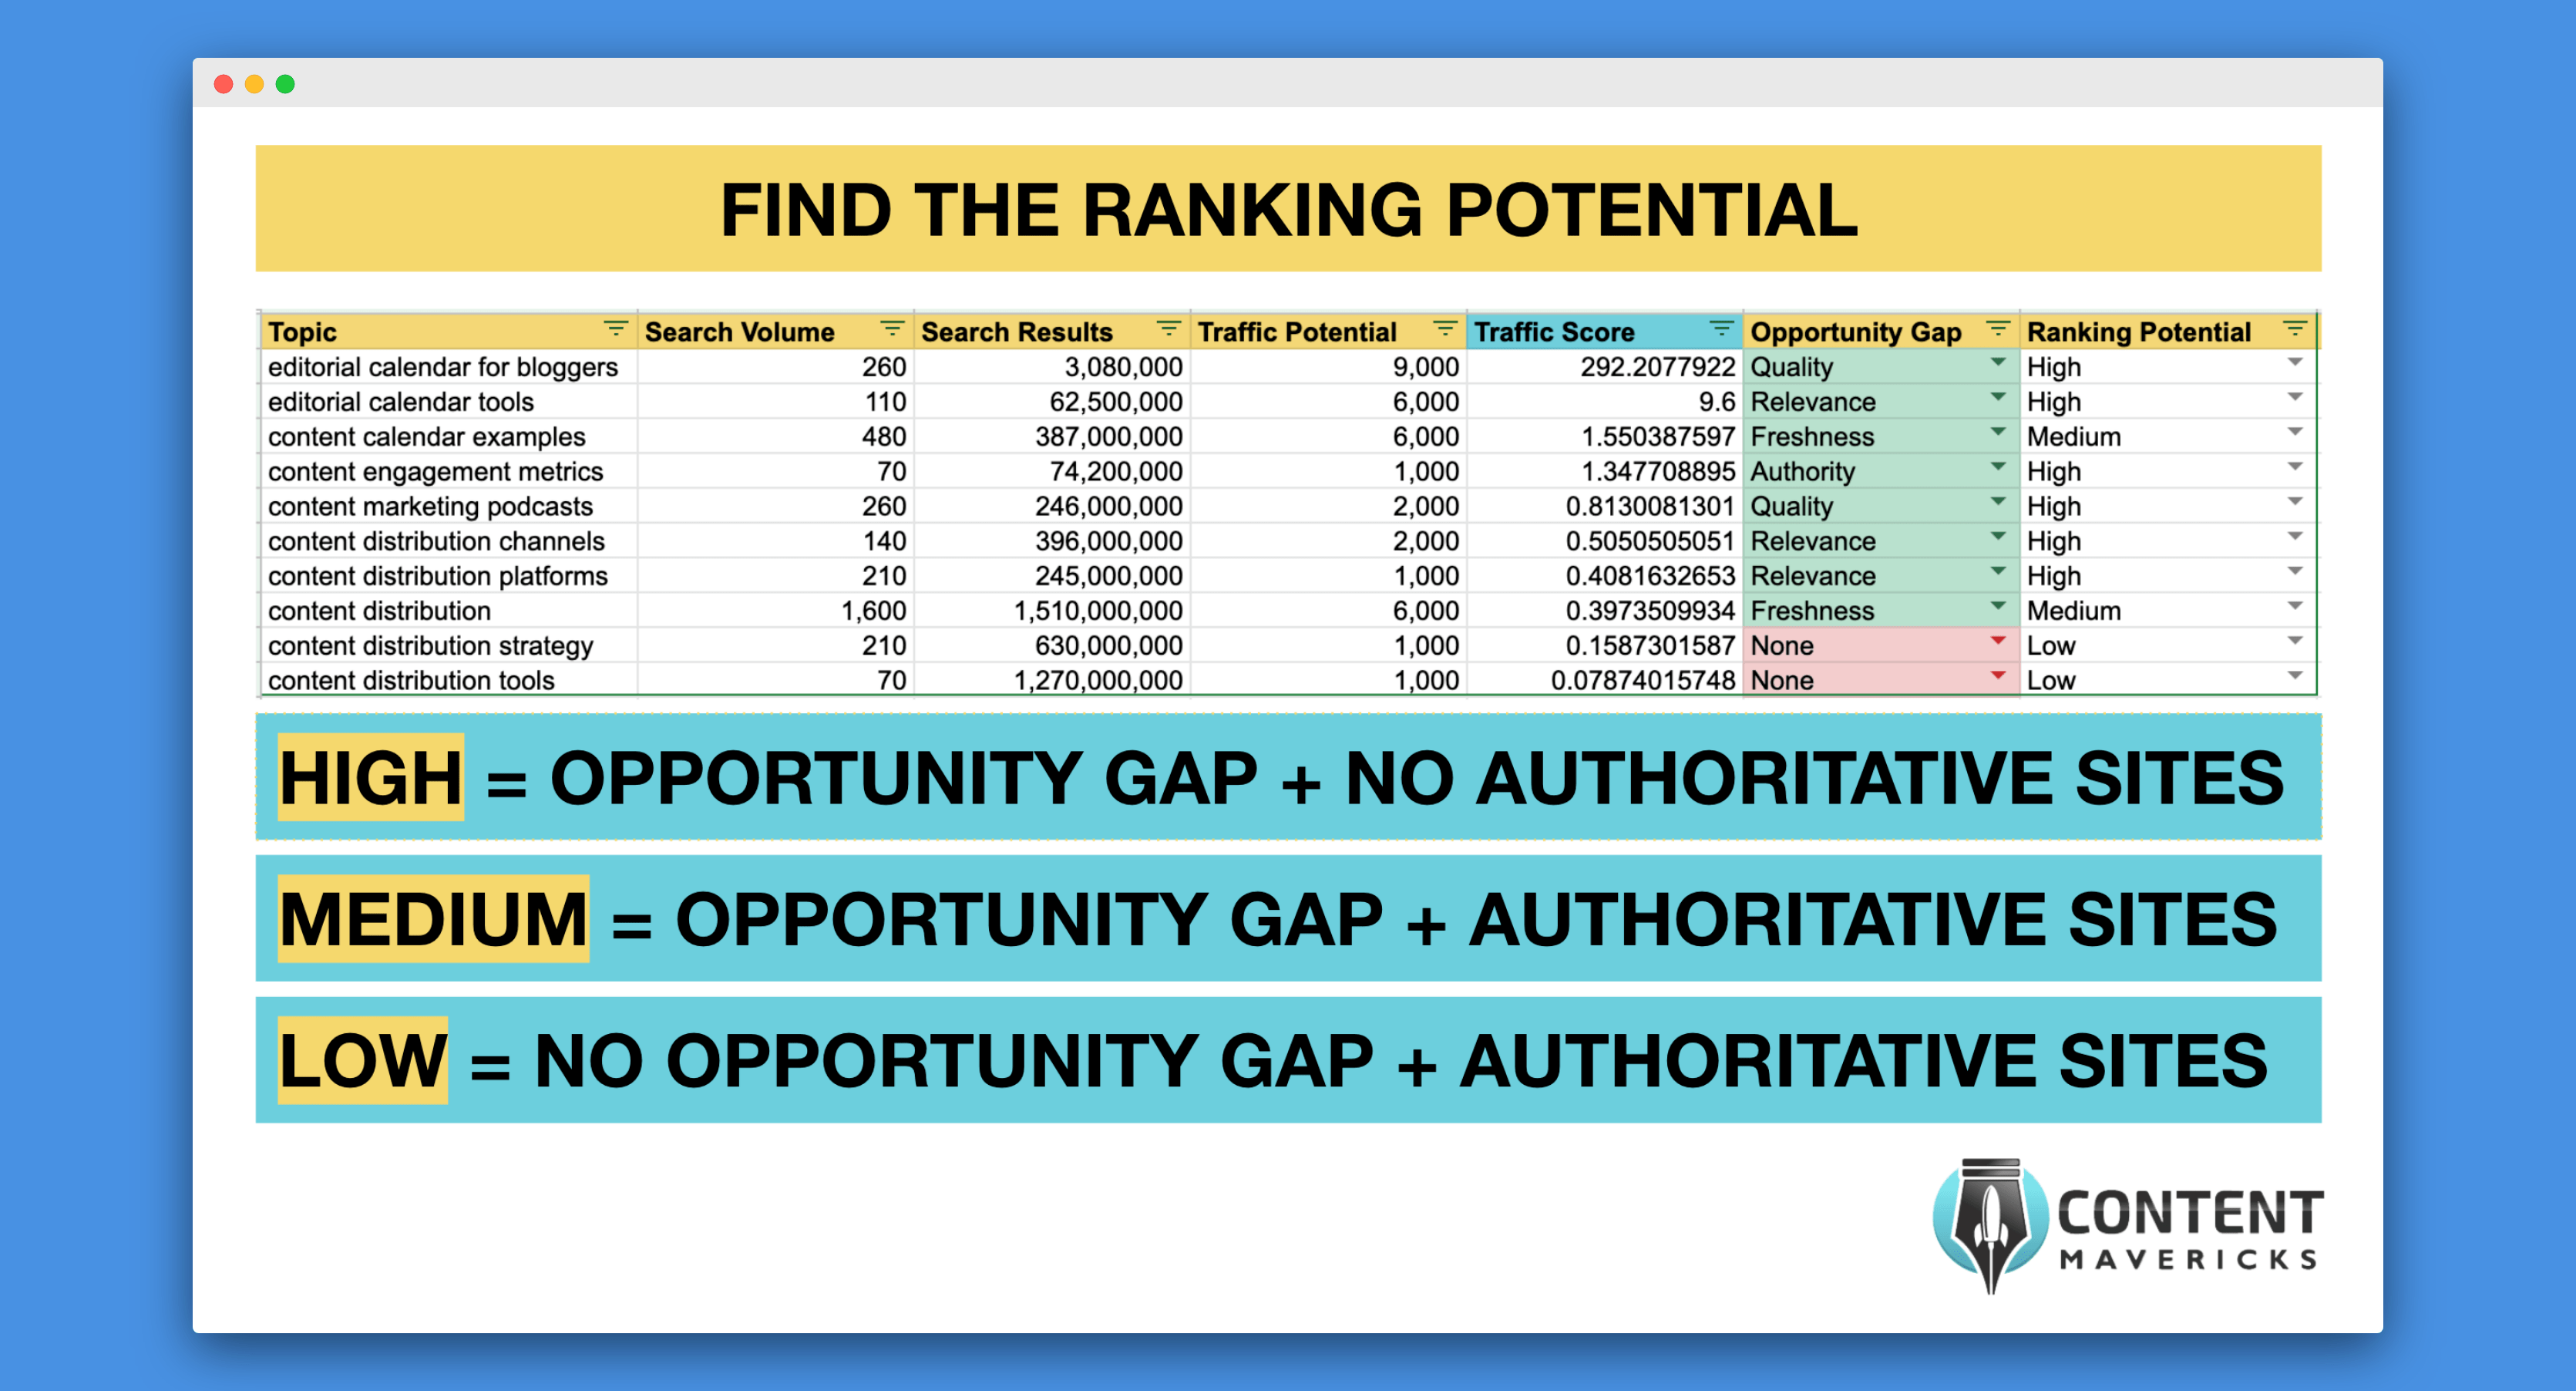
Here’s how to fill out your spreadsheet:
- Give a blog post high ranking potential if you identified an opportunity gap and there are no authoritative sites in the top three Google results.
- Give a blog post medium ranking potential if you identified an opportunity gap, but there are authoritative websites in the top three Google results.
- Give a blog post low ranking potential if you didn’t identify any opportunity gaps and there are authoritative websites in the top three Google results.
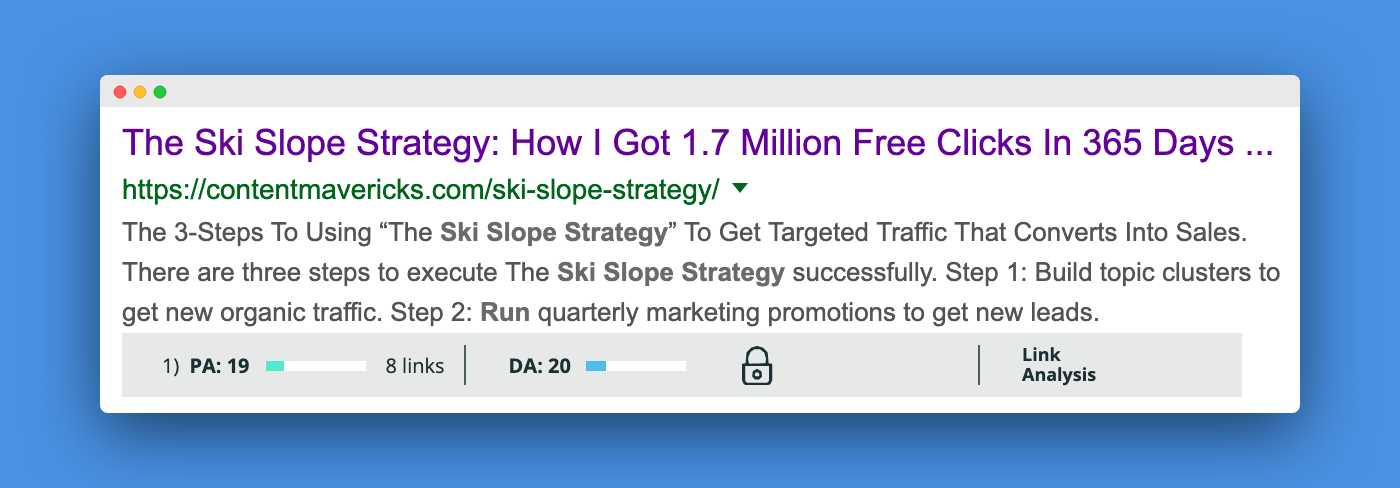
Note: Whether a website is “authoritative” or not is relative compared to your website’s domain authority (DA). If your website has a DA of 40, and the competing website is DA 50, it is more “authoritative” than you.
You can check the DA of a site using the MozBar chrome extension. When turned on it will show you the DA of the site directly beneath the Google search result.
10. Fill Your Editorial Calendar With Your Prioritized Topic List
Now you have a list of blog post topics prioritized by traffic score, and you know how likely you are to rank on Google for every one of them.
It’s time to fill in your editorial calendar.
Fill your editorial calendar from top to bottom, like this:
- First priority: High traffic score + high ranking potential topics.
- Second priority: High traffic score + medium ranking potential topics.
Here’s what mine looks like (based on my step 8 topic research above):

Note On Medium Traffic Potential Topics: For medium ranking potential topics I use my content distribution sttategy to make a concerted promotion effort to get them to rank.
Note On Low Traffic Potential Topics: The only time I write on low traffic potential topics is when they’re part of a bigger pillar page like the Content Mavericks pillar page on content distribution.
There are hundreds of topics you can write about, so only prioritize ones with high or medium ranking potential if you have a goal to increase your organic traffic.
11. Decide On Your Blog Publishing Schedule
Once you’ve got all your content in your calendar, you’ll want to:
- Allocate who the writer will be.
- Decide on the publish date.

In the above example I have a bi-weekly publishing schedule.
Blogging is not a volume game.
In my experience a great piece of content will take ~20 hours to write (if the writer already has past experience in the topic). If they don’t have past experience it will often take them even longer to research and write something truly great.
For example, this blog post on content marketing podcasts took 50+ hours to write because it involved listening to hundreds of podcast episodes to find the best on the internet.

Whereas this post on my content strategy took ~20 hours because it was based on my past experience, and I made custom images to make it is easy to follow along.
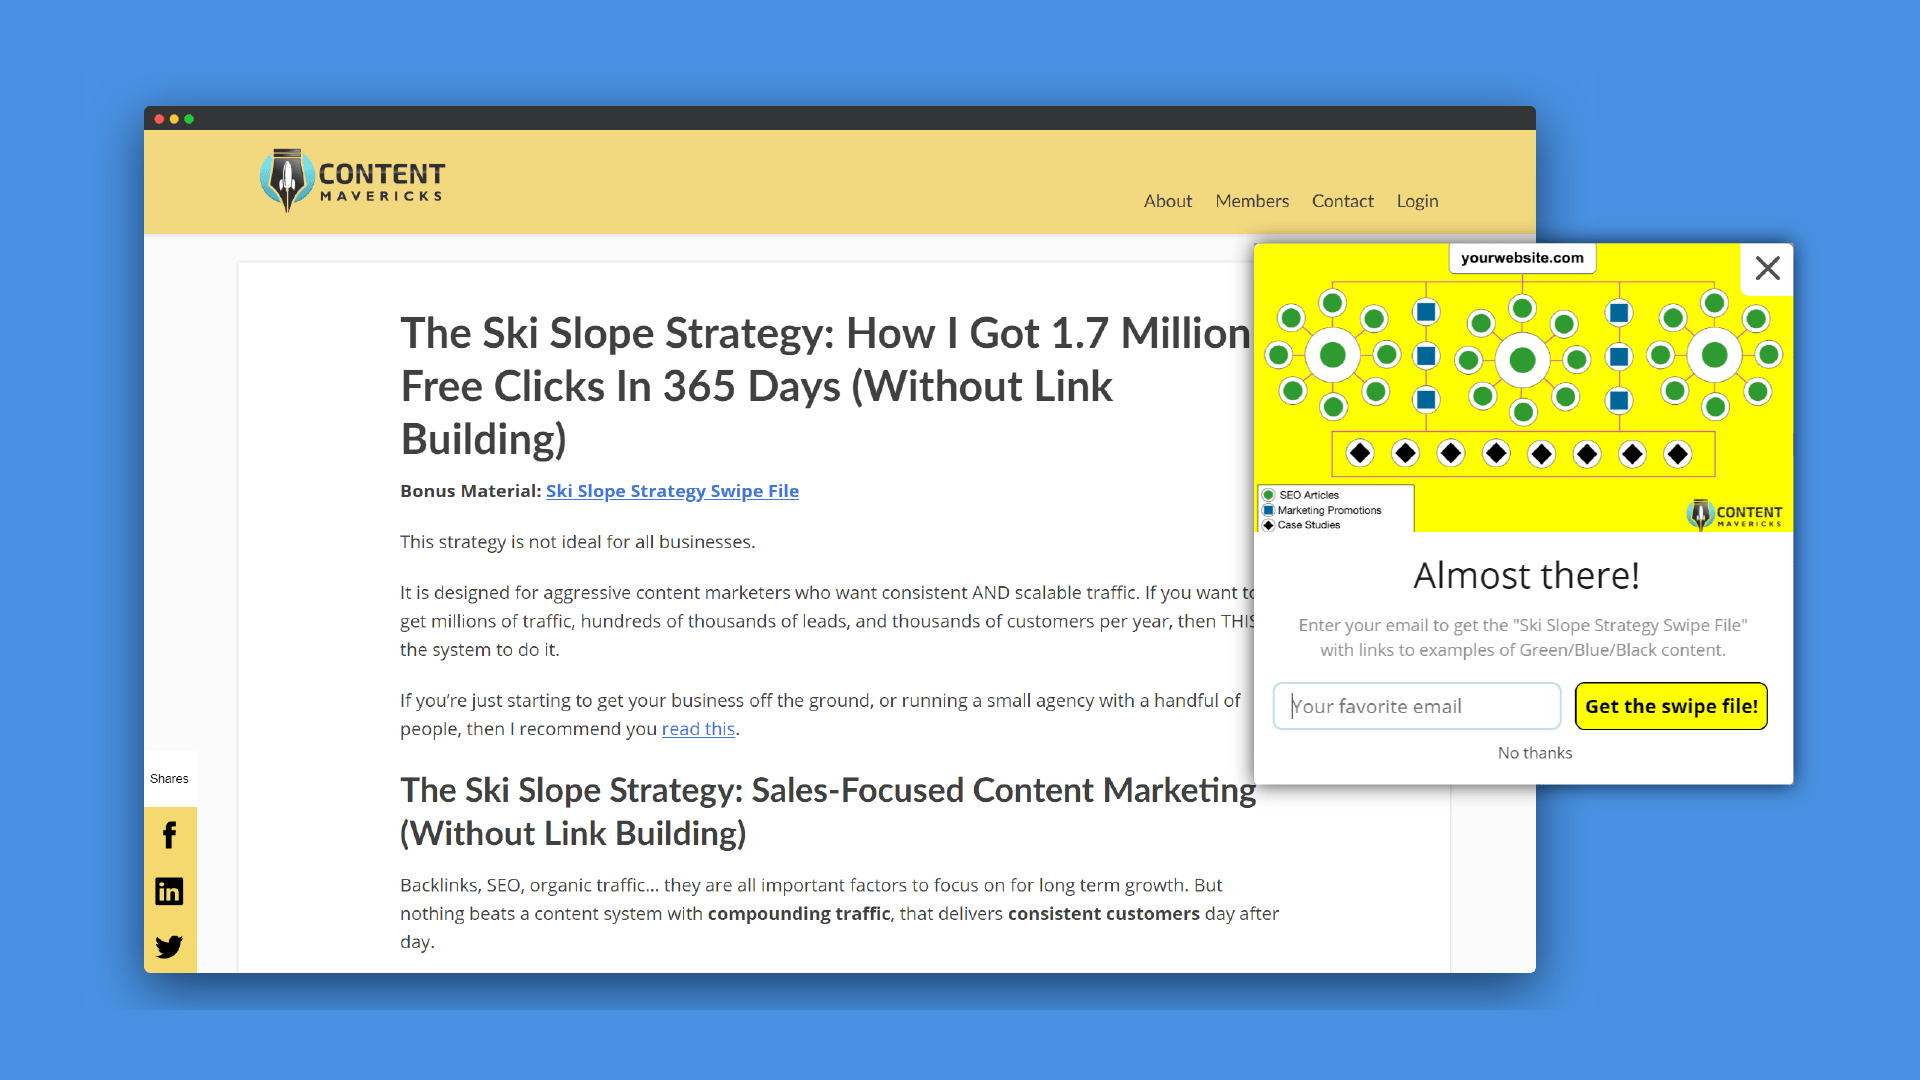
As a general rule of thumb I give writers at least one week to write one blog post.
And I like to have at least one month of content pipeline (ideally three months) so it doesn’t feel like I’m on a content treadmill trying to get blog posts ready to push out week-to-week, like my buddy Freddie.
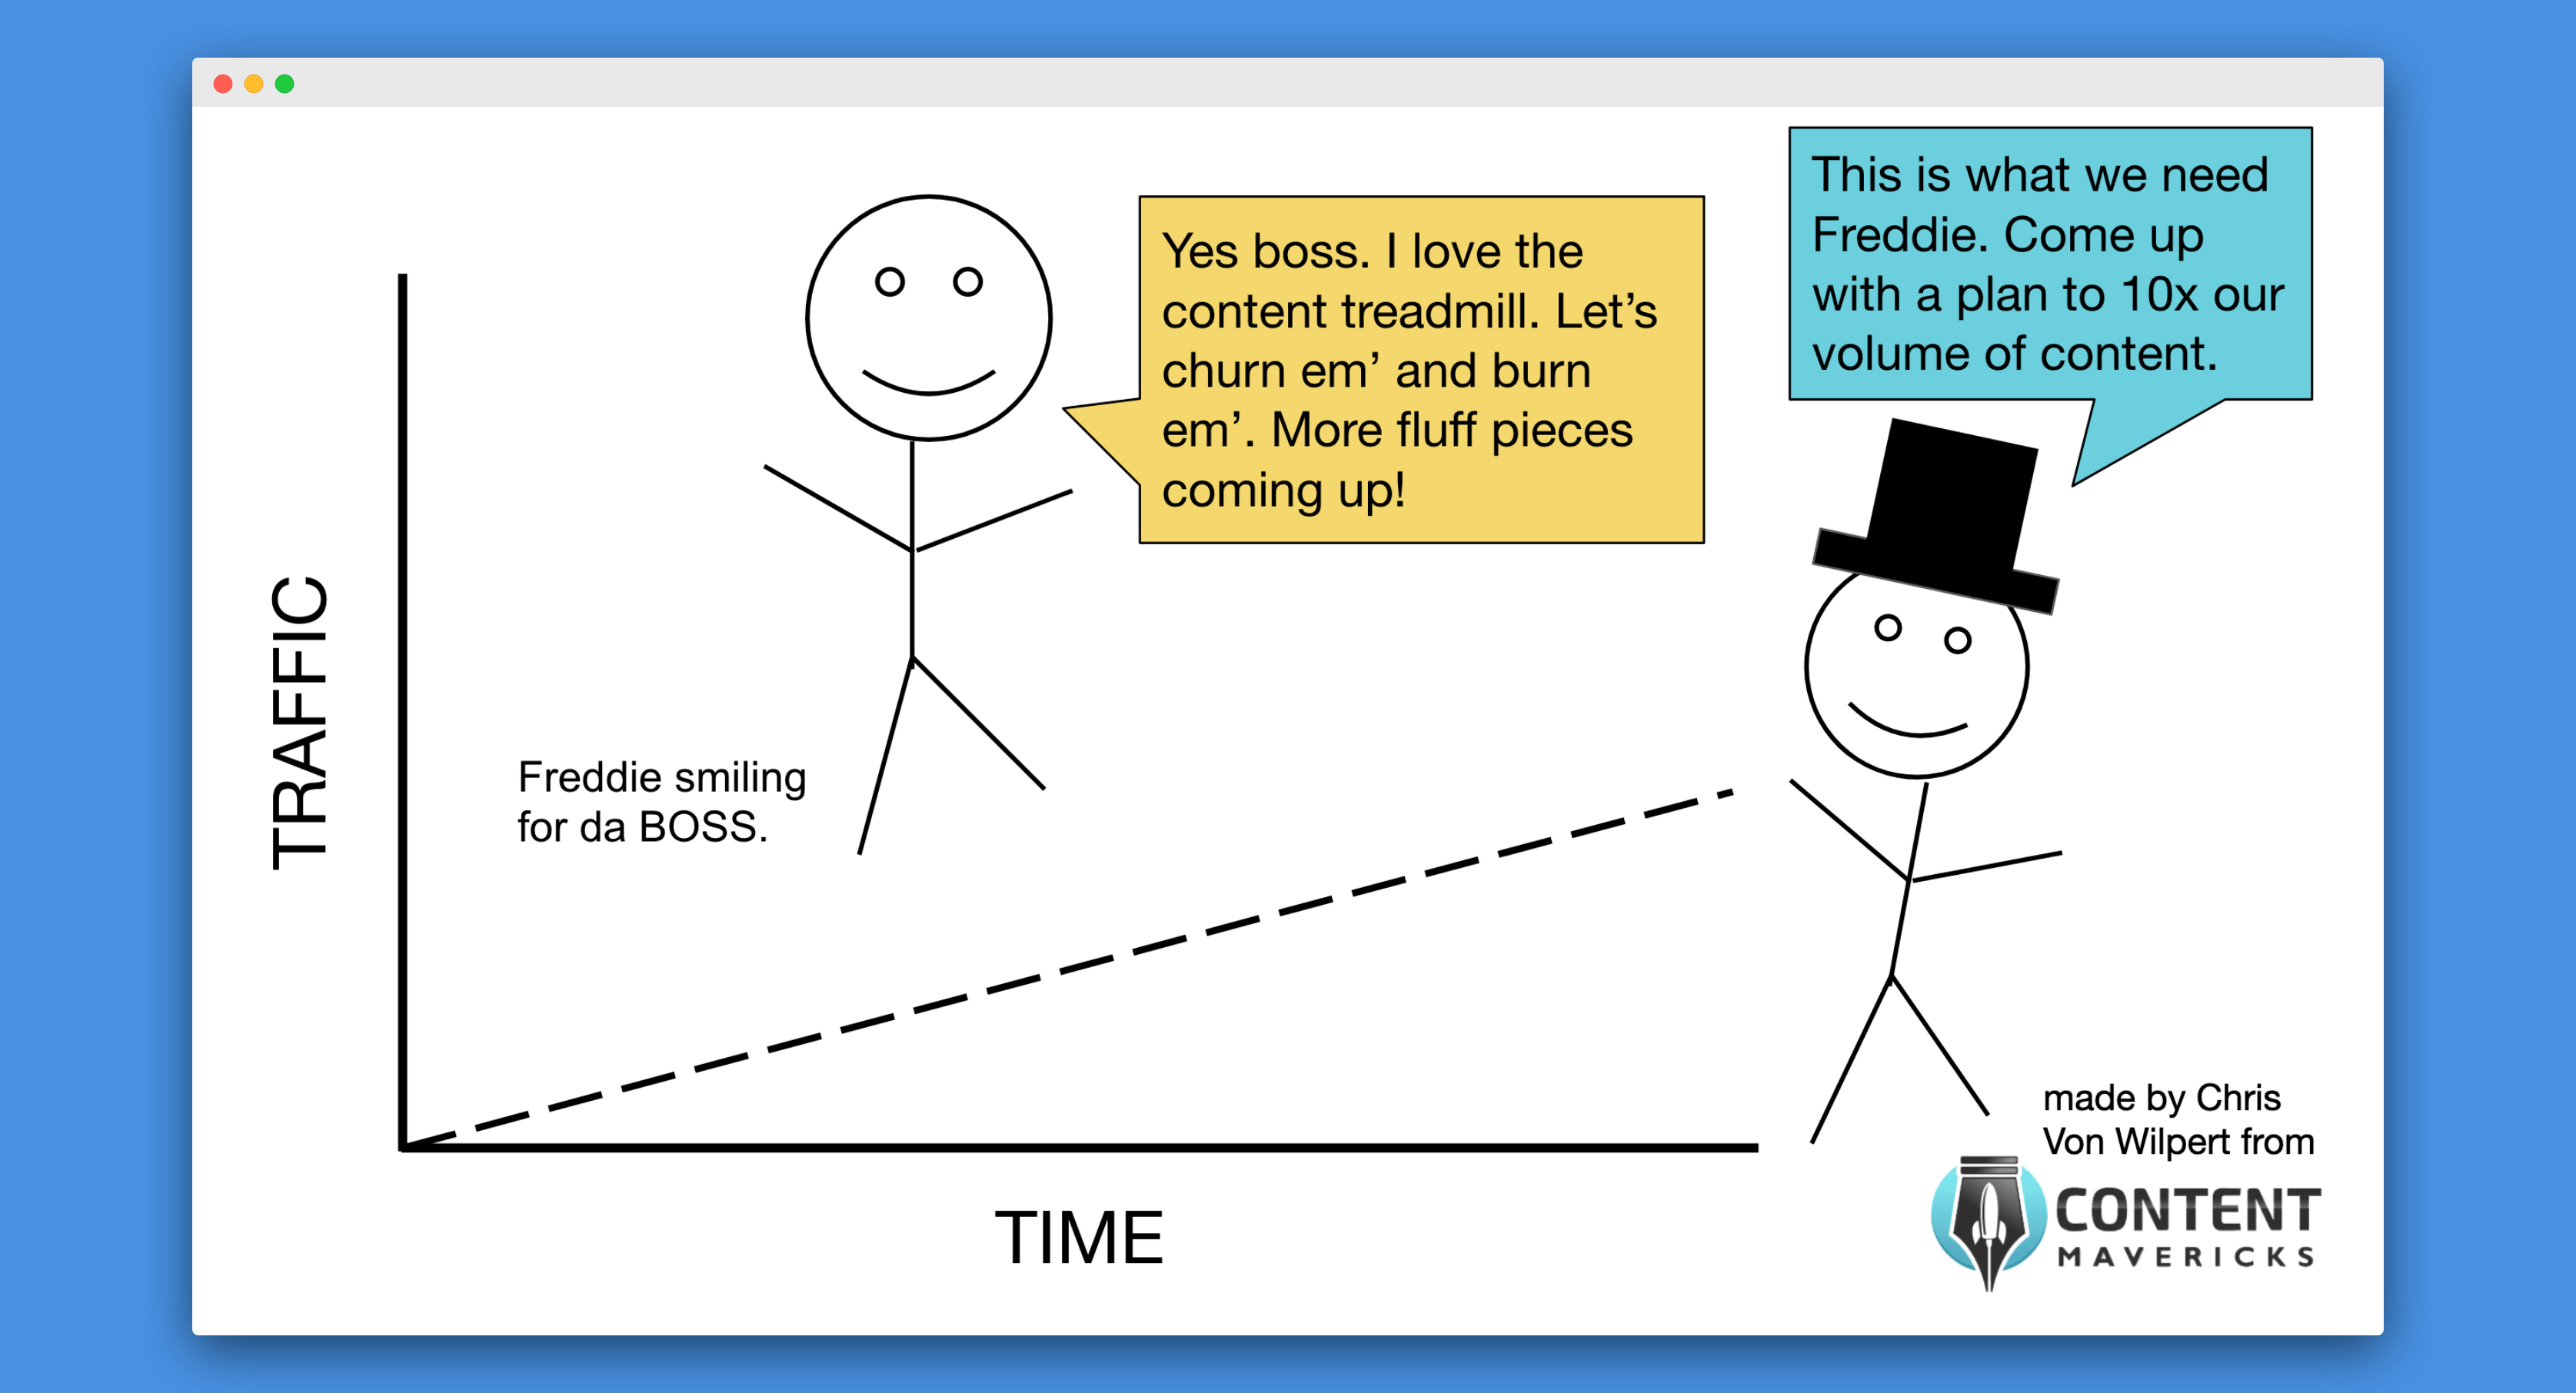
To avoid the situation above, I recommend setting a publishing schedule based on the resources you have:
- 1 writer: publish quarterly or monthly
- 2 writers: publish monthly or bi-weekly
- 3 writers: publish bi-weekly or weekly
Remember, you need to leave as much time for promotion of your content as you do for writing it. So take into account content promotion time in your schedule. And give yourself two weeks editing time between the first draft date and live date.
If you can’t get traffic to your content, all your research and writing time will be wasted because Google won’t get any data to determine if your blog post is worth ranking.
My Editorial Calendar Template To Plan One Year Of Content In One Day
Following my step-by-step instructions in this post you can plan one year of content in one day.
The best part?
Your calendar will be filled with blog post topics that drive long term, consistent traffic to your blog.
The only thing missing: my editorial calendar template.
If you’d like to get a free copy of the same editorial calendar template I use to grow blogs, click the button below.
Inside you’ll get my spreadsheet with:
- The editorial calendar template I use on Sheet 1.

2.The blog post ideas master spreadsheet I use on Sheet 2.


