Bonus Material: Free Fill-In-The-Blank Content Template (Valued at $250)
Today I’m going to show you the website content template I use to create content and rank #1 (almost every time).
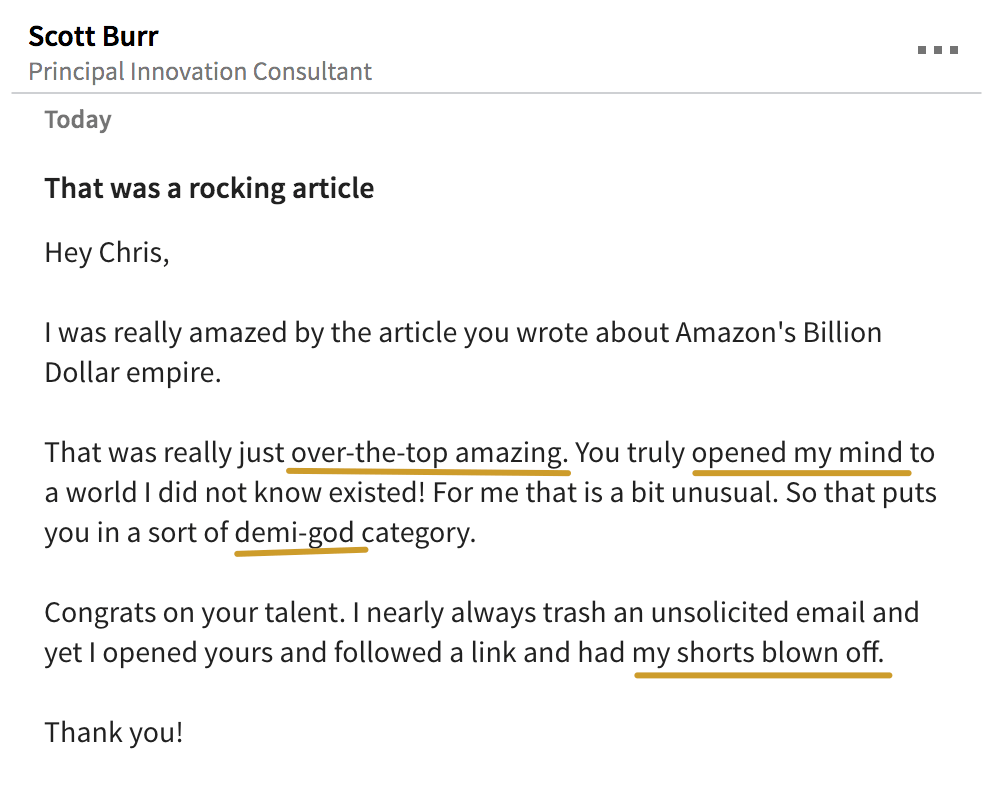
Once you start using it, it’s not uncommon for (high-up) people to share and go crazy for your content, like Taylor Swift fan boys:
Grab a free copy of the template below to use for yourself.
Or give it to your content writers so they have a proven system to follow for every piece of content they write for your business.
Then follow my instructions below to write your content.
The Topic
In my post on content optimization I went over a step-by-step method to find a proven content topic (with buying intent) you can write about.
So I’m not going to go over that again here.
At the top of your template simply write the topic you found.

Simple.
The URL Slug
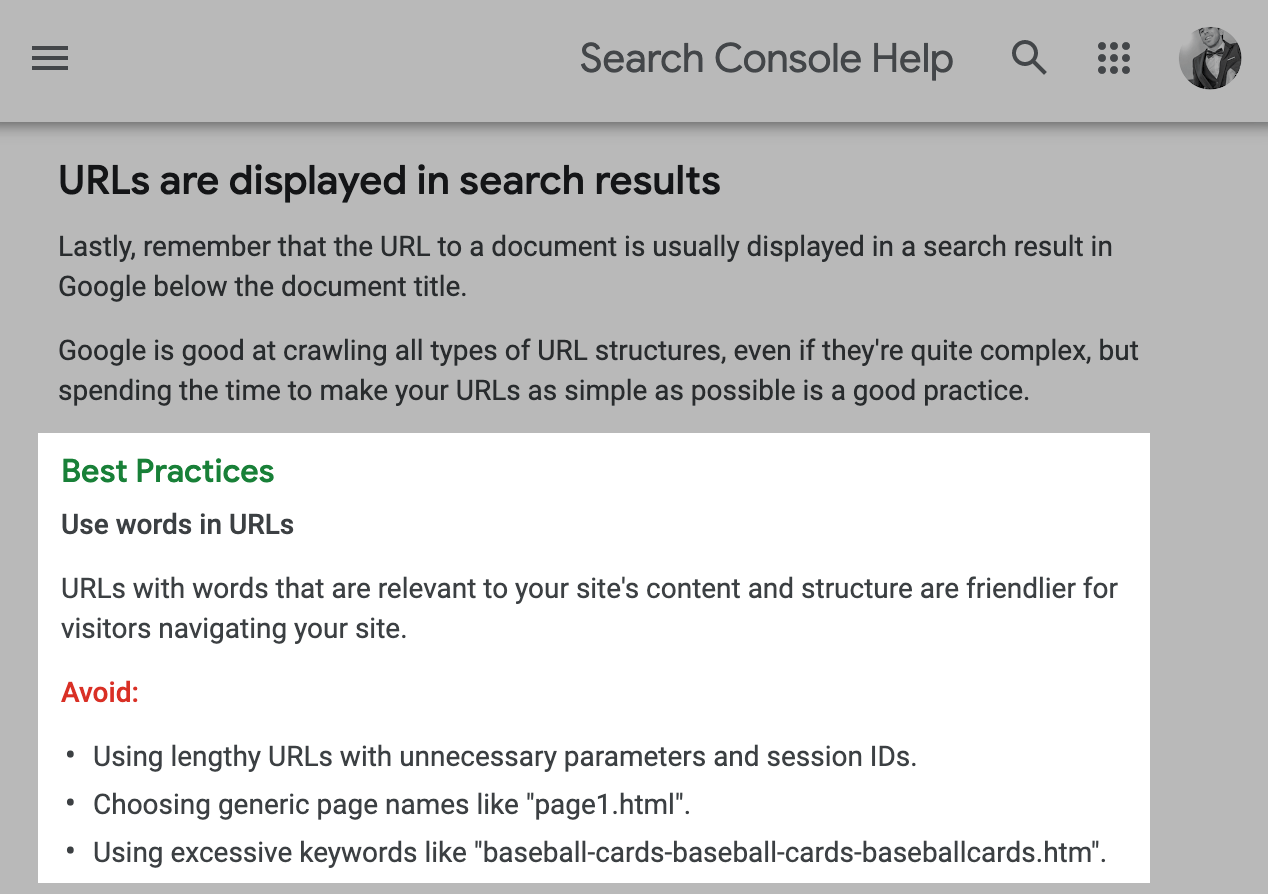
Google officially recommend using short, topically relevant words in your URLs:
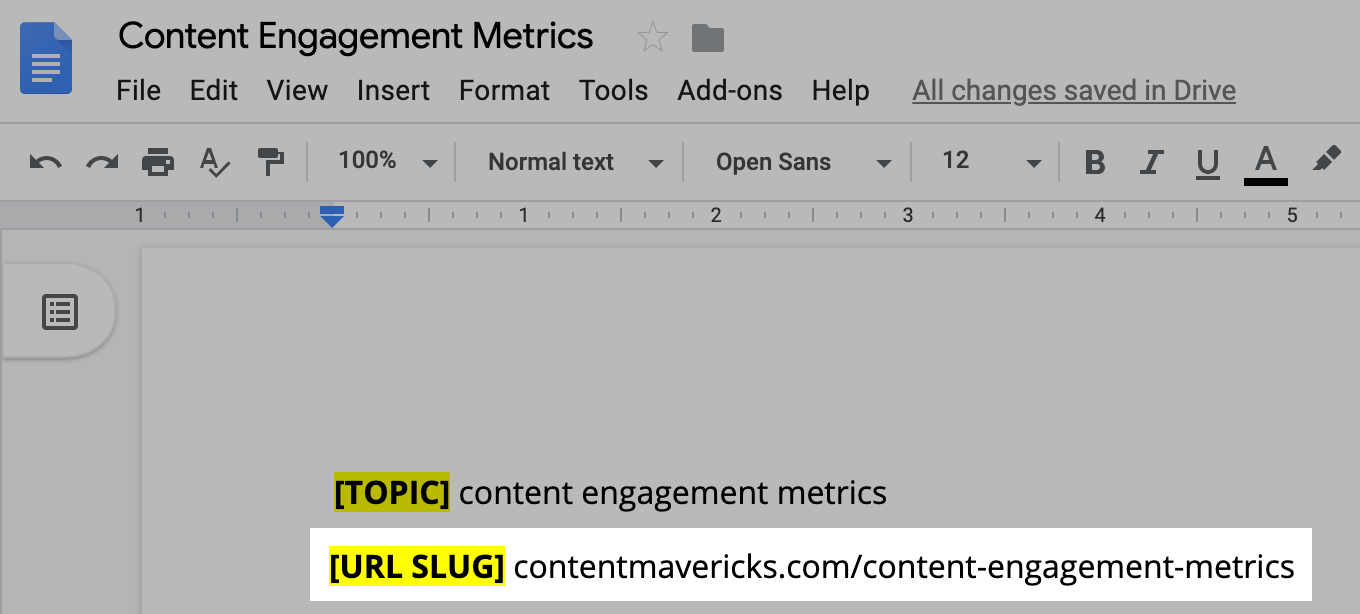
So in your template use the exact same URL as the topic you found.
(with hyphens to separate words.)
Not that hard, is it?
The Outline
This is THE most important part of the template (and writing content in general).
It’s how I go from blank page to viral masterpiece ranking at the top of Google.
How exactly?
I answer these two questions before writing any post:
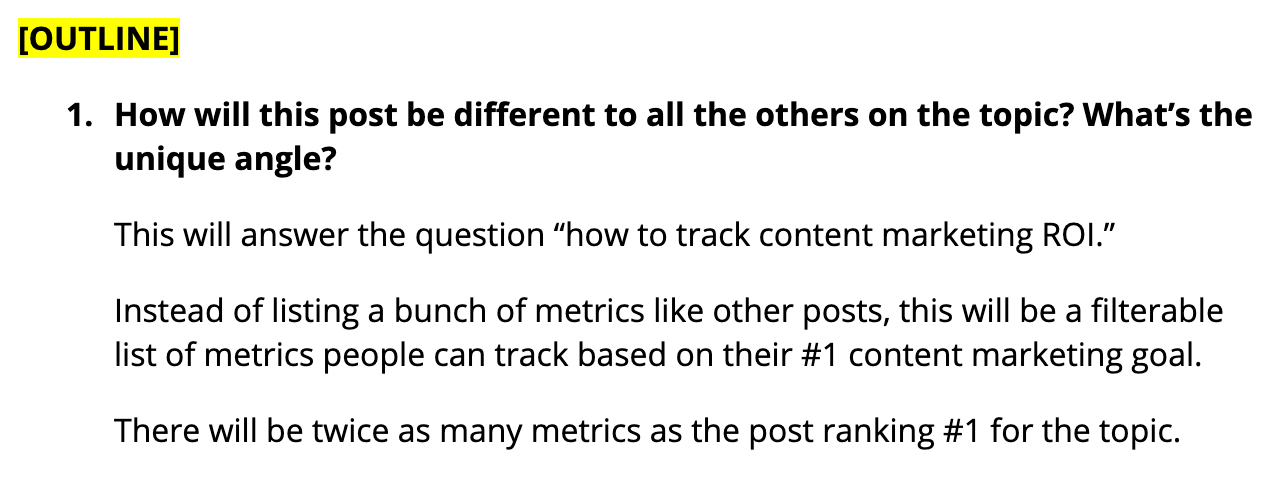
1. How will this post be different to all the others on the topic? What’s the unique angle?
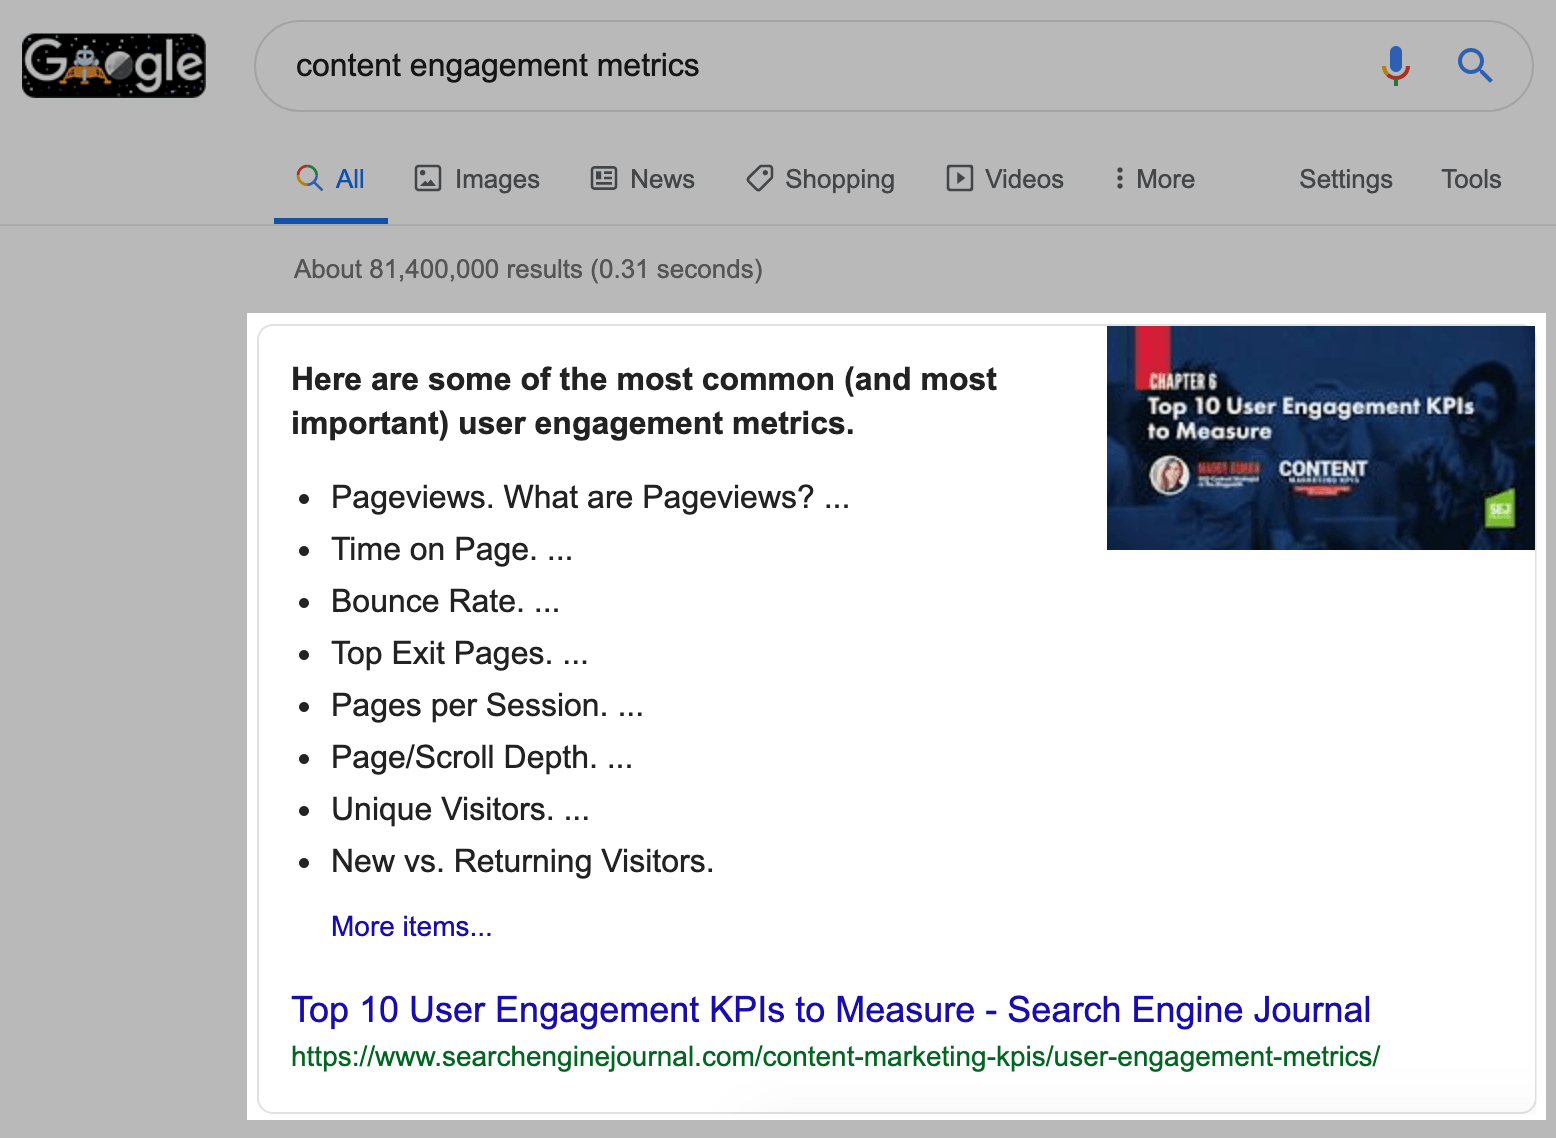
For example, when I wrote my post on content engagement metrics I saw top posts on the first page of Google talking about a list of metrics to track.
To be unique (and still match search intent) I came up with this angle:
To come up with your own unique angle, you need to study what else has been written on your topic.
Personally I like to study the first page of Google (if my goal is to get organic traffic):
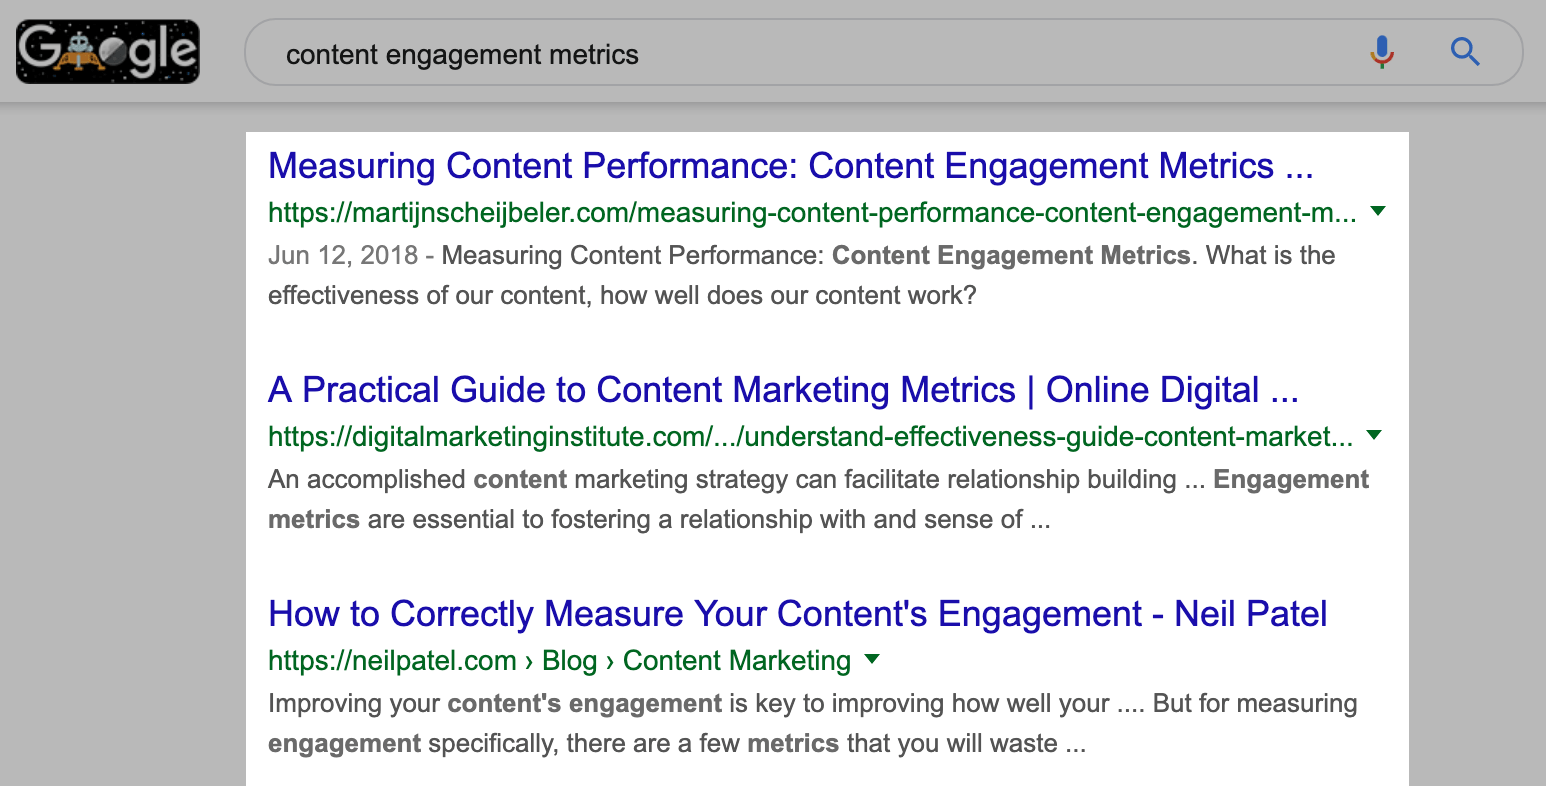
Google ranks content for a reason:
It’s what they determine to be “the best” result for that search query.
Whether you think so or not, it’s wise to take notice.
And make sure your content matches the search intent.
If you find users looking for:
- A list of items (give them a list of items with your own unique take).
- A complete guide (give them a complete guide with your own unique take).
- A template (give them a template with your own unique take).
You get the idea 🙂
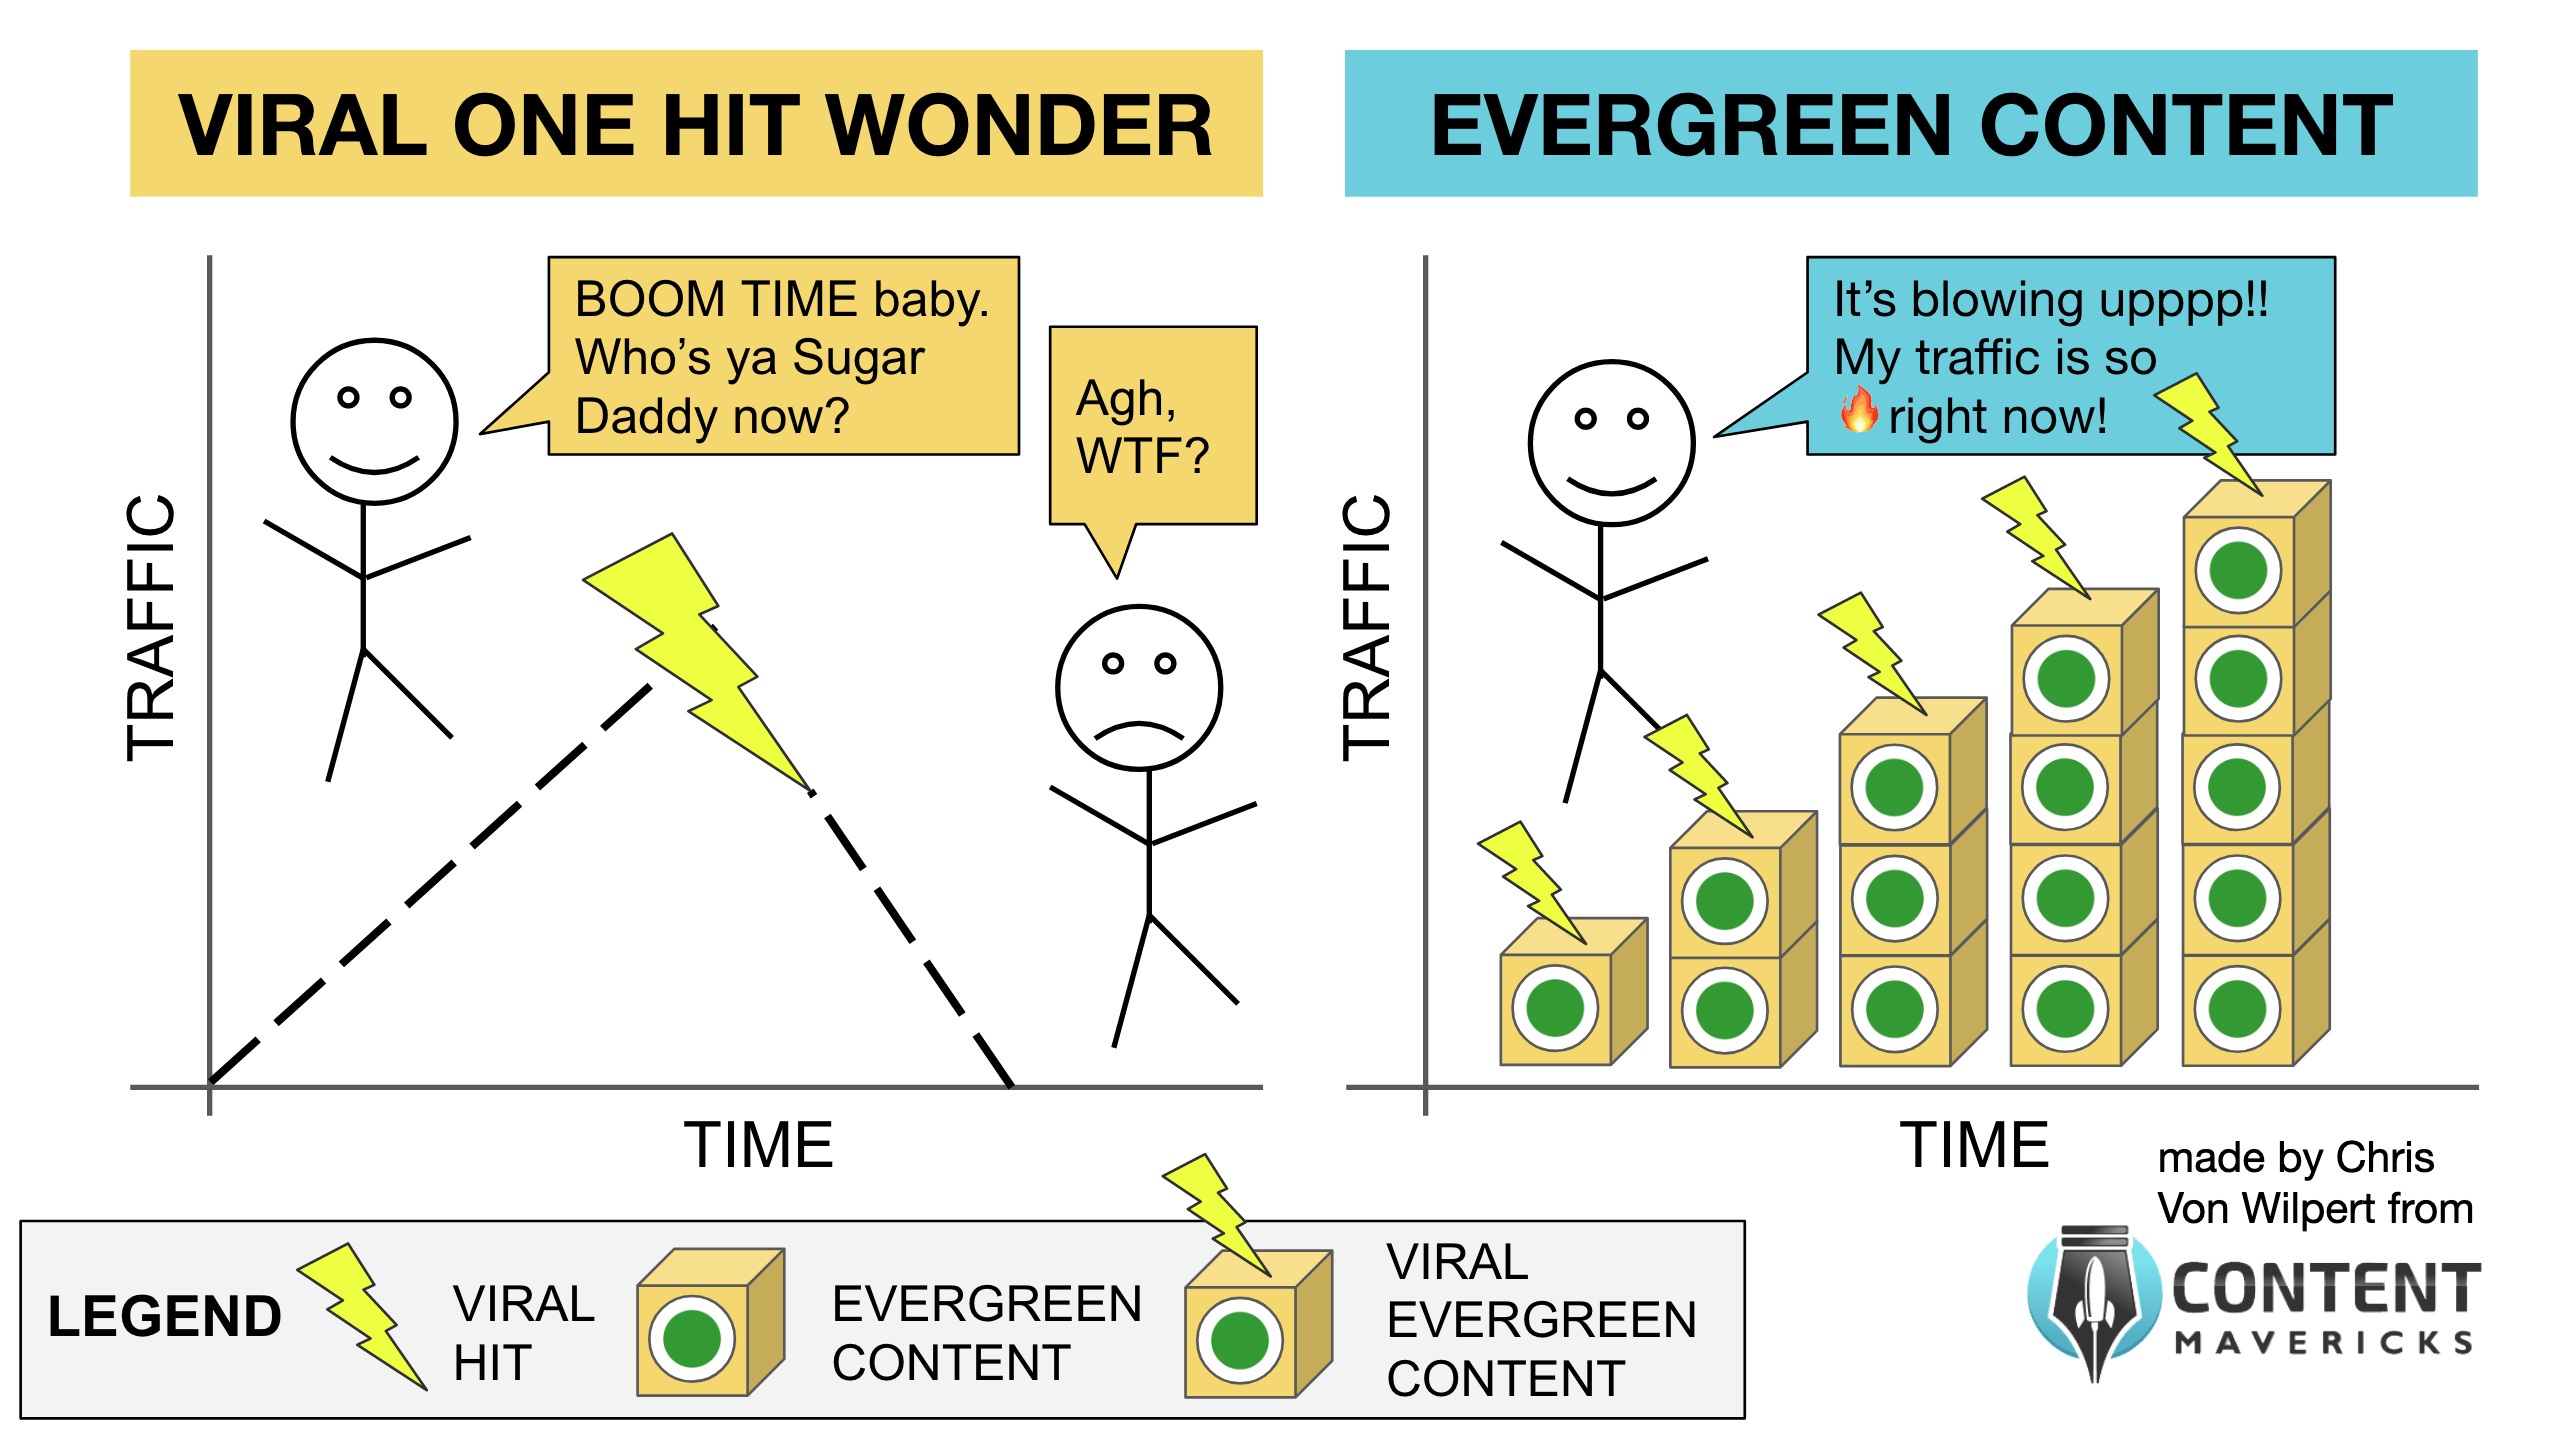
If your goal is to go viral, you should study the most shared content on BuzzSumo.
Look for content on your topic with the most social engagement, and the highest Evergreen Score.
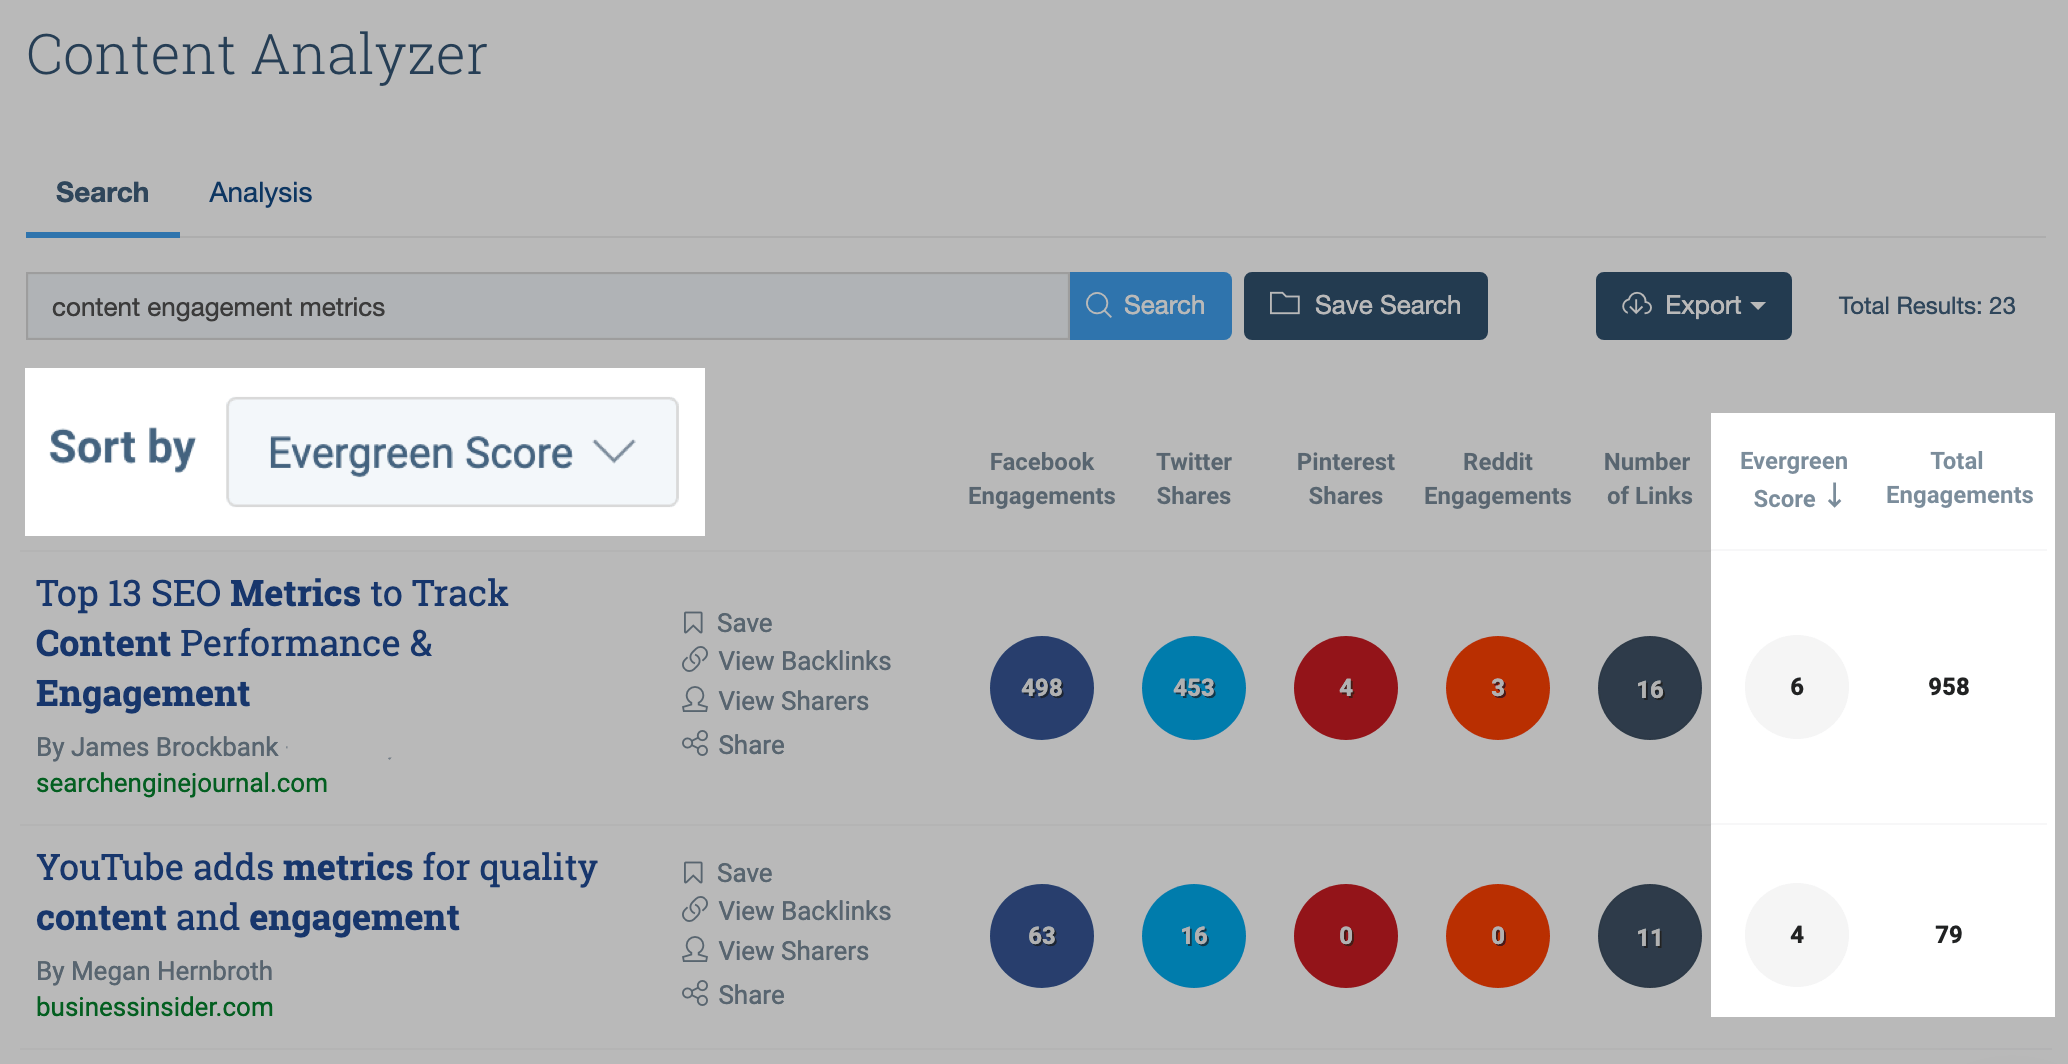
The BuzzSumo Evergreen Score measures the number of social engagements and backlinks an article receives 30 days after the article is published.
The more engagements an article receives after the initial 30-day period, the higher the score.
By studying content that’s proven to get shares and backlinks more than one month after it’s been published...
You can come up with a unique angle that’s likely to get shared in your market AND maintain its relevance and rankings over time.
Cool, right?
After that, you can move onto question two:
2. What are all the main sections in the post you’ll be writing about?
This is where you’ll spend most of your time.
The main sections in your post will be a combination of:
- Your personal experience.
- Research.
Here’s what my outline looks like for my content engagement metrics post:
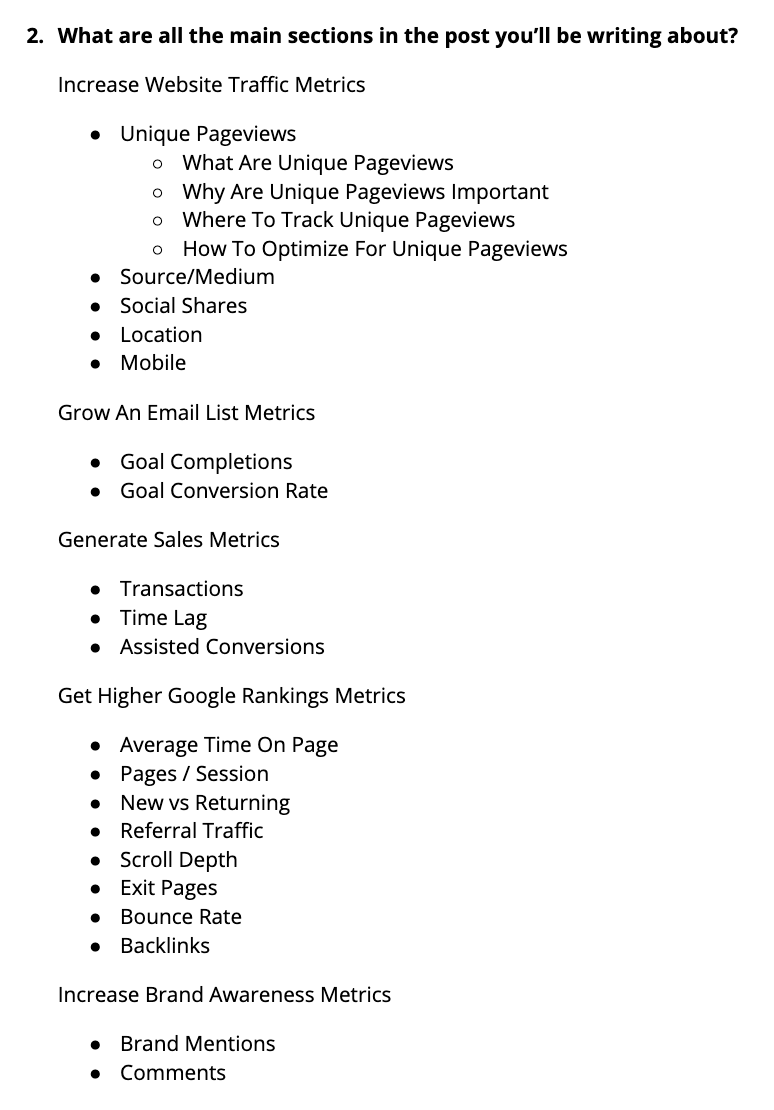
Note: I DIDN’T jot those down in 10 minutes, then start writing.
First, I drew from my personal content marketing experience.
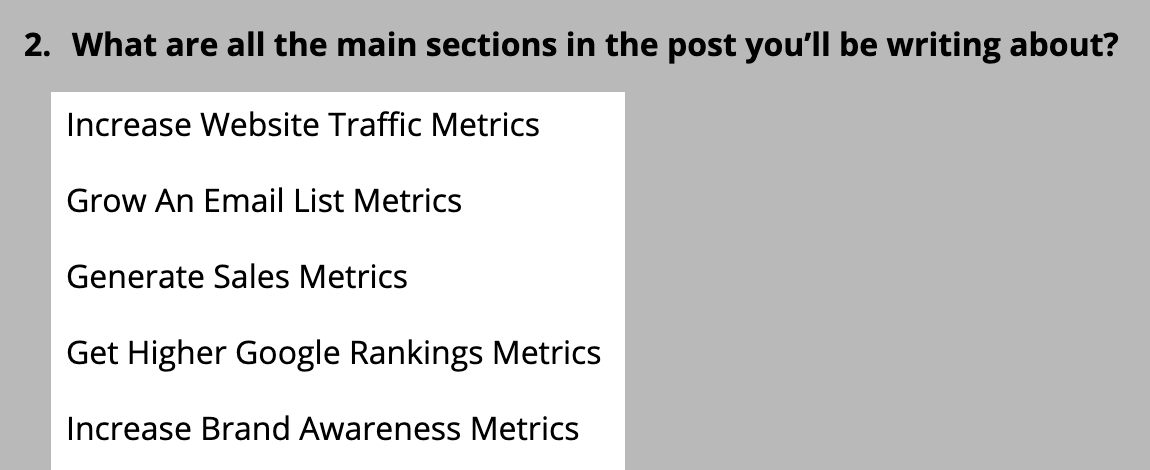
I knew the most common goals people have when doing content marketing could be summarized down into five main categories:
- Increase website traffic
- Grow an email list
- Generate sales
- Get higher Google rankings
- Increase brand awareness
So that’s where my outline started:
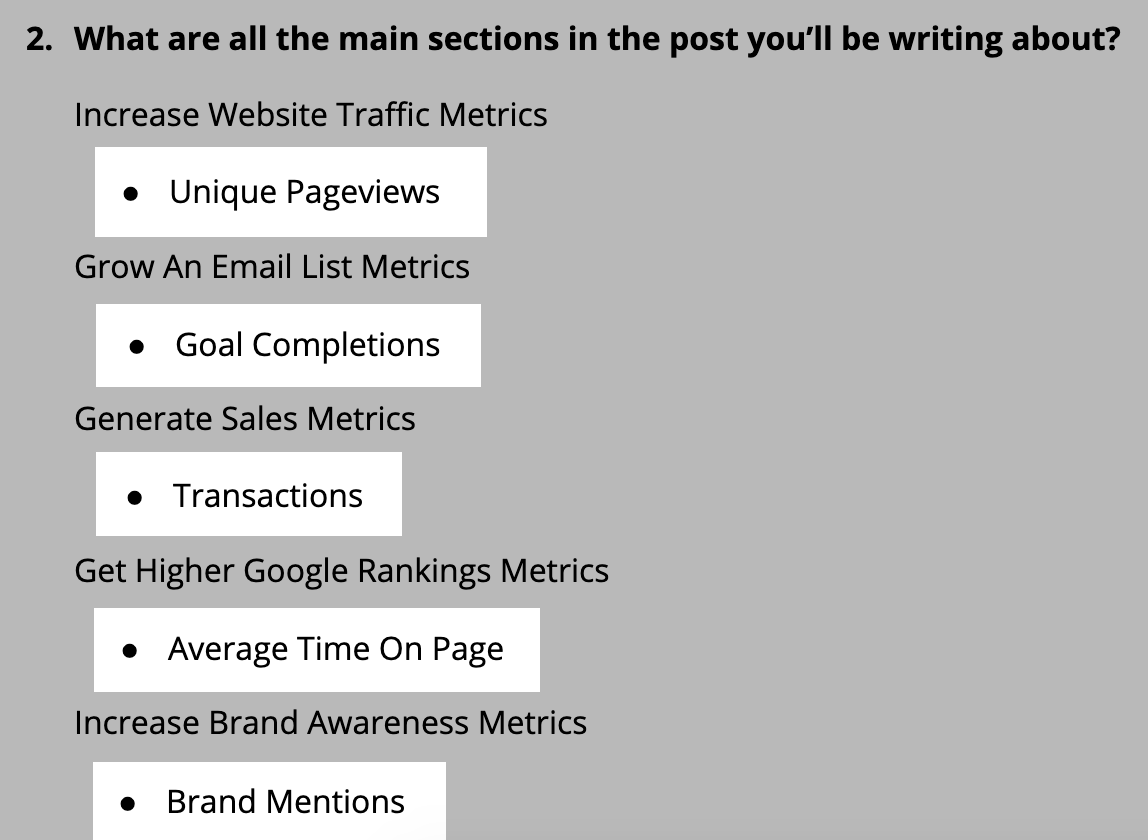
Then I added the core metrics I know to track for each:
Then I started researching top content on my topic to see what metrics other experts recommend to track:
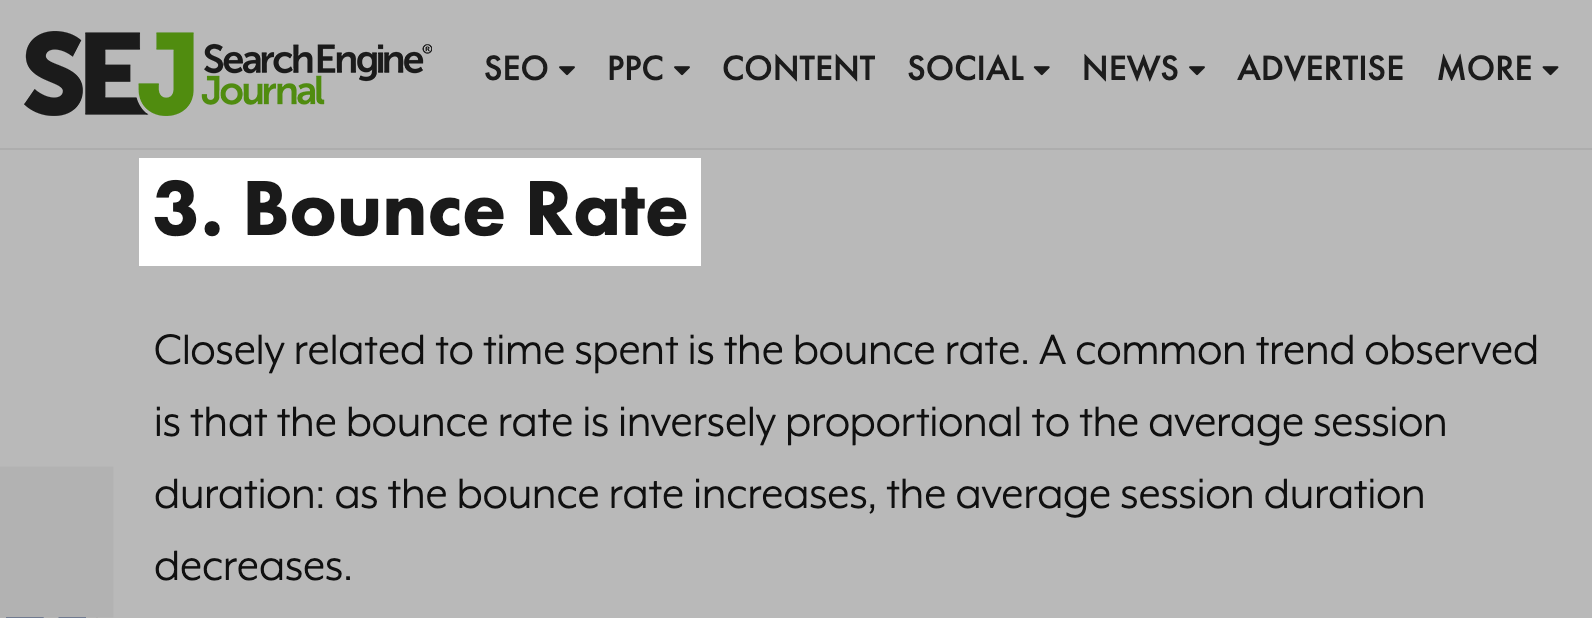
Through this research I was able to start building a list of every metric a content marketer can track, sorted by their #1 content marketing goal:
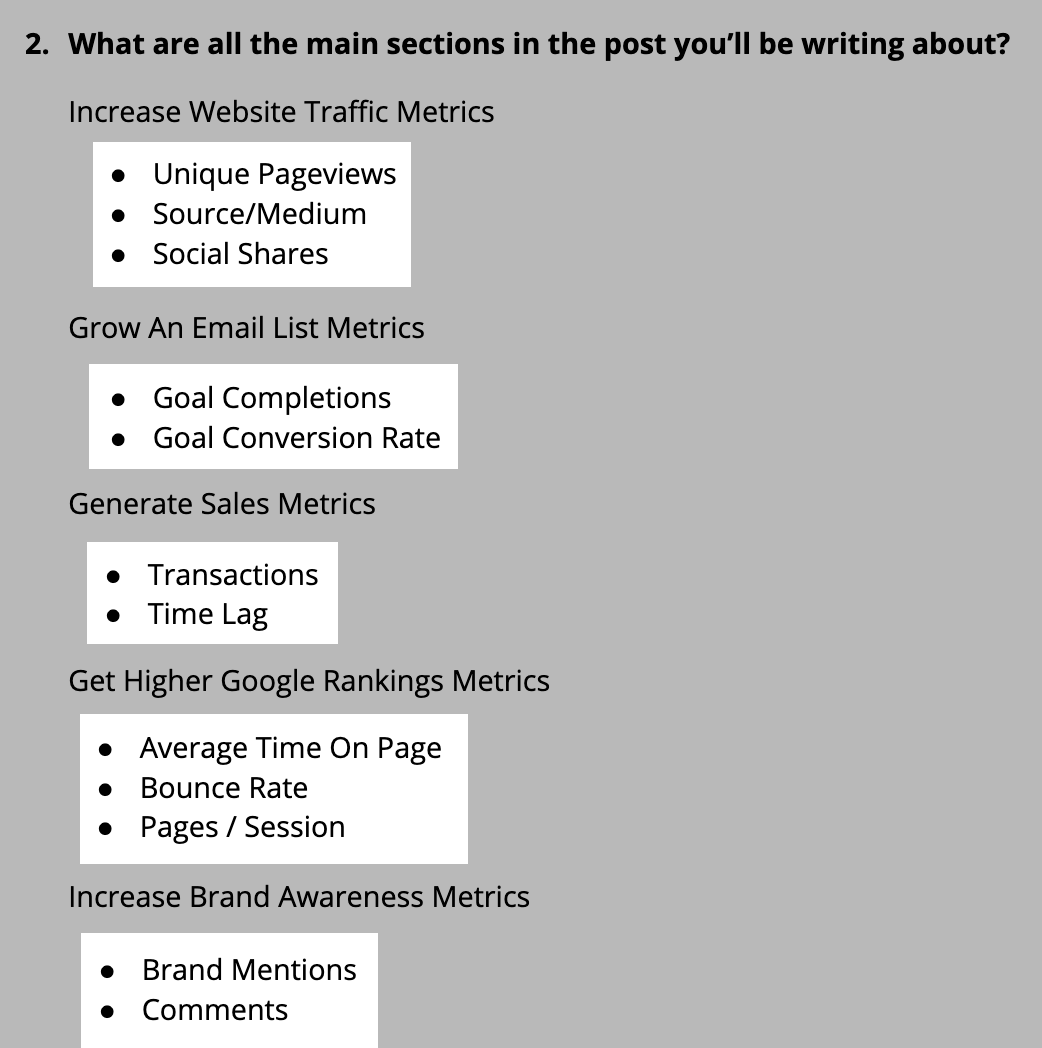
There was only one thing missing:
A list of metrics on it’s own isn’t actionable.
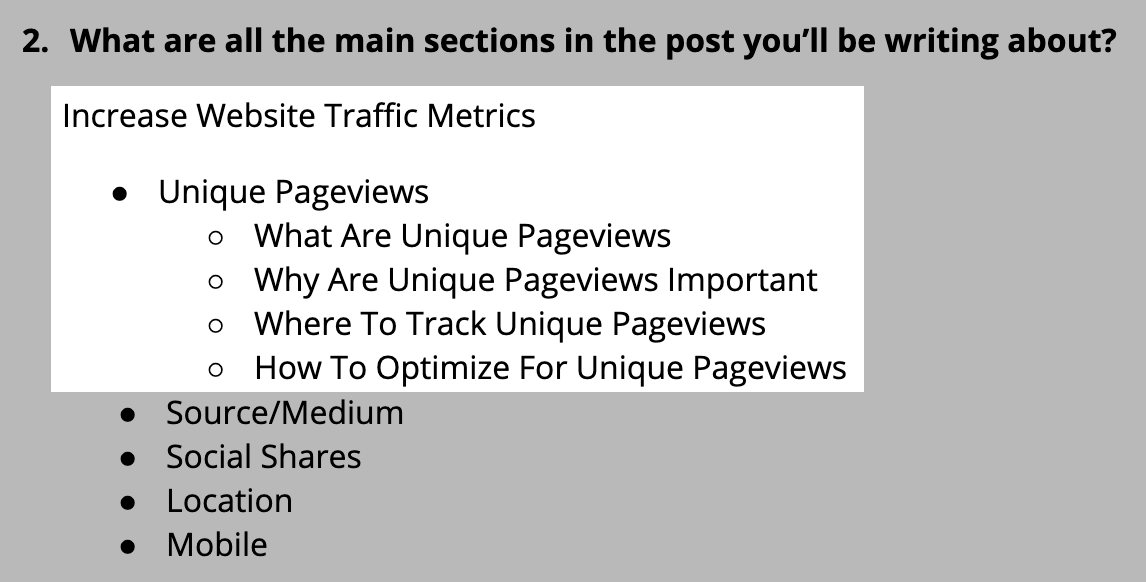
So I added four sections (for each metric) to my outline that would make my blog post the most actionable:
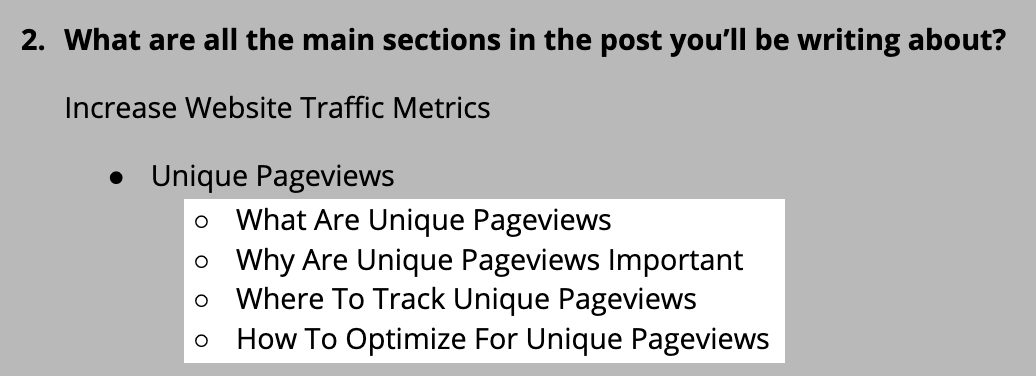
- WHAT: A short definition of what the metric is.
- WHY: Why it’s important to track this metric.
- WHERE: A screenshot of where to track the metric.
- HOW: Step-by-step guidance on how to optimize for the metric.
Once you have a unique, actionable outline like this:
You can start to fill-in-the-blanks.
But first:
You need to write your headline.
The Headline
Whether you like it or not:
Most people on Google and social media will judge whether to read your content or not, based on your headline.
(unless they’re a true fan of yours, and want to consume everything you put out).
That’s why I write AT LEAST five headlines for every post.
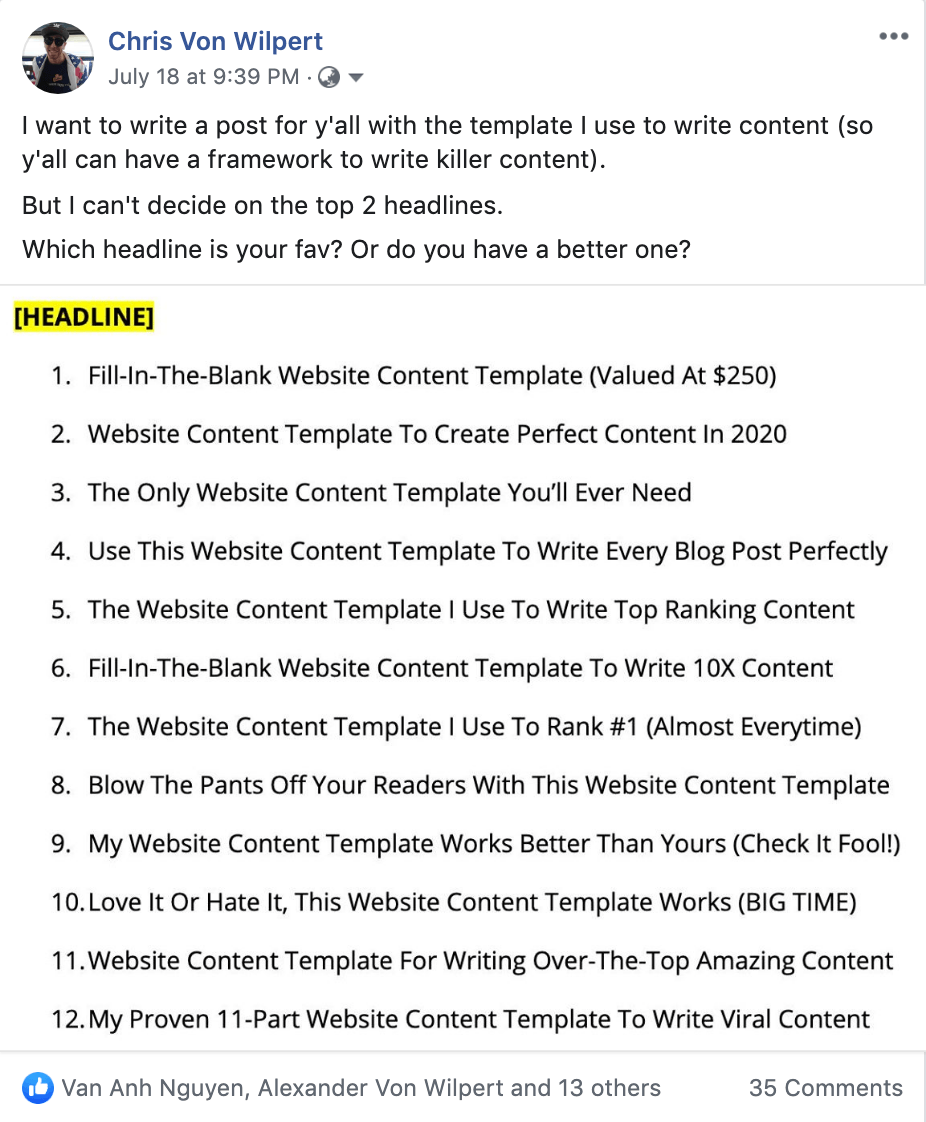
Here are the 12 I wrote for this post you’re reading now:
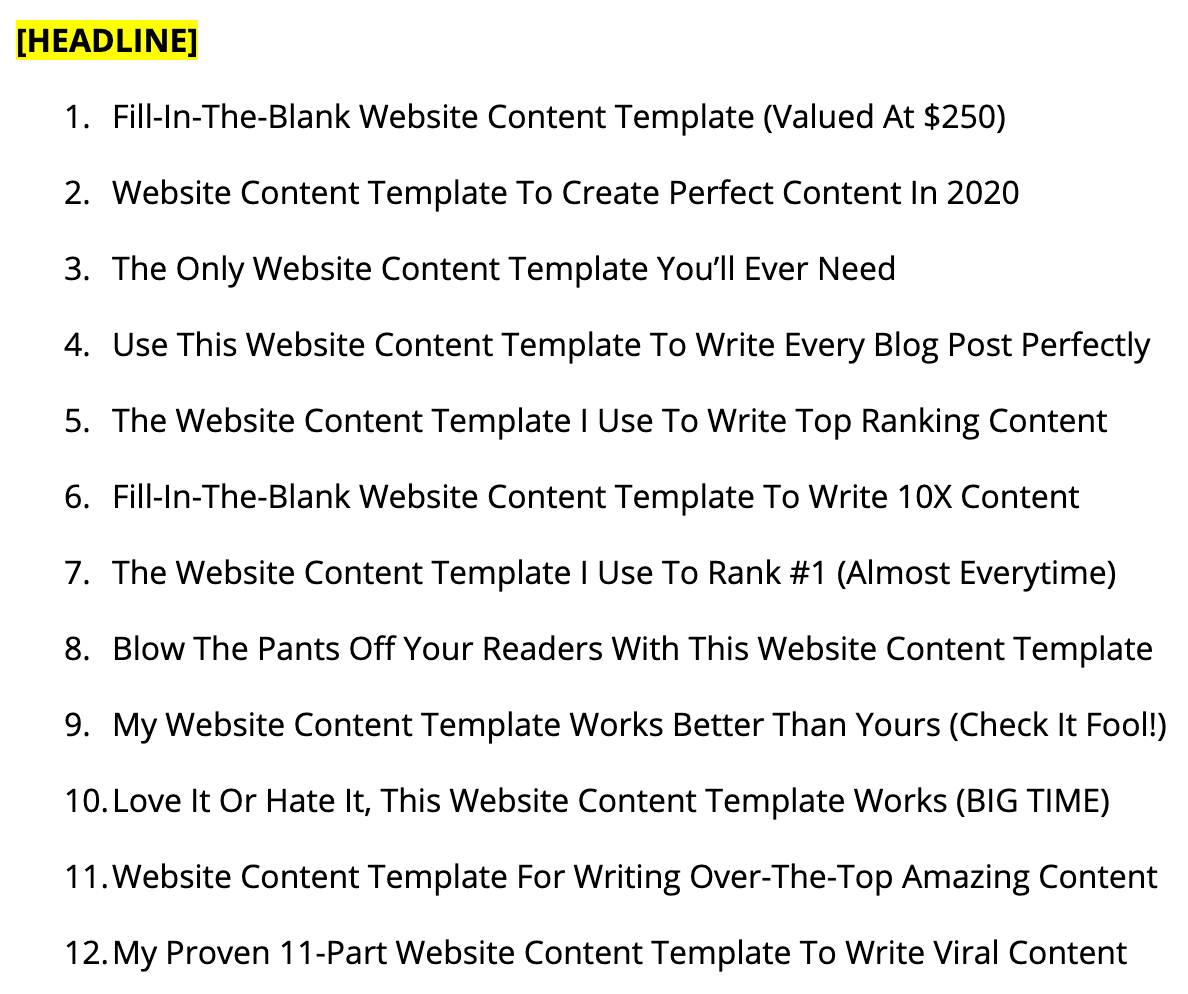
After this, I do one of two things:
- Pick my two favorite headlines to test OR
- Ask my audience for feedback on their favorite headline, then headline test the two with the most votes.
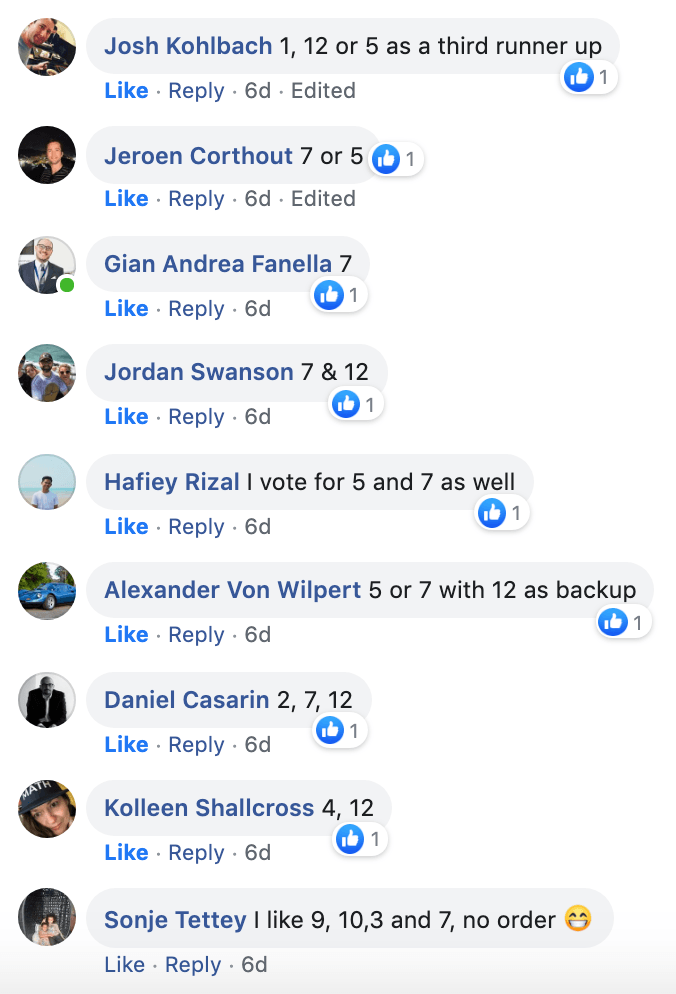
Here’s an example where I asked my audience on Facebook to vote for their favorite headline:
And I got a ton of valuable feedback from my market:
I also did this across my LinkedIn, Twitter, and to my email list.
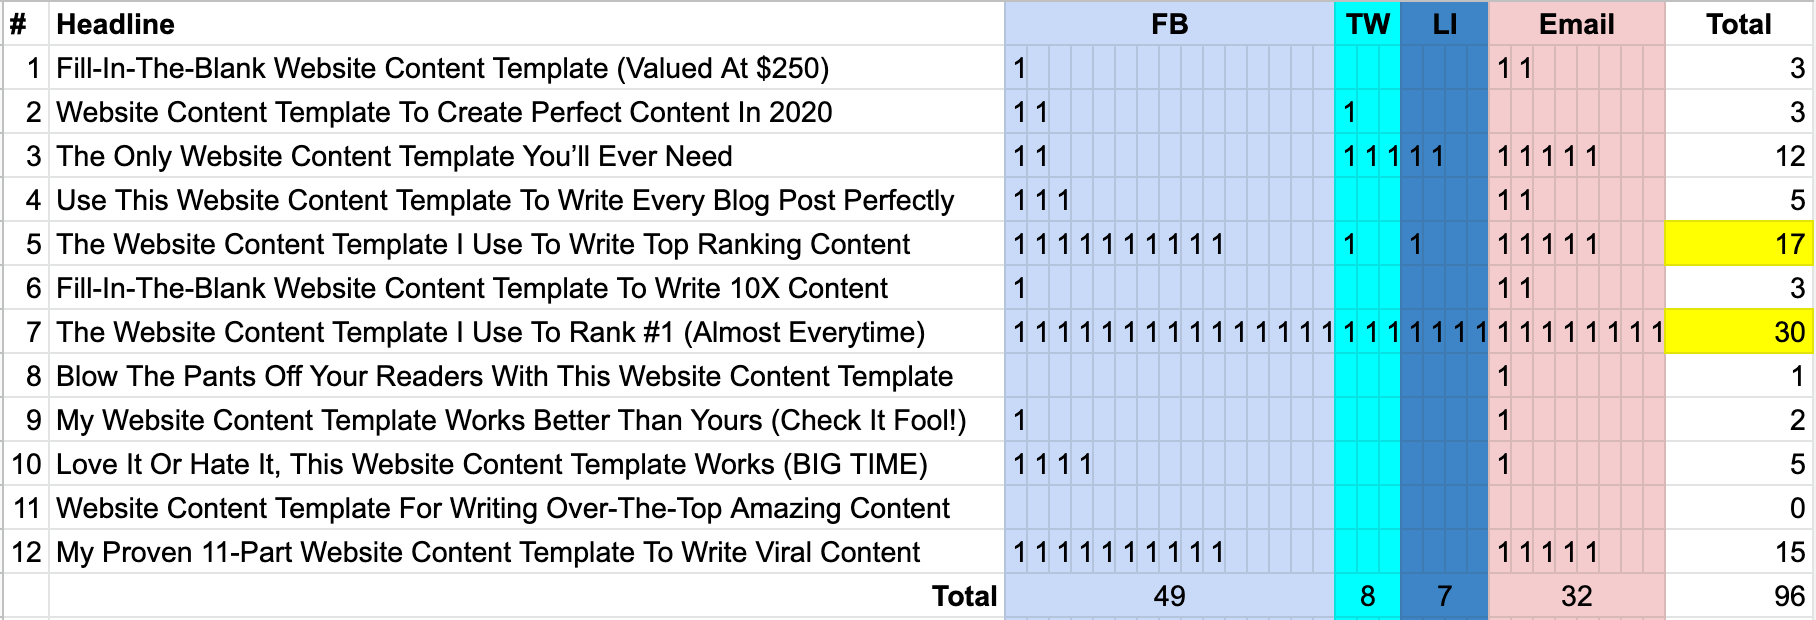
These were the results (the number “1” represents one vote for that headline):
Note: You can get a free copy of the Google doc I used to track performance here (go to File > Make copy).
Notice how headline #5 and #7 got the most votes.
If I had only written two headlines, I never would have found these winners.
In addition to finding the top two headlines, I also:
- Got to see which social media channel I have the most engaged audience on (Facebook).
- Got my audience excited for a new piece of content I have coming up.
Obviously, getting 96 votes across social and email isn’t a statistically valid test.
But once you narrow down the top two headlines, you can use my WordPress Headline Hack to find a winning headline (with statistical validity).
The Meta Description
The purpose of your meta description is simple:
Get someone searching on Google to click your link.
To do it I use a truncated teaser, like this:

It includes:
- A short teaser to the content.
- An ellipsis “...” I add at the end teasing people to click and read more.
- Matching the teaser to what people will get in the blog post (so it’s not spammy).
The meta description isn’t a fixed length.
It varies between desktop, mobile, and if Google decides to add a date at the start of your description.
So I purposefully keep my descriptions short (<140 characters).
To do it, I use the Yoast SEO WordPress plugin to guide me on the length:

As long as my text is in the GREEN on Yoast, I’m good to go!
The Content Upgrade
If you want to grow an email list you can use to:
- Promote your content to.
- Sell your products to.
You have to use a content upgrade.
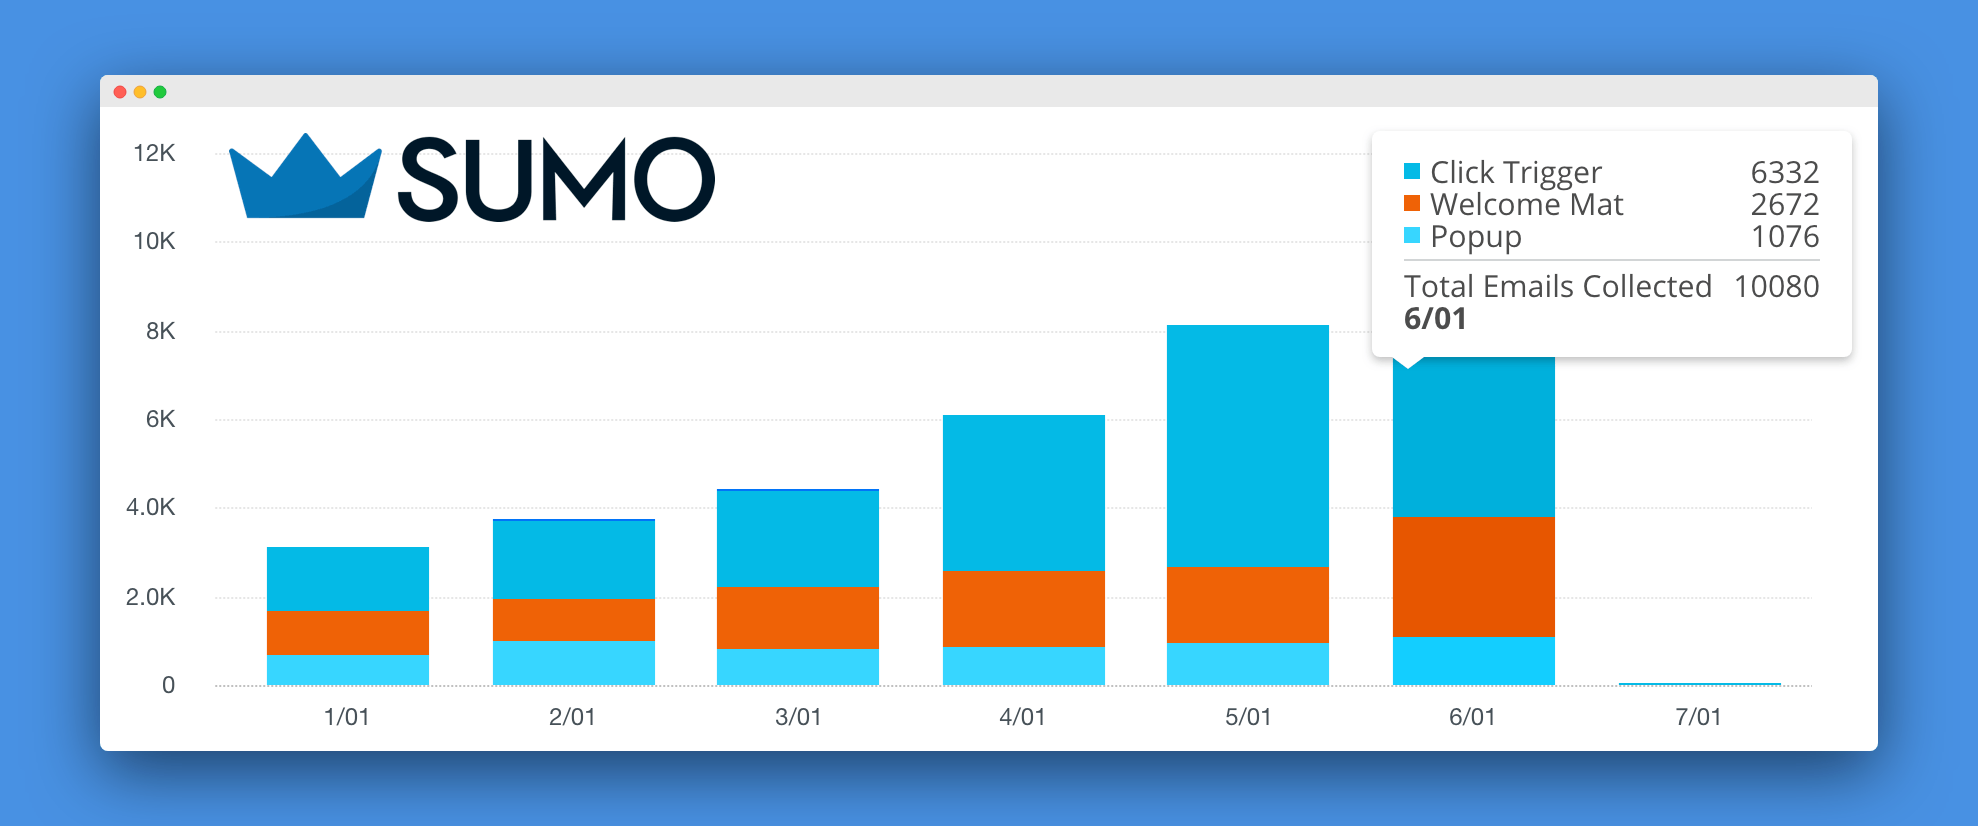
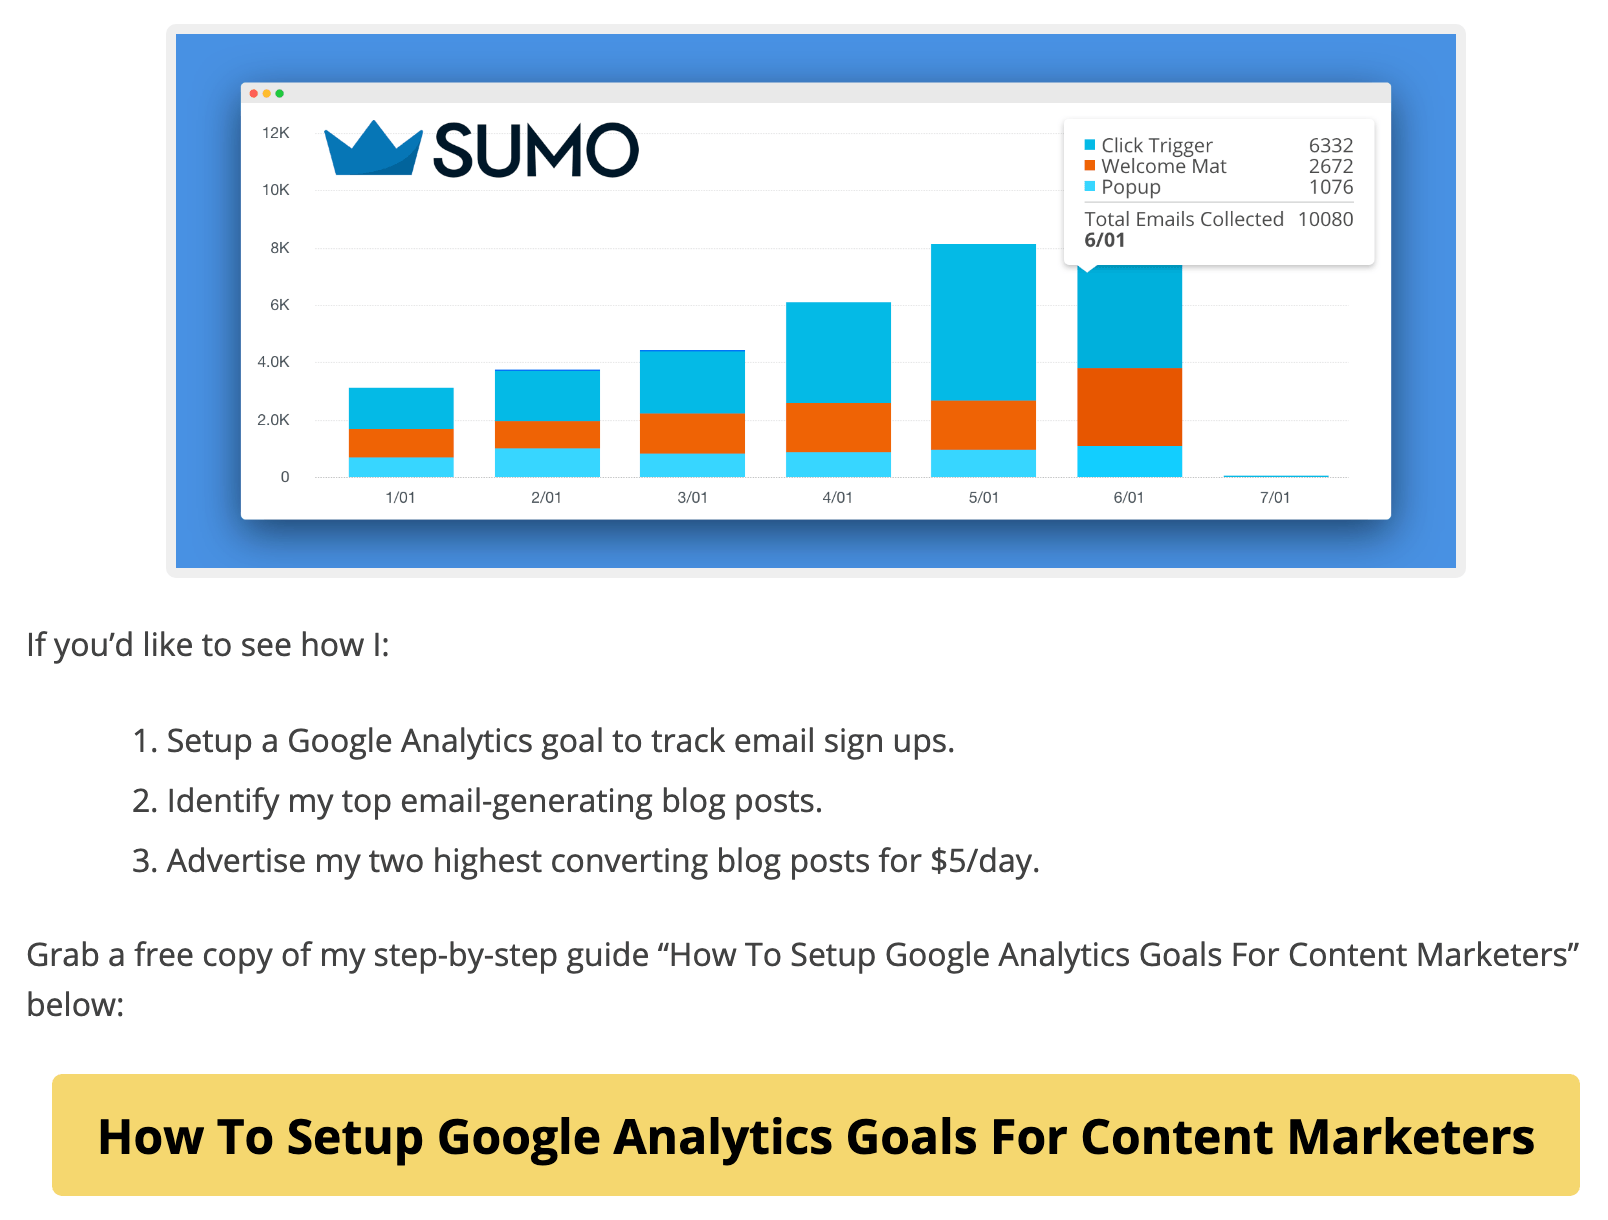
It’s the one list building strategy I used to grow Sumo’s list to 10,000 emails per month.
(in five months).
To do it, it’s not hard (but it does require a little extra work).
Most people don’t like “extra work", so if you do this you can beat them.
Simply create a bonus piece of content that accompanies your main content.
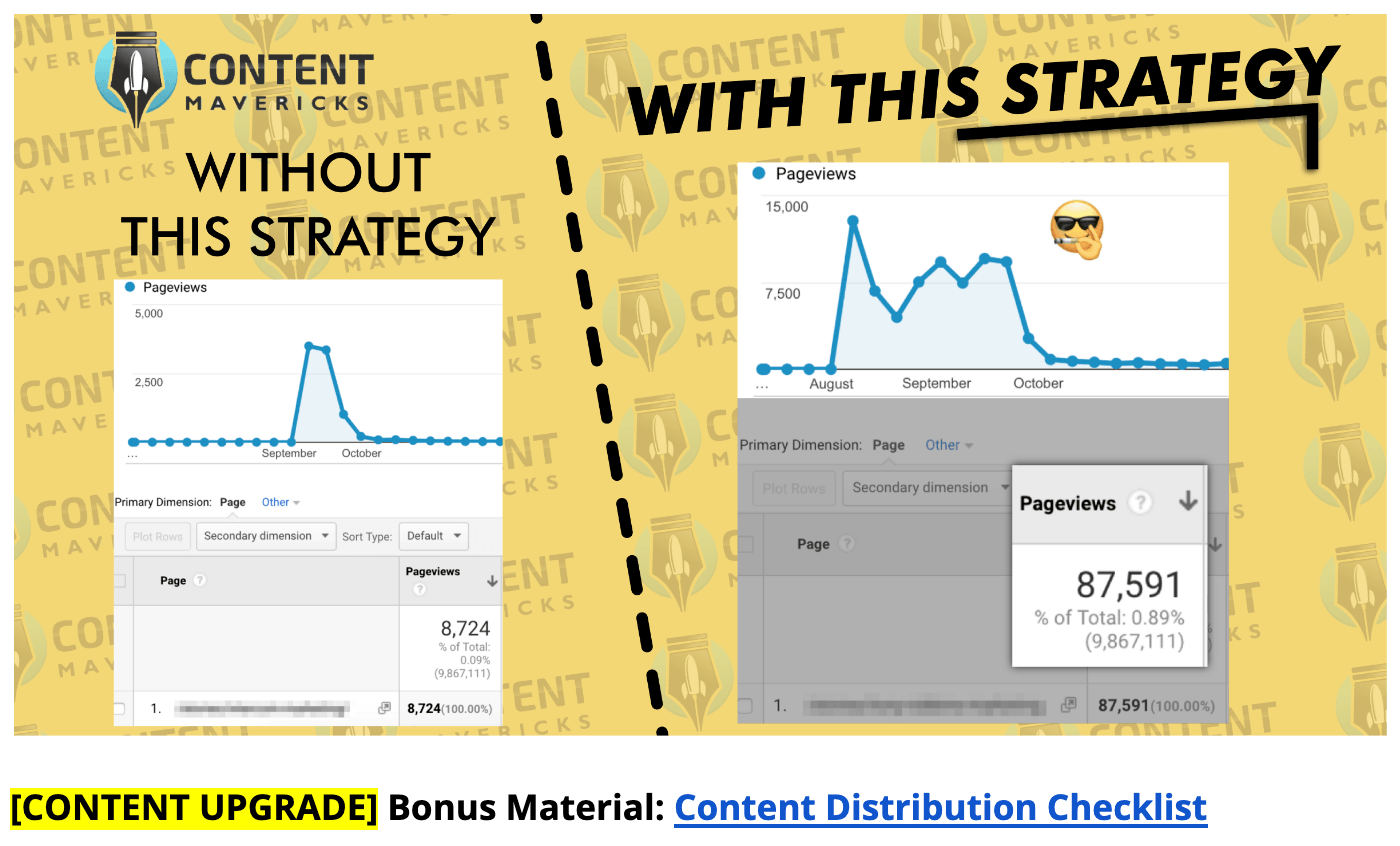
On my content distribution strategy post, you can get my bonus content distribution checklist:
On my 10 content marketing hacks post, you can get my bonus list of 100 content marketing hacks:

In this post you can get the fill-in-the-blank content template I use to write viral evergreen content that ranks #1 (almost every time).
Just remember: the closer your upgrade is to the topic of your post, the better it will convert.
Don’t be offering your puppy toilet training content upgrade on your post about puppy grooming.
Puppy owner’s will be much more interested in a list of puppy grooming tools if they’re reading about grooming their pup 🙂
The Attention & Interest
If you don’t grab your audience's attention in the first three sentences.
And get them interested to read the full post.
They’re gone.
Luckily, there’s one intro formula I’ve found that works like gangbusters.
It consists of three elements:
- Teaser.
- Result.
- Proof.
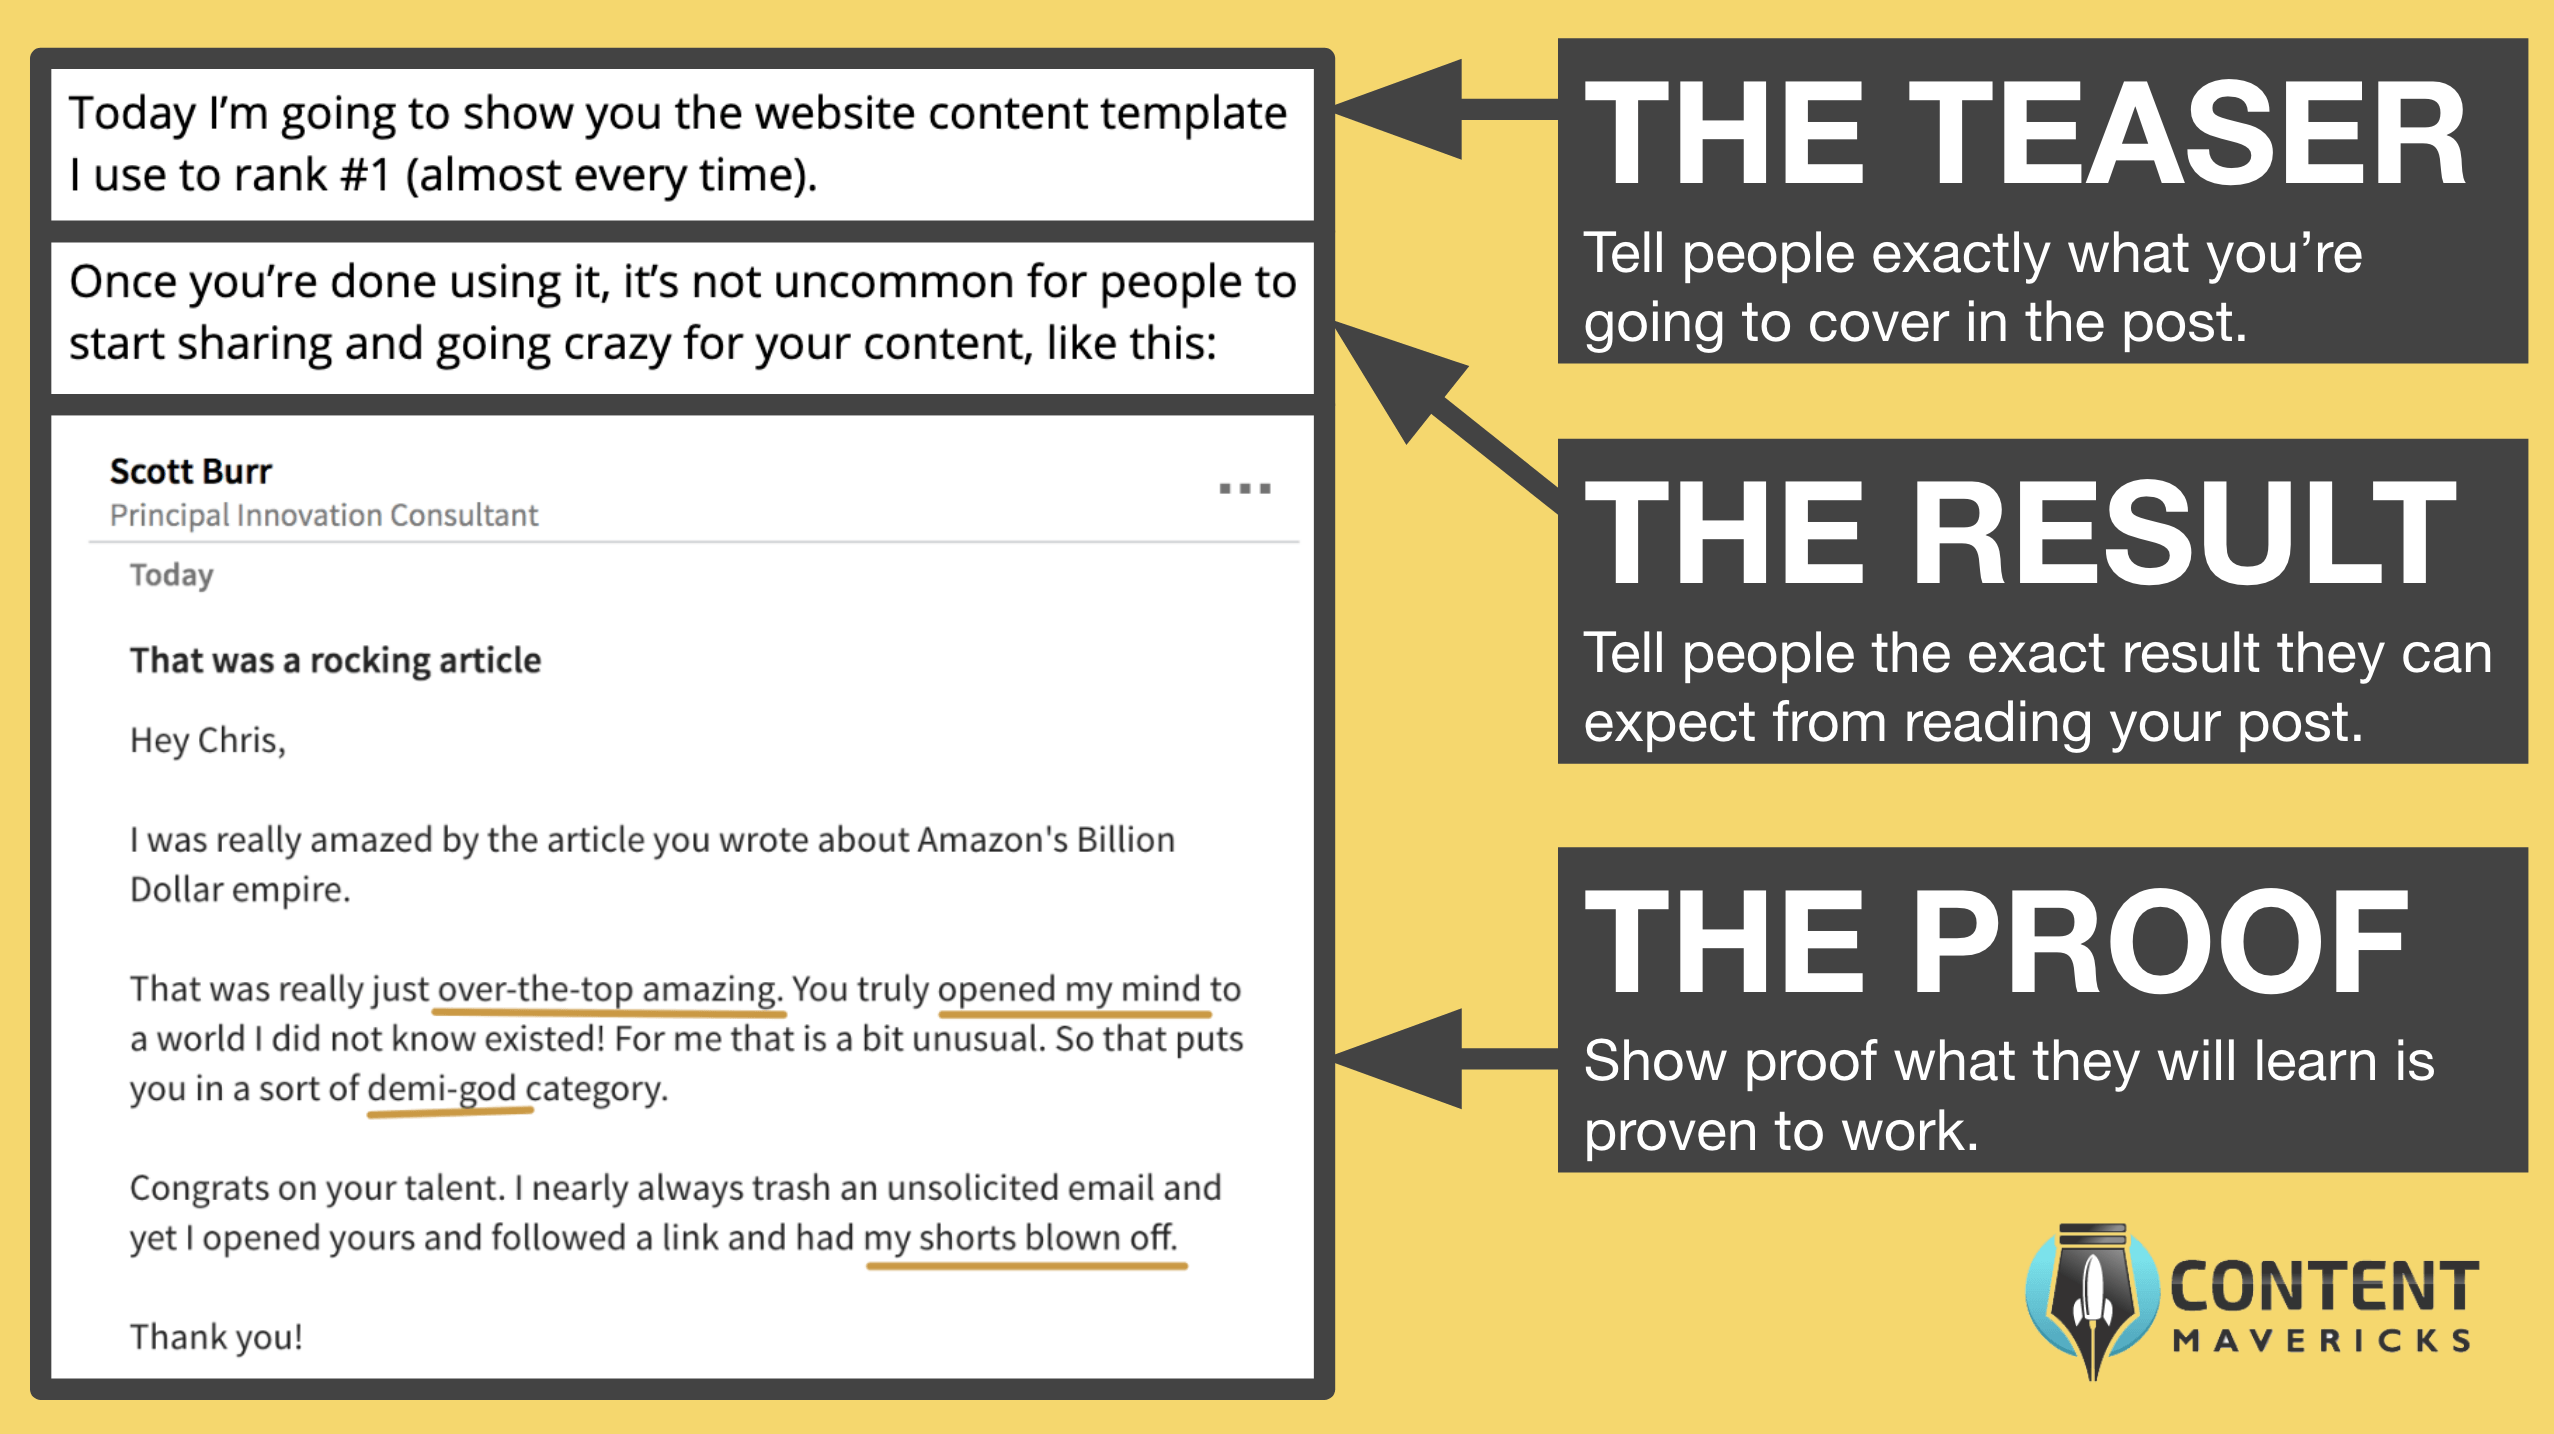
It doesn’t matter what order the three elements are in.
What’s important is you get all three in.
Here’s an example where I lead with the result first, then the teaser last:
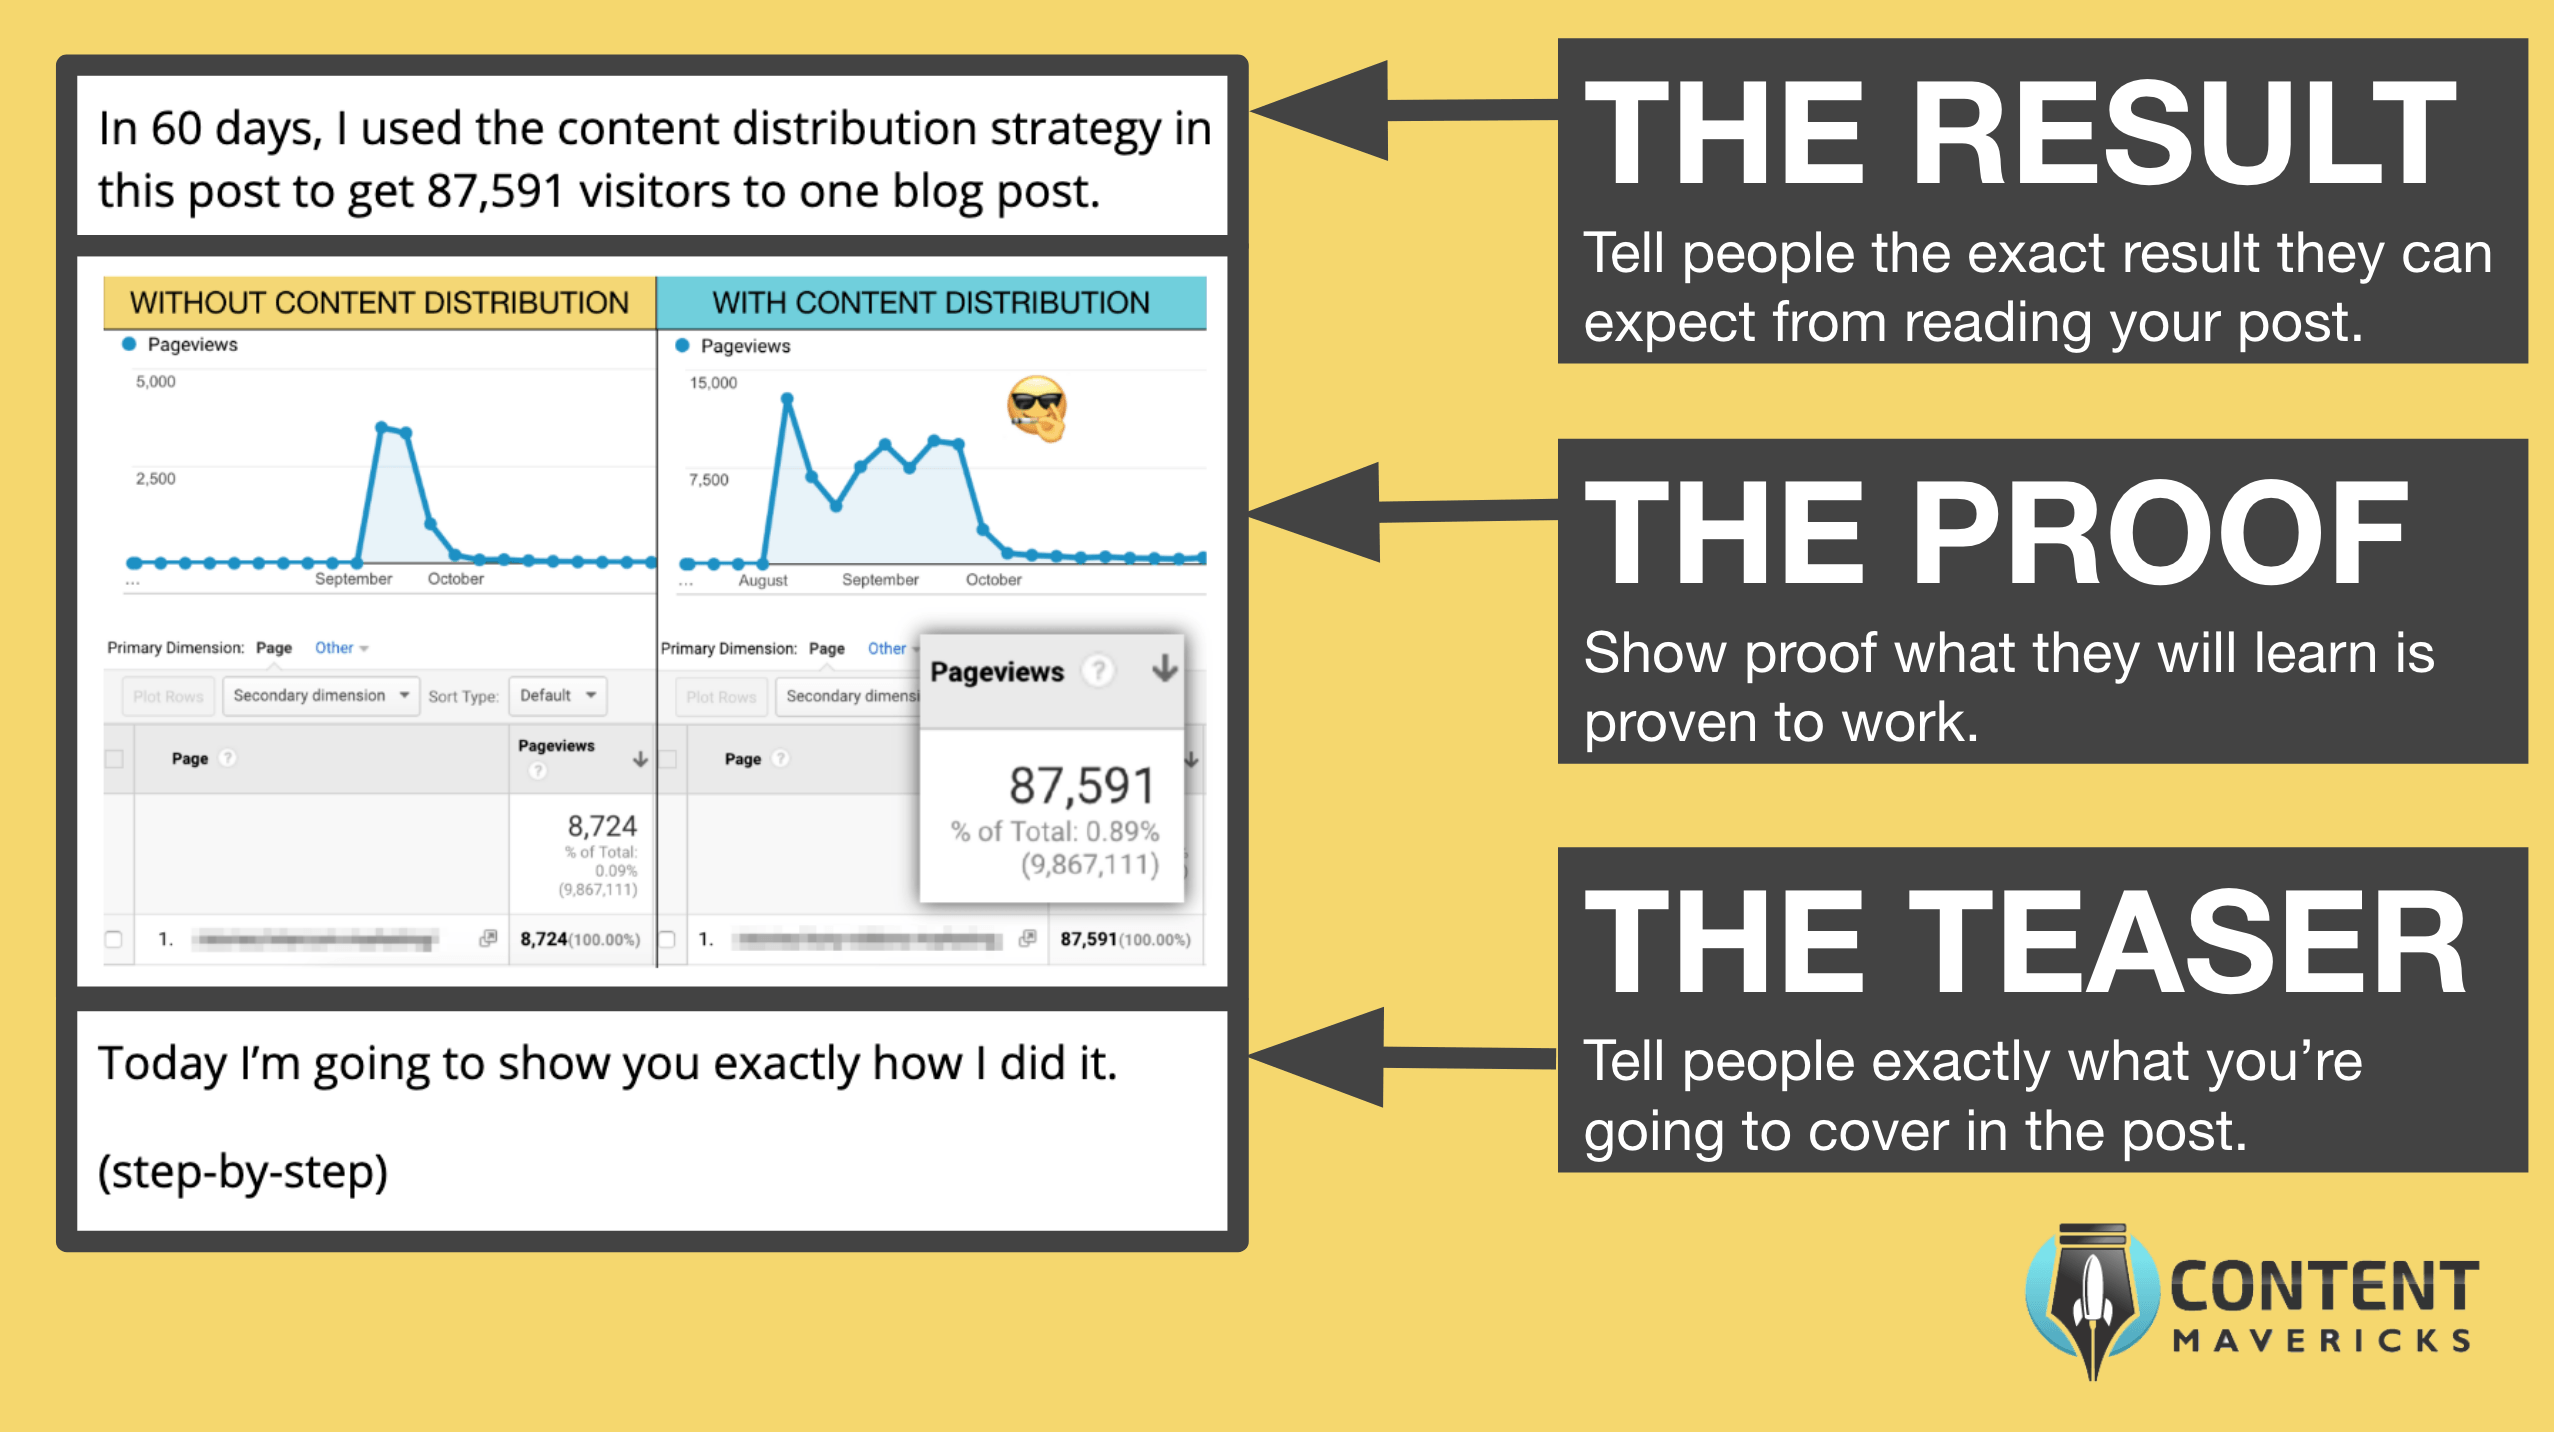
These three elements are guaranteed to:
- Capture your reader's attention (make them say “Wow, how’d he do that?”).
- Get them excited to read the full post.
That’s why I use them on almost every post I write.
Then I quickly get into the meat of the post.
The Table Of Contents
A good table of contents will:
- Give your readers a quick overview of what they can expect in your post.
- Make it easy for people to skip to the section they like (with jump links).
This section is easy to fill out.
You already have your outline written.
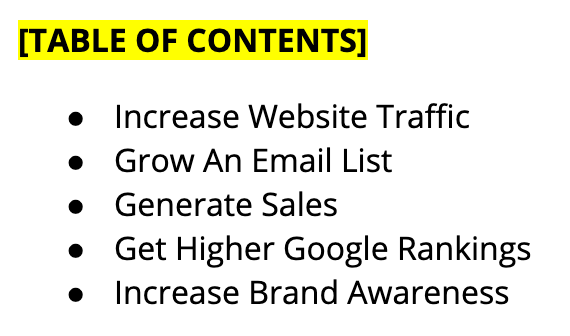
Now all you have to do is take the main points from your outline:

And transfer them to the table of contents section in your template:
Easy.
The Desire
In this section you want to make people desire the concept you’re selling.
For example, in this post I’m selling you the concept of using my website content template to write your content.
You do this by:
- Creating original content with your own unique take.
- Keeping your post actionable and tactical with no fluff.
- Writing simply and clearly at a 6th grade reading level.
If you followed my instructions to create your outline, you’ll already have a unique and actionable outline to work from.
Now you’re going to work through each section one-by-one:
Fill-in-the-blanks for each section based on:
- Your own experience.
- Research.
Here’s a snippet from the first section of my post:
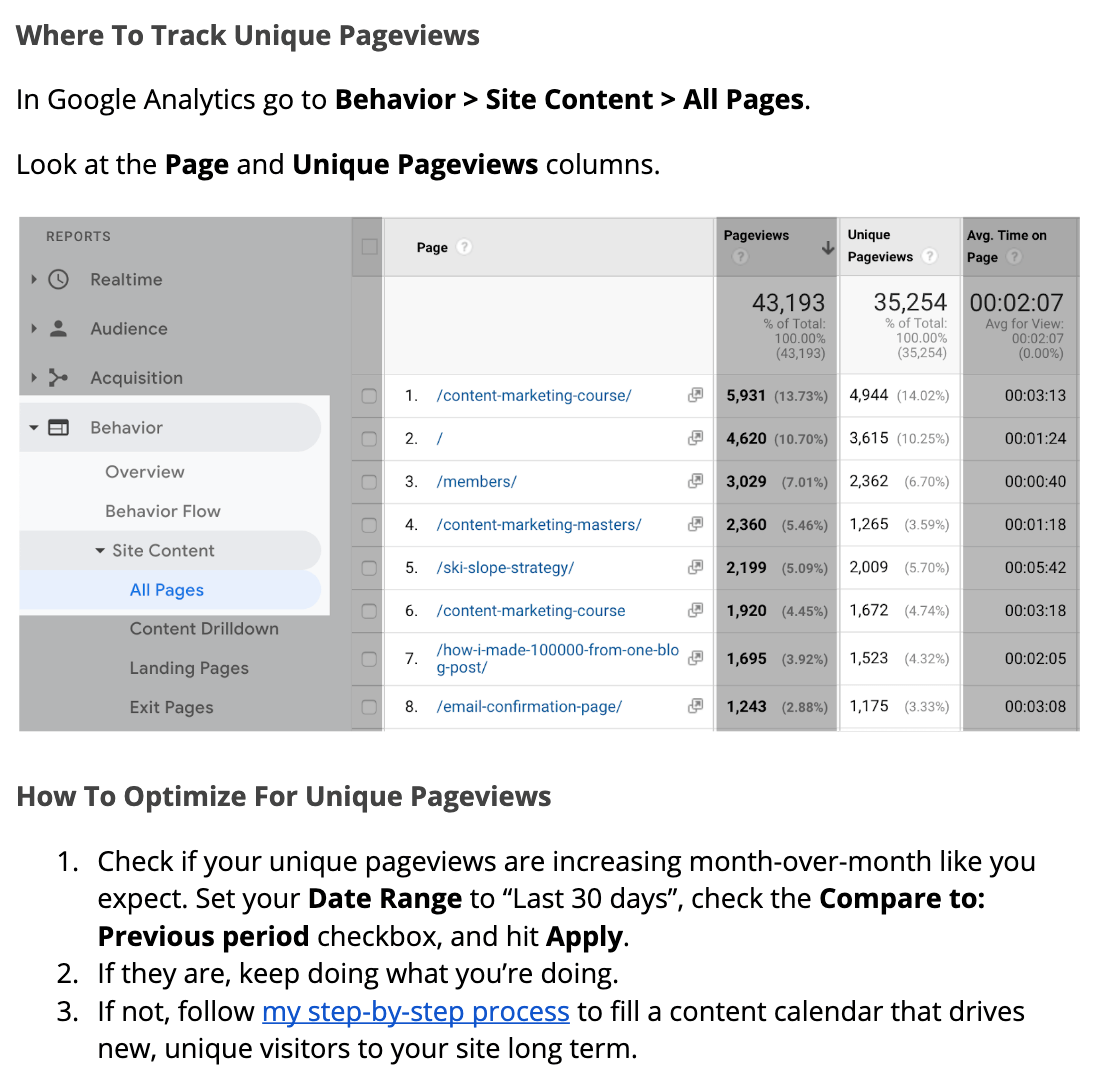
This content came from a combination of:
- Researching Google Analytics to find the Unique Pageviews report.
- My own experience growing traffic for businesses.
Pro Tip: To take your content to the next-level, add video. I do this often to increase the perceived value of my content, and make it more actionable for readers.
I then rinse and repeat for every section in the post.
Once you’re done, run your post through the Hemingway Editor.
Make sure you’re writing at a Grade 6 (or lower) readability level:
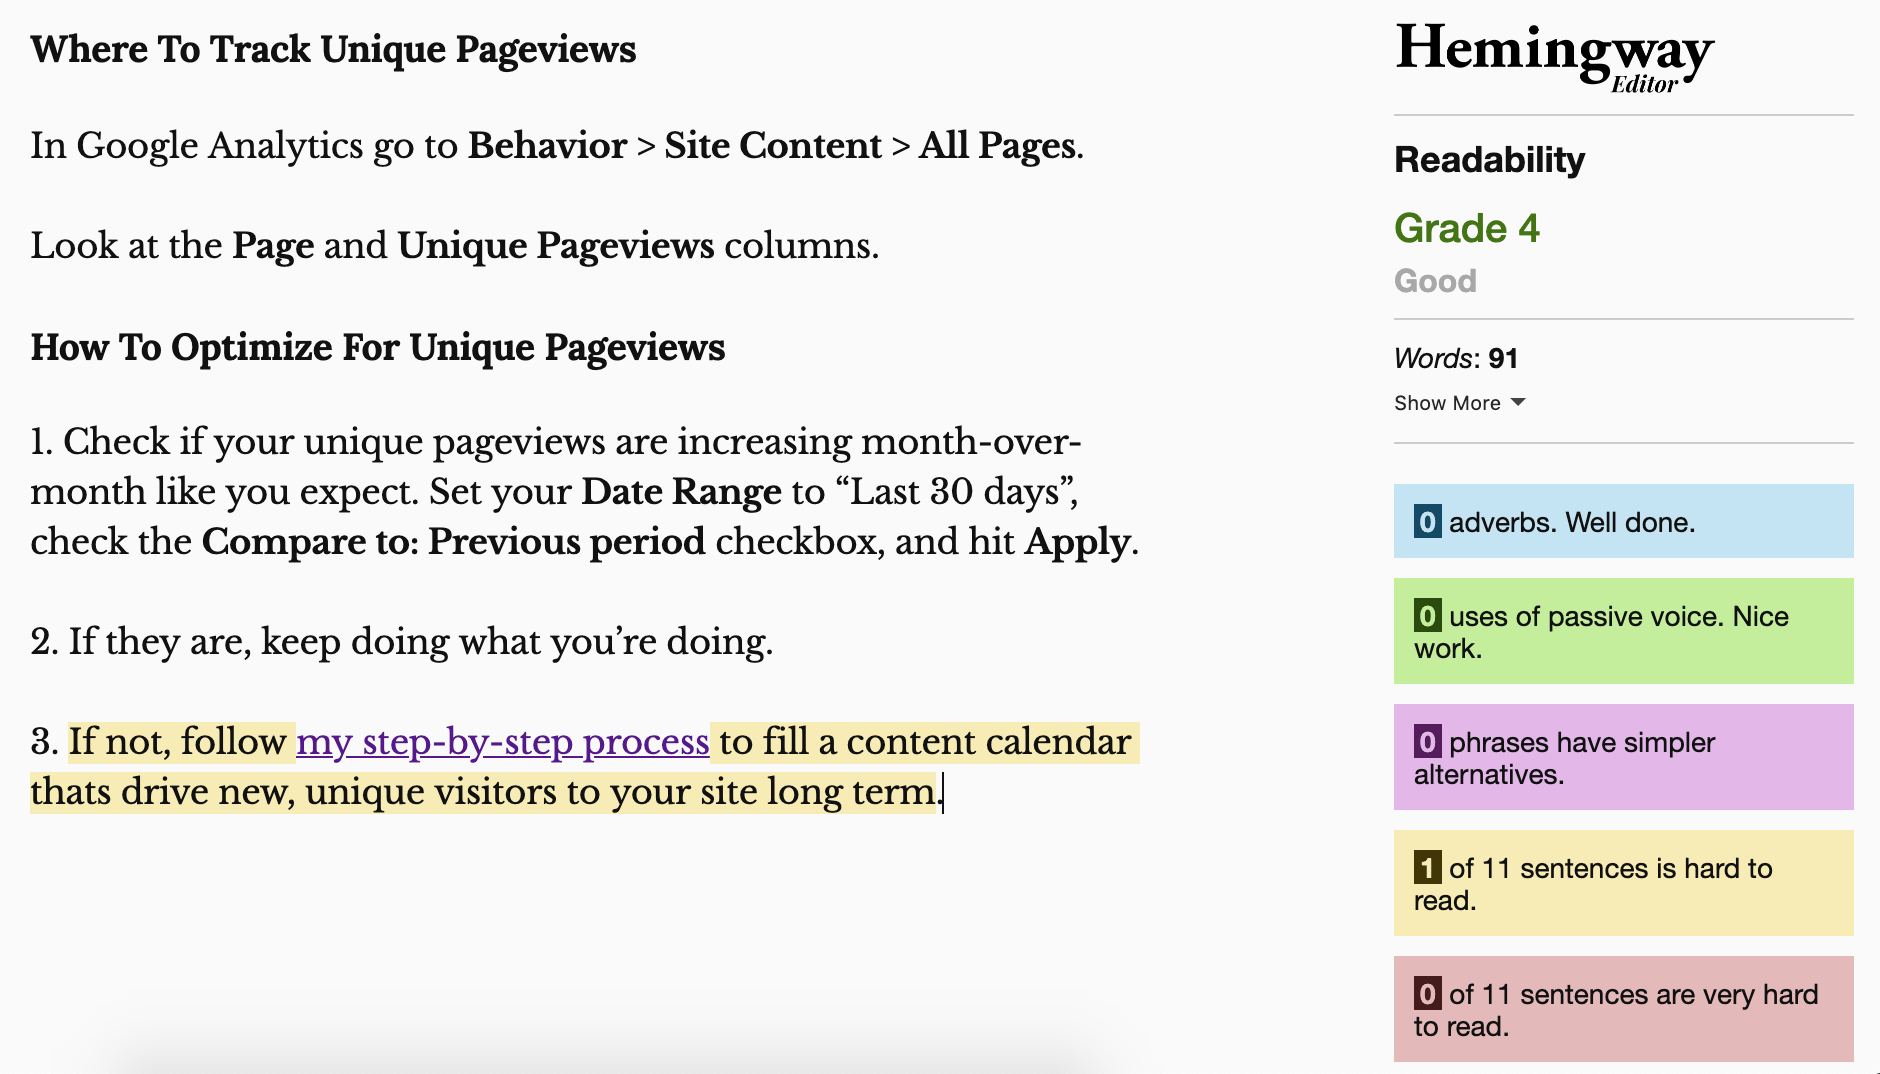
Grade 6 (or lower) readability makes it easy breezy for your readers to consume your content.
This process is how all great, unique, easy-to-read content is written.
Ultimately leading your reader to:
The Action
Unless you’re doing this content marketing thing for fun and giggles…
You want to give your reader ONE next-step action to take.
This could be to download your content upgrade, like this:
Or to sign up for your product, like this:
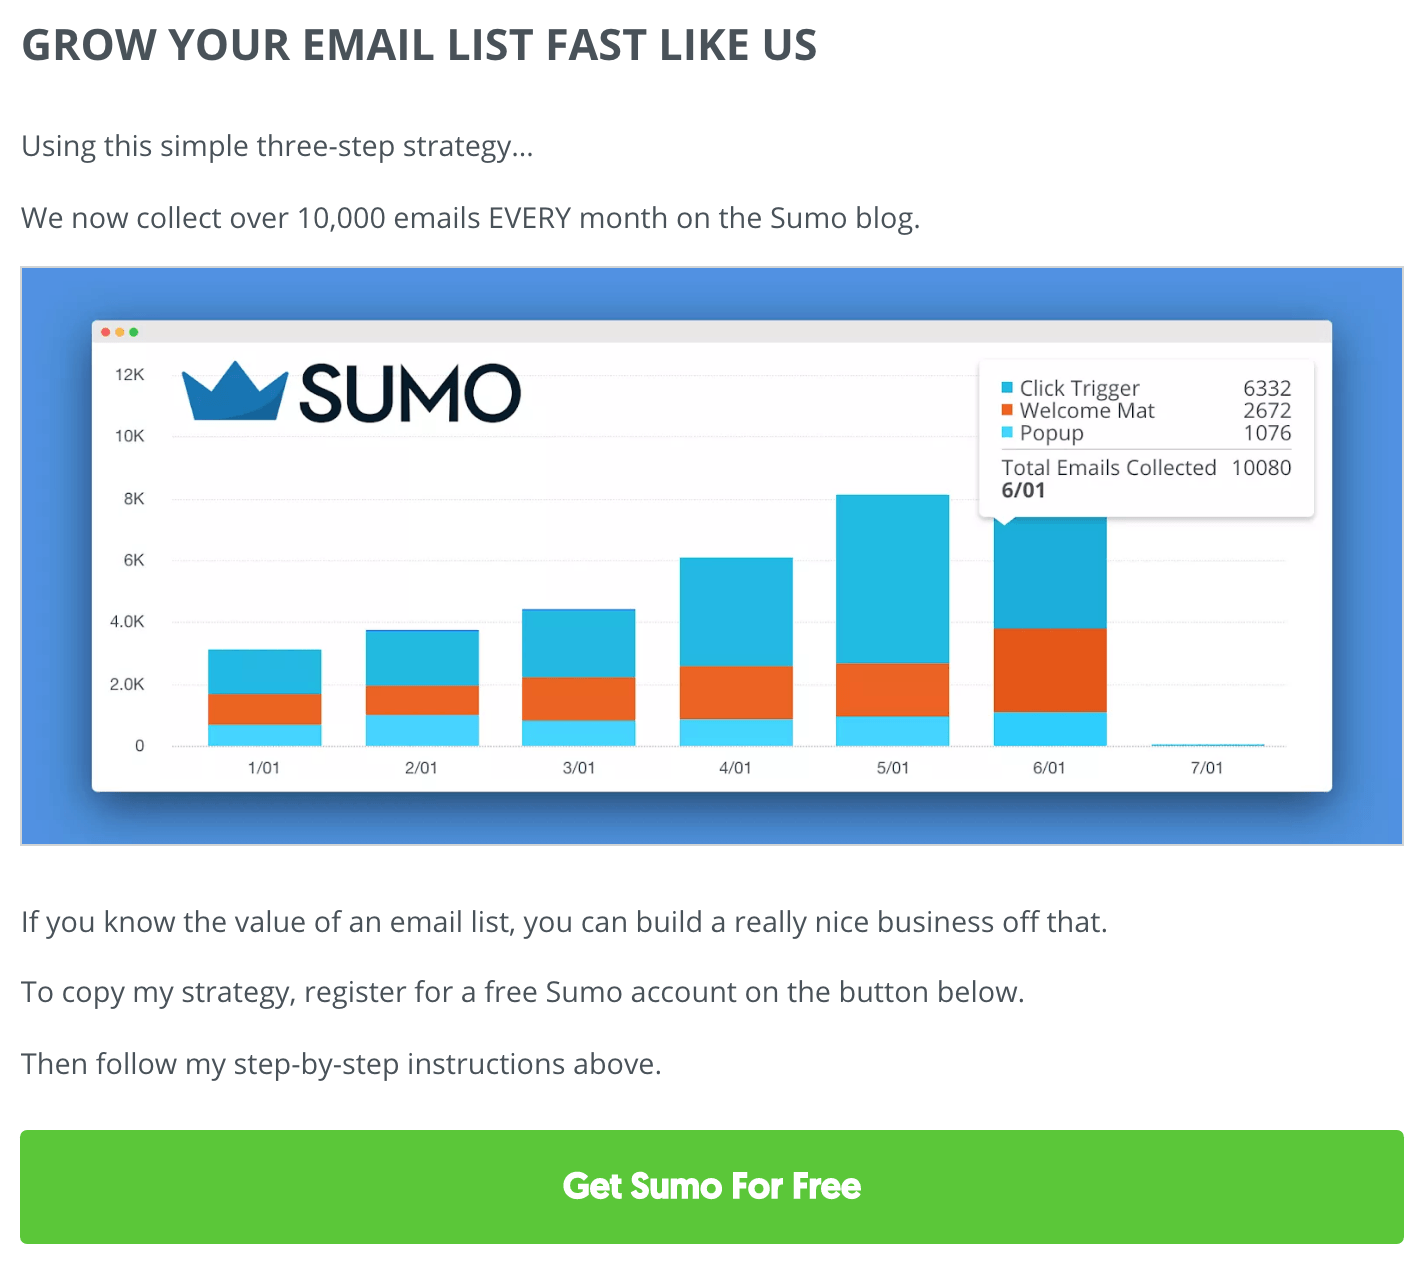
Without any action to take, you can’t track your content marketing success.
You’re winging out.
You’re hoping people sign up or contact you about your product/service.
That may well happen.
But it’s not a reliable, long-term content strategy.
That’s why I always make my call-to-action really, really clear.
Bonus: The Image
If you want your content to get noticed on social media...
You need a feature image that will capture people’s attention (in an instant).
Here are the four elements I include in every image:
- Contrasting background color.
- Diagonal lines.
- High contrast.
- Recognizable objects (optional).
Contrasting Background Color
Platforms like Facebook, Twitter, and LinkedIn all use two main colors on their site: white and blue.
To stand out, use colors like yellow, green, orange, purple or pink for the background on your feature images.
On the Content Mavericks blog we always start with this image template:

Then we overlay text, icons and pictures relevant to the topic of the post.
Diagonal Lines
In everyday life we're used to seeing horizontal and vertical objects like windows, roads, tables, chairs, doors, TVs, etc.
So diagonal lines cause a pattern interrupt.
On your image, orient the text (or pictures) slightly diagonal.
Here’s how we do it on Content Mavericks images:

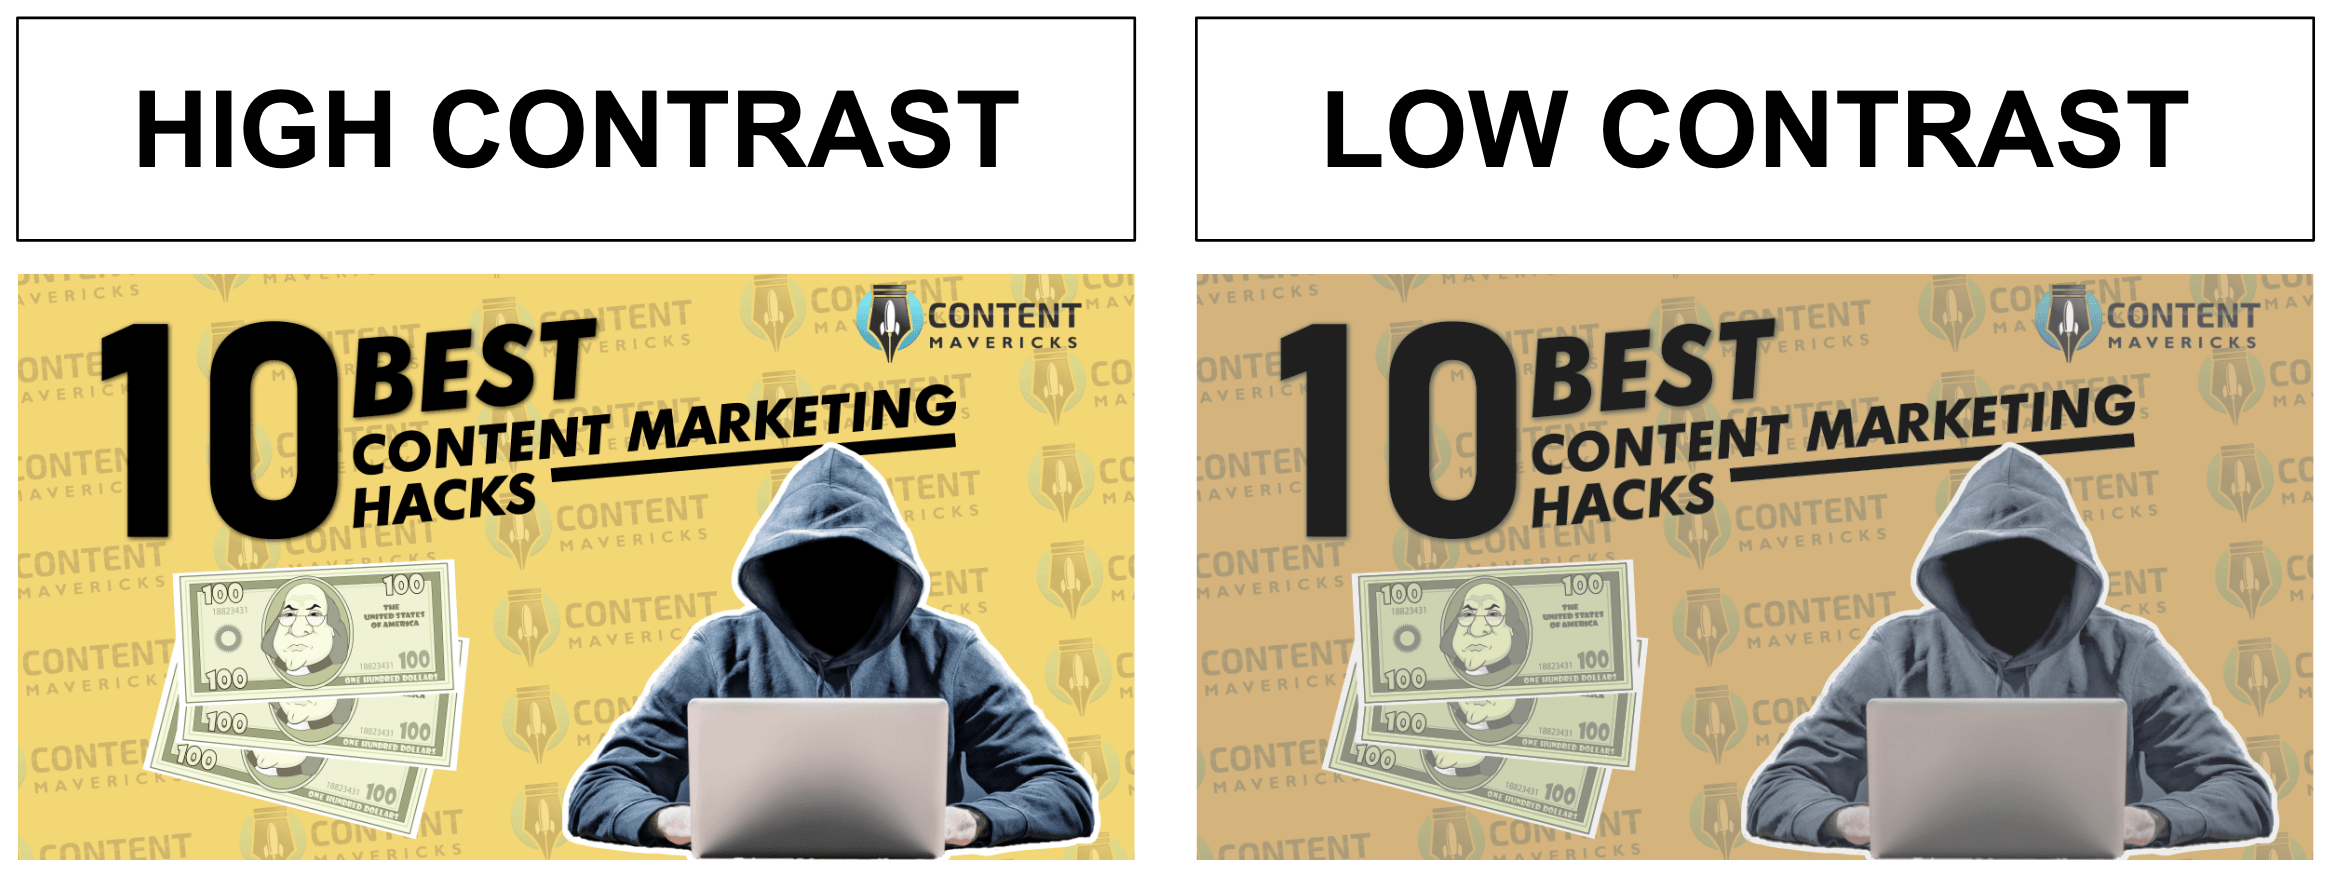
High Contrast
On your Instagram pics, too much contrast can make your image look unnatural and off putting.
But when it comes to feature images, you want lots of contrast.
So they’re more noticeable in the social feed.
Here’s what I mean:
Recognizable Objects
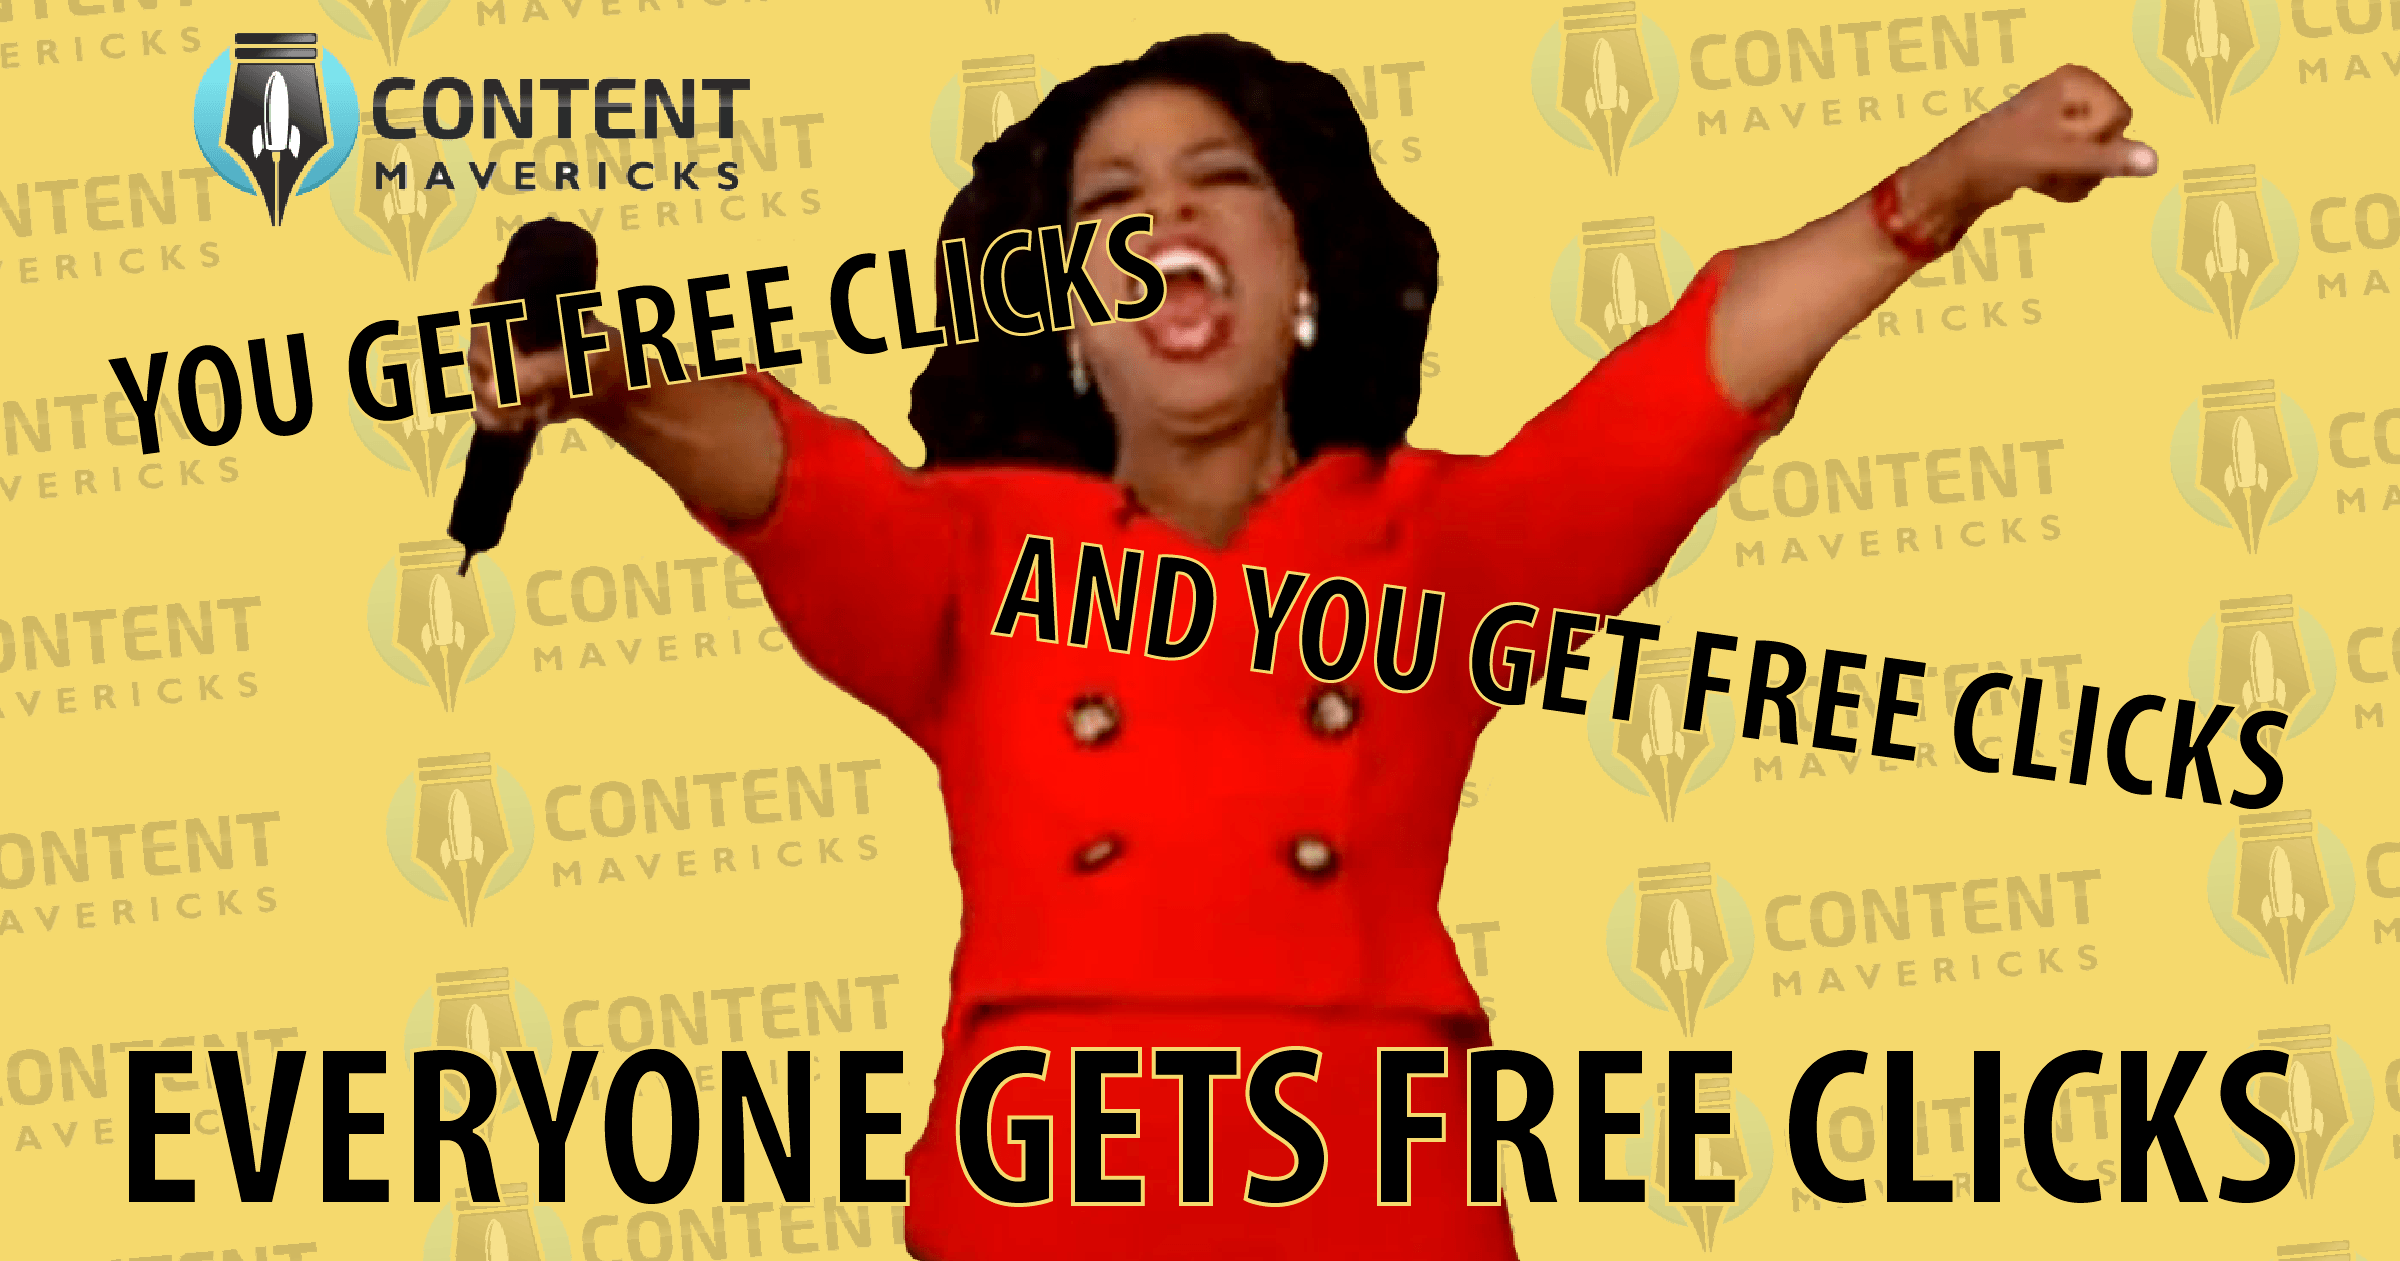
If you have an opportunity to include famous people or places in your image, do it.
People are more likely to click on images with recognizable objects in them.
Like this image we made with Oprah for our content marketing case studies post:
Bonus: The Email
Your email list is your #1 content promotion tool. Period.
That’s why for every blog post I write an email to promote my content, like this:
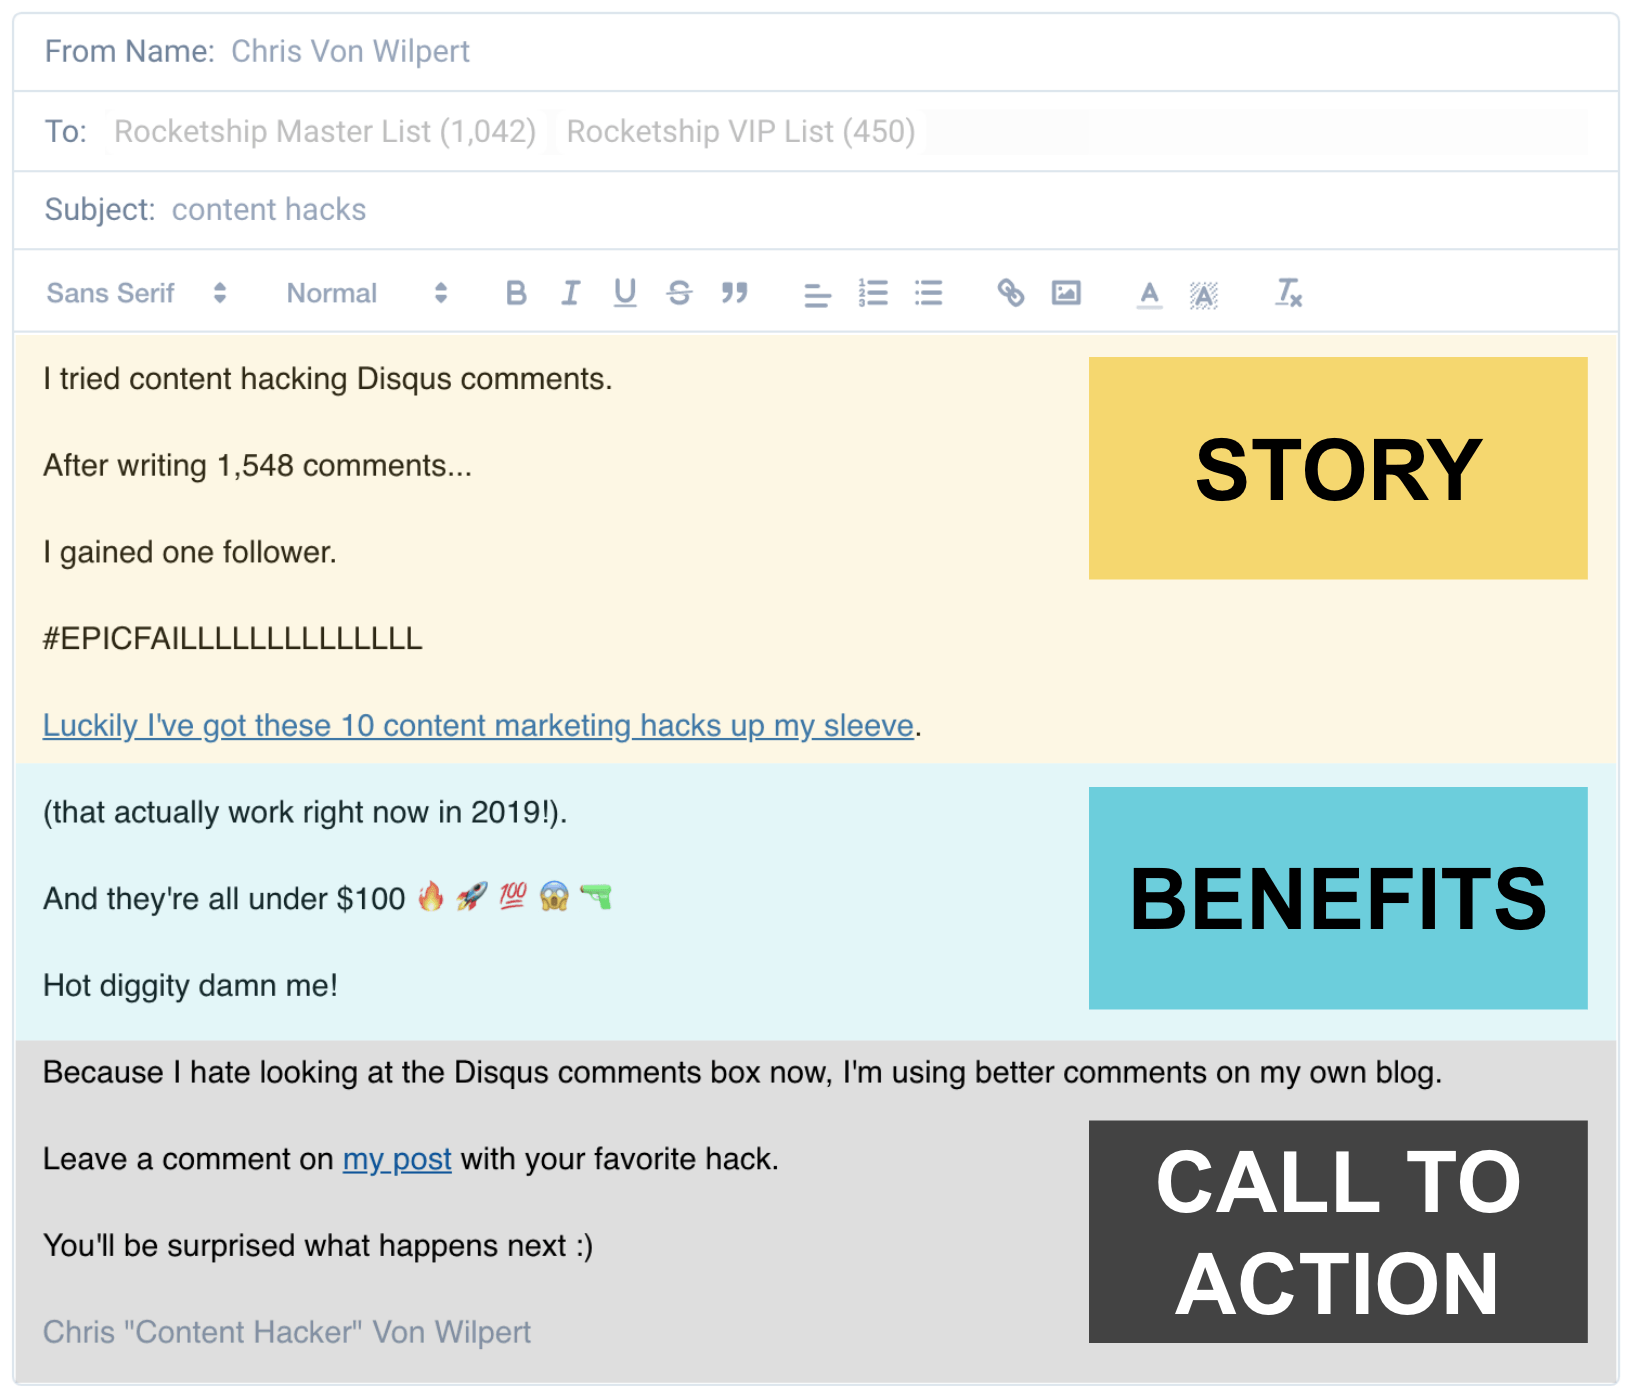
The formula I’ve found works best is simple:
- SUBJECT LINE: Two word subject line (shorter arouses more curiosity).
- STORY: Short story that gets people excited to read more.
- BENEFITS: 1-3 cool things unique to your content.
- CALL TO ACTION: Link to check out your content.
The goal is to get your subscribers excited to click and read.
So write it like you’re writing to a friend.
Short, simple and to-the point.
Your subscribers will appreciate it, and your email deliverability will skyrocket.
Get My Website Content Template (Valued at $250)
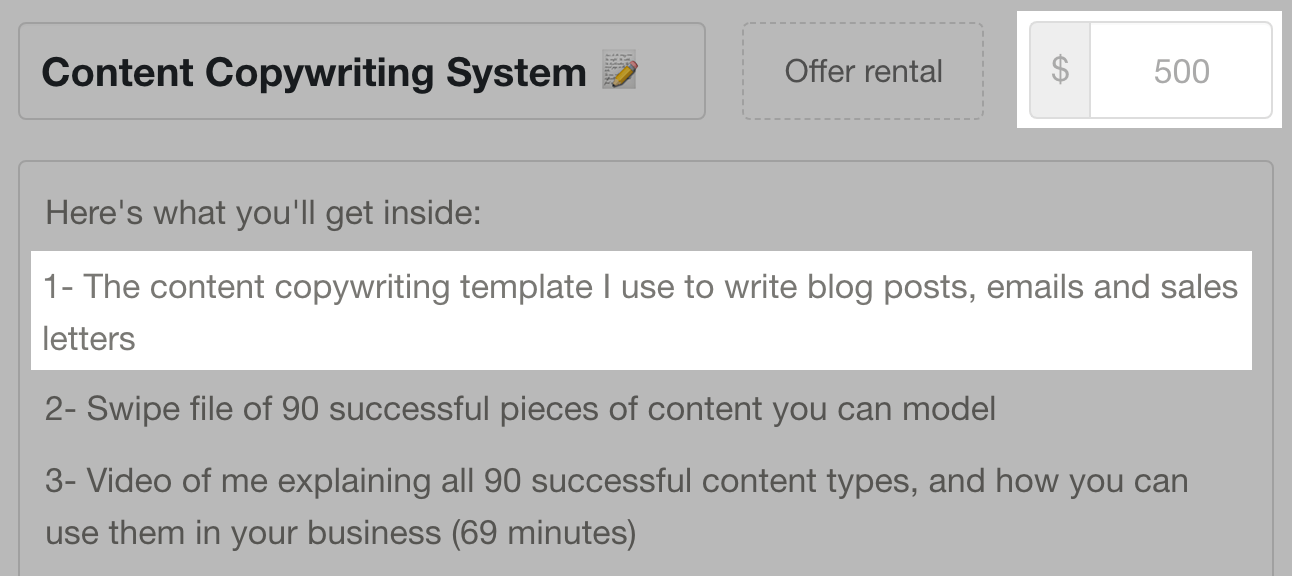
In the past it would’ve cost you $500 to get access to my content writing template.
(including other goodies):
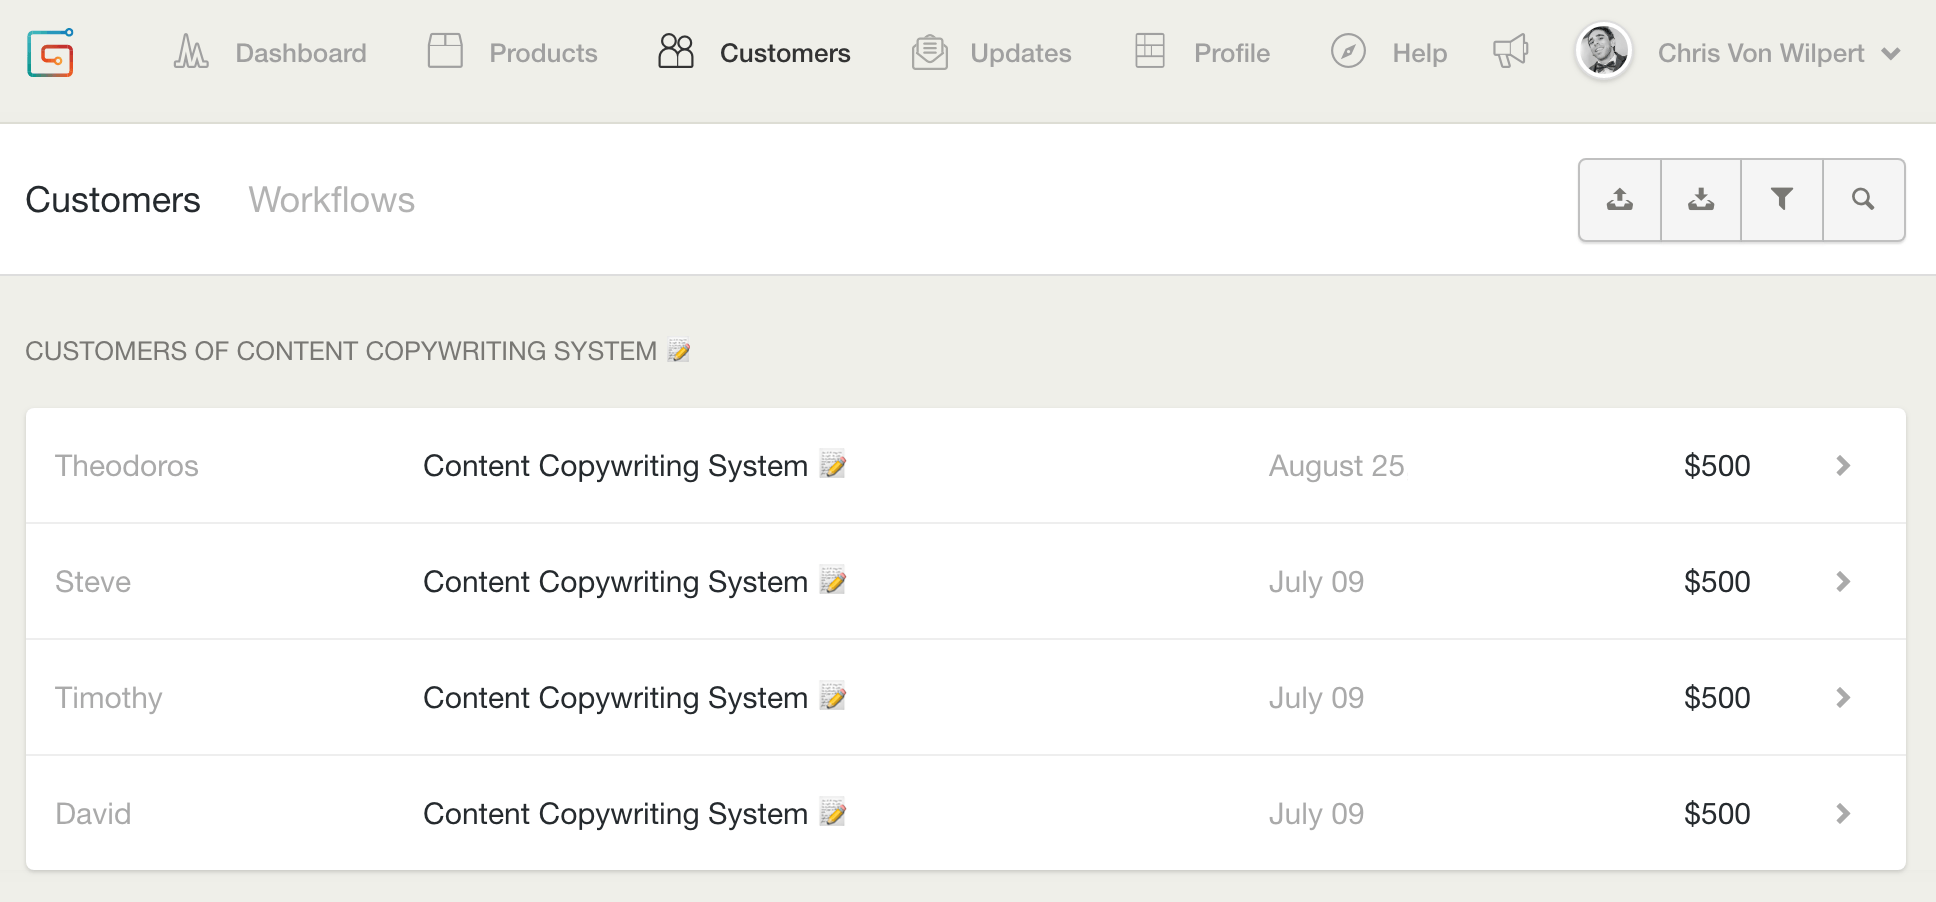
Customers happily paid for it:
But today I’m giving it away to you for free.
All the best practices I described in this post are baked into the template.
Download it below and use it for your next blog post.
